Showing posts with label Cheese. Show all posts

Thursday, September 9, 2010

Years That Answer

Photobucket

There are years that ask questions and years that answer. So says the text on the card I received from my parents today for my 30th birthday. According to my mother, I am in one of those years that answers.

At the moment, I still feel as though as I am asking a lot of questions. Where will this year of culinary school take me? Where will I be working? At the end of this year will I get to stay in New York or head back to Los Angeles? Or somewhere else?

At least one question has been answered. Will I ever go to culinary school? Yes. In fact, I am doing that at this very moment. Every now and then I have to stop and remind myself that I am, in fact, doing that very thing. I have been putting this dream together for years and it is so easy to forget that I am finally here living it.

I feel particularly grateful today. It is 1:30 in the morning and I am up late riding the adrenaline of a day that included the 30th anniversary of my birth and the practical and written finals for level one of culinary school. As we were waiting in the hall at school for our exam to begin, a man walked by and asked if there was a final going on. I glanced up and realized that Jacques Pepin was standing in front of me wishing our class good luck. “Cook from the gut,” were his final words as he continued down the hall after graciously posing for pictures with some of my classmates.

Chef Pepin is a dean at FCI, but it’s not as though the man is there every day roaming the halls. It was, without a doubt, a celebrity sighting. I had already decided it was very apropos that I should spend the night of my 30th birthday chopping vegetables during the level 1 final, but Chef Pepin provided the icing on the cake for a notable evening.

There is a bit more icing in my life right now as I lay in bed eating the slice of devil’s food cake I picked up on my way home from school tonight. Final or no final, a girl has got to have cake on her birthday. Lest you start thinking I eat cake every night, I am including the recipe for one of my more common evening snacks.

By the time we finish with school and I catch the subway home, it is usually at least 11:30 pm. To help myself wind down from a busy and late night in the kitchen, I make a quick snack of pears on rye toast with ricotta and agave nectar. The pears and rye feel judicious after an evening that inevitably includes a butter-enriched something and the ricotta and agave sufficiently satisfy my sweet tooth to spare me yet another visit to Billy’s Bakery and a subsequent trip to the gym.

If you are not a fan of the combination of savory and sweet, you can leave out the salt and cracked pepper, but I think it would be a mistake. The more pepper the better and make sure it is freshly ground. It is the perfect offset to the creamy ricotta and sweet agave.

Pear and Ricotta on Rye Toast

1 large slice of rye bread
1/2 small pear
1/3 cup fresh ricotta
Sea salt and freshly ground pepper to taste
Agave nectar for drizzling

Toast the rye bread. Slice the pear thinly and place the slices on the rye bread. Spread the ricotta over the pear and sprinkle with salt and pepper. Drizzle the agave nectar over everything.
Monday, August 2, 2010

Roasted Beet Timbale

Photobucket

Week one of culinary school is officially behind me. In only four classes we covered knife skills, taillage, tournage (turning vegetables into cocottes and other maddening seven-sided football shapes that I am pretty sure are going to give me carpal tunnel), ServSafe and all the many ways I can kill you if I don’t handle food properly, cooking a l’anglaise and a l’etuvee, ratatouille, timbales, and a vegetable dish made up almost entirely of cocottes. At least, it was supposed to be made up entirely of cocottes. I have a long way to go before those seven sides come out evenly. It was an exciting if not slightly frenetic week and though I am not yet working during the day, I was grateful for this past weekend to catch my breath, find my footing and prepare for this week’s lessons.

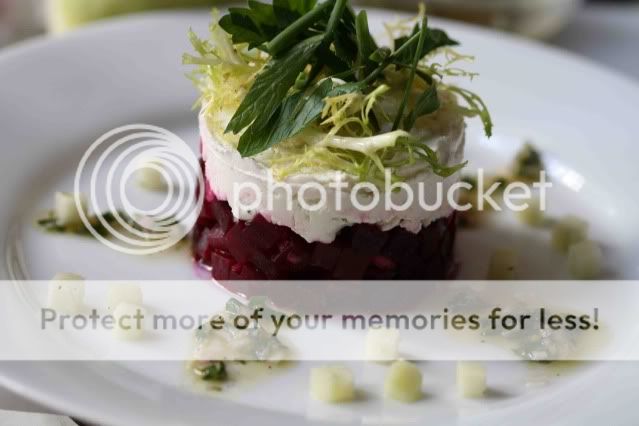
A roasted beet timbale was the most attractive dish we made last week. For that reason, and because of its surprisingly simple preparation, I recreated the dish at home to share with you here. Well, those reasons and I snagged the extra roasted beets from class. Aside from the precarious beet juggling it took to get them home on the subway without a bag, I was thrilled. Extra beets meant I could make this timbale for you without even turning on my oven. At the risk of beating a dead horse I must say, the idea of turning on my oven for anything is still a bit off-putting.

Photobucket

Once your beets are roasted (or donated by a generous culinary school instructor), this salad is just a few simple steps of chopping, mixing and stacking. It looks slightly intimidating because of its lovely composition, but trust me, this is simple stuff. I did not even look at the recipe the second time I made it.

In a few hours I am off to school for lesson five – stock night. I have made my fair share of chicken and vegetable stocks so I am hoping for a beef or veal stock assignment. Though I am not sure we will even make those in class this evening as they need to simmer for longer than the five hours we have available. Perhaps we will set them to simmer overnight and tomorrow’s day class will take it from there.

Photobucket

Roasted Beet Timbale
Adapted from The French Culinary Institute Level 1
Yield 4 Servings

3 large beets (approximately 1 lb), roasted
2.5 oz extra virgin olive oil
1 oz white wine vinegar
1 shallot, finely chopped
1/2 bunch fresh tarragon, chopped
1 granny smith apple
4 oz goat cheese
1 T chopped parsley
6 chives, cut into 1-inch segments
1 T chopped chervil
1/4 head frisee, picked, washed and dried
Salt and pepper to taste

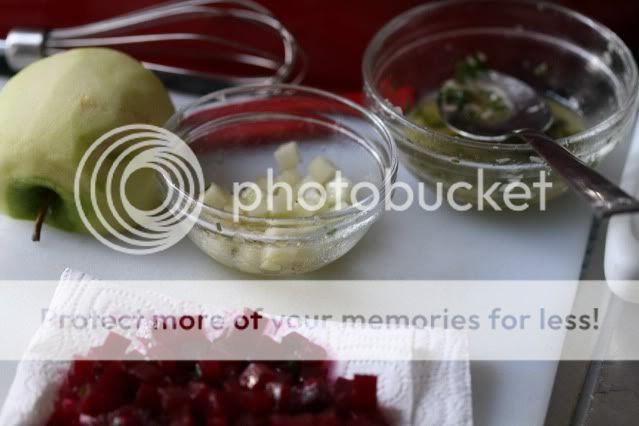
Peel the beets and cut into a small dice (to be exact, we cut them into a shape called macedoine which is a 1/2 cm x 1/2 cm cube). Place the chopped shallots in a small bowl and add the vinegar and a sprinkling of kosher salt. While whisking, slowly pour in the olive oil. Add the tarragon leaves and adjust the seasoning. Use a few spoonfuls of vinaigrette to dress the beets and set aside.

Peel the apple and cut into a small dice (again a macedoine if you want to be exact). Dress the apple with a bit of vinaigrette to slow oxidization and set aside.

Bring the goat cheese to room temperature. In a small bowl, work the goat cheese until it is spreadable and season with salt and pepper. Blot the beets with a paper towel to remove any excess liquid. Place a 3-inch ring mold on a plate and put the beets in the mold, pressing down slightly to create an even layer. Top with the goat cheese, smoothing the top so it is flush with the mold (my ring mold was too tall so the goat cheese was not flush with the top of the mold). Gently remove the ring mold.

In a separate bowl, mix together the herbs and frisee and season with salt and pepper. Add olive oil to lightly coat the leaves. Top the goat cheese with the small herb salad. Place some of the apples around the plate and spoon the vinaigrette over the plate in a decorative manner.

Note – you may have some leftover vinaigrette, salad and apple. Do not feel as though you have to fit it all on the plate. Toss them together and enjoy separately from the timbale.

Wednesday, July 28, 2010

Finally a Food Photo

Photobucket

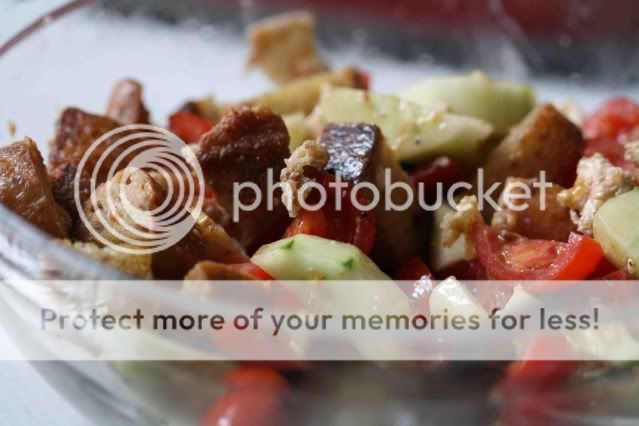
I find it appropriate that Panzanella is the first thing I made in my New York kitchen. After a week-long restaurant binge that could rival my best vacation eating on record (Cookshop, Tipsy Parson, Crema Restaurante, Oyster Bar, Bleecker Street Pizza, Txikito, Shake Shack, a culinary tour through Chinatown, and Otto Enotecca) I needed to slow down and make a simple and affordable dish.

Panzanella is considered peasant food in Italy. At least it was when the salad was created as a way to use up stale bread. A bit of a peasant myself these days (no paycheck in site and a culinary education to pay for) I am trying to take on my own waste-not-want-not mentality. Rather than discarding stale bread, I can chop it up, sauté it with a little olive oil and garlic and toss it with some chopped vegetables already on hand. It means lunch is thrown together without running out for additional ingredients. Simply put, Panzanella is delicious and makes me feel good about my grocery budget. Added bonus? I do not have to preheat my oven in the sweltering New York heat.

I ate this salad right away, but it gets even better after a few hours as the flavors meld together.

Next up – finding ways to use up mounds of julienned carrots without turning on my oven. Practicing my knife skills at home, where there is no industrial pot of chicken stock waiting at the ready for my carrot donations, may turn me orange from carrot consumption.

Photobucket

Panzanella

7-inch long piece of baguette (multigrain or other)
3 T of extra-virgin olive oil, divided
1 garlic clove, smashed and skin removed
1/2 cucumber
6 baby roma tomatoes (or 2 regular roma tomatoes, roughly chopped)
2 oz buffalo mozzarella
2 t balsamic vinegar
Salt and pepper

Cut the baguette into 1-inch chunks. Heat a large sauté pan over high heat. Add 2 tablespoons of olive oil to the pan and fry the garlic clove for one minute. Add the bread and salt liberally. Reduce heat to medium and sauté until bread is crisp and golden brown, about 10 minutes. While the bread is cooking, peel the cucumber and chop into 1-inch pieces. Cut the tomatoes into quarters. When the bread is crisp, place it in a medium bowl along with the cucumber and tomatoes. Using your hands, rip the mozzarella into small pieces and add to the bowl. Drizzle the balsamic vinegar and remaining tablespoon of olive oil over the bread mixture. Season to taste with salt and pepper.

Thursday, May 20, 2010

Squash Blossom Pizza

Photobucket

It has been far too long since I last posted! I left for vacation with the best of intentions of logging on and sharing a few recipes while I was off traveling, but of course, it never happened. I had some great food while out and about and even managed to snag the recipe for a delicious Thai curry that I promise to share with you soon. I’m also working on getting the recipe for a citrus marmalade we enjoyed in England. If I can get permission to share it with you, I’ll have that one up soon as well.

In the meantime, let’s take a look at what to do with all the squash blossoms that should be appearing in your kitchen garden right about now. Each time I have the pleasure of dining at Mozza Pizzeria, I order the squash blossom pizza. It’s my favorite dish on the menu and as I eagerly await any news about Nancy Silverton’s forthcoming Mozza cookbook, I am resigned to trekking to West Hollywood and paying $20 for a pizza. Or so I thought.

Photobucket

Saveur’s recent Los Angeles issue was a pleasure to read. I saw some of my favorite places in Los Angeles getting the credit they deserve and learned about some new restaurants, food trucks and taco stands that I must try. The most exciting discovery was the publication of not only Mozza’s famous pizza dough (adapted for the home kitchen) and not only Mozza’s tomato-based pizza sauce, but the entire recipe for Mozza’s squash blossom pizza. I think it might just be enough to hold me over until the Mozza cookbook is published.

Photobucket

In case you missed the Los Angeles issue of Saveur, I feel a sense of duty to share the recipe with you here. This could easily be the best pizza you’ve ever had. Make sure you take the time to track down the best burrata you can find. The creamy cheese, coupled with a healthy dusting of salt is really what makes this pizza so spectacular.

Next step? Build a wood burning pizza oven in my backyard so I can get just a little closer to pizza nirvana that Nancy achieves at Mozza.

Photobucket

Mozza’s Squash Blossom Pizza

9 T extra-virgin olive oil
1 T active dry yeast
1 T sugar
1 t kosher salt, plus more to taste
6 cups flour
2 cups pizza sauce (recipe below)
60 squash blossoms, stemmed
1 pound burrata

Combine 1T of the oil, the yeast, sugar, salt, and 2 cups of 115˚ water. Let sit until foamy, about 10 to 12 minutes. Add the flour and mix until the dough comes together. Transfer the dough to a floured surface and knead until smooth. Divide the dough into four equal parts and roll into balls. Put the balls on a floured baking sheet, cover with plastic wrap and let sit in a warm place until tripled in size, about 2 hours.

Place a pizza stone on a rack in the lower part of your oven and preheat the oven at 500˚ for 1 hour. Transfer 1 dough ball to a floured piece of parchment paper. Working from the center, gently flatten dough with fingertips to a 10" round. Cover the dough with a barely damp towel and let rest for 15 minutes. Brush the edges of the dough with2 T oil and season liberally with salt. Spread 1⁄2 cup of pizza sauce over the dough, leaving a 1" border. Arrange 15 squash blossoms over the sauce in concentric circles. Place the pizza (still on the parchment paper) on the pizza stone and bake until golden brown, about 10 to 14 minutes. Top with spoonfuls of burrata, a drizzle of olive oil and final sprinkling of salt.

Pizza Sauce

28-oz. can of whole peeled San Marzano tomatoes
1 T extra-virgin olive oil
1 t dried basil
2 garlic cloves, minced
½ medium onion, grated

Put all the ingredients in a food processor and purée. Season to taste with salt and pepper.

Thursday, April 8, 2010

Ham and Eternity

Photobucket

“Eternity is two people and a ham," wrote Irma S. Rombauer in the original Joy of Cooking. Perhaps you can relate to this statement. I certainly know I can. It's the week after Easter and in my house that means we are diligently trying to use up the leftover Honey Baked Ham.

Every year I order more than we need. Perhaps I forget how hard it was to use up all the ham the year before or perhaps, because I only order Honey Baked Ham once a year, I get excited and order much more than could ever be consumed by two people in a reasonable amount of time. Whatever the reason, here I am, left with my piles of ham.

Photobucket

The ham bone was frozen for use in split pea or navy bean soup somewhere down the road, a half pound of ham was neatly diced and stowed in the freezer to have at the ready as a flavor base or to add to soups, and a ham and cheese quiche is on the menu for this weekend; still, I was in need of some new inspiration.

It came in the form of slices of ham and cheese sandwiched between two pieces of sourdough and smothered in a cheesy béchamel. In other words it came in the form of a croque monsieur. This happens to be my boyfriend's favorite sandwich and I am baffled at how it managed to escape me as a way to use up leftover ham.

The thick-cut Honey Baked Ham works perfectly in this sandwich. Gruyere is a traditional accompaniment, but I found that a blend of gruyere and swiss was particularly delicious. There is something about ham and swiss that just works.

This isn't the lightest or healthiest way to follow up Easter dinner, but let's be honest. Who hasn't already had a few too many pieces of Easter candy this week? Can one croque monsieur really do that much damage?

Photobucket

Croque Monsieur
Adapted from Ina Garten

2 T unsalted butter
3 T flour
2 cups hot milk
1 t kosher salt
½ t pepper
Pinch nutmeg
6 oz grated gruyere or gruyere / swiss blend
½ cup grated parmesan
8 slices sourdough bread
Dijon mustard
4 – 6 slices of Honey Baked Ham, or any thick-cut, cooked ham

Preheat oven to 400*
Melt the butter in a saucepan over medium heat. Sprinkle the flour over the butter and use a rubber spatula to combine. Cook the butter and flour for about two minutes, stirring constantly with the spatula. Add the milk, a half cup at a time, making sure the milk is fully incorporated before adding more. Let the béchamel simmer until thickened, stirring constantly for about five minutes. Turn off the heat and add the salt, pepper, nutmeg, ½ cup of gruyere and the parmesan cheese. Set aside.

Place the bread slices on a baking sheet and toast in the oven for five minutes. Turn the slices over and toast for an additional two minutes. Brush half the bread slices with mustard on one side and place one to one and a half slices of ham on top. Sprinkle the ham slices with half the remaining gruyere. Spread about a ¼ cup of béchamel over each of the remaining other slices and use them to top the sandwiches (béchamel side down). Spread the remaining béchamel evenly over the top of the four sandwiches and sprinkle with the remaining gruyere. Bake for five minutes. Turn the broiler on and place the sandwiches under the broiler until bubbly and browned, about five minutes.

Monday, March 8, 2010

Candied Kumquat Tart

Photobucket

There was a kumquat tree in my front yard when I was young. Unfortunately, it met the chopping block when my parents re-landscaped the front yard. I’d like to think the gardeners lovingly transplanted the tree elsewhere, but this was the eighties and sustainability wasn’t exactly “in” at the time. Sadly, I didn’t enjoy kumquats when I had an abundance of them at my fingertips. My young taste buds couldn’t appreciate the tartness of the tiny citrus fruit and something about eating the whole thing, rind and all, was off-putting to a six-year-old.

Photobucket

I’m certain I have eaten a kumquat at some point between the time the tree was removed and now, but the moment escapes me. So, this weekend when there were bags upon bags of kumquats available at the farmers’ market, I couldn’t resist the opportunity to try them again.

It turns out that my adult taste buds very much appreciate the balance of sweet and tart along with the convenience of eating the entire fruit, rind and all. In fact, I started popping the little suckers like candy. I knew I needed to make something with them before I worked my way through the whole bag.

Photobucket

I was already working on a tart crust made primarily of quinoa flour and almond meal for my first experiment in gluten-free cooking. I don’t have any problem digesting gluten, but I have girlfriends who do and to be honest, I was more curious than anything. I still needed something to fill the tart and the kumquats, with their bright orange color, promised to at least make the tart look appetizing if nothing else.
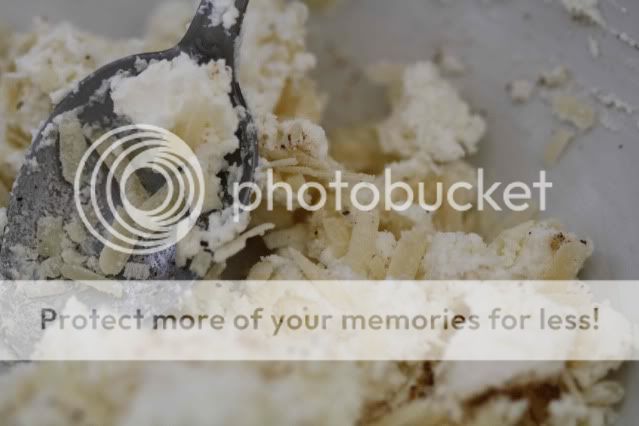
Appetizing indeed. I candied the kumquats which turned out to not only be delicious, but the process actually intensified their orange color. The crust was a partial success. It was tasty and imparted a peanut butter flavor to the tart, but it was a bit crumbly and could have held together better. This may have been my fault for rolling the dough out too thinly in an attempt to stretch it between two tarts. Either way, it was good enough to try again. Will I be giving up my all purpose flour and butter and lard-laden crusts? Absolutely not. But this will be a nice alternate to have on hand, especially when my gluten-free friends are coming over for dinner.

Photobucket

Candied Kumquat Tart
Crust adapted from a Whole Foods recipe
Filling adapted from Epicurious

Crust
1 cup quinoa flour
1/2 cup almond meal
1/4 cup sugar
1/2 t xanthan gum
1/4 t salt
1/2 cup (1 stick) unsalted butter
1 egg yolk

Filling
1 lb fresh kumquats
1 cup water
2 cups plus
2 T sugar
1 t fennel pollen
2/3 cup ricotta
1/3 cup sour cream

Crust
Place the quinoa flour, almond meal, sugar, xanthan gum and salt in a food processor and pulse to combine. Cut the butter into small cubes and add to the food processor. Pulse until the mixture looks like wet sand, but the butter is not fully incorporated. Form the dough into one disc for a round tart or two oblong discs for two smaller rectangular tarts and chill for 30 minutes.

Preheat oven to 400*
Remove the dough from the refrigerator and roll out to the shape of your tart pan. In order to keep the dough gluten-free, use quinoa flour to dust the dough while rolling it out. Transfer the dough to your tart pan and use a fork to prick the crust all over. Bake the crust for 15 – 20 minutes until golden brown. Remove from the oven and allow to cool on a wire rack.

Filling
Thinly slice the kumquats and remove any seeds. Bring the water and 2 cups of sugar to a boil and simmer for 5 minutes. Add the kumquats and simmer for 10 minutes. Drain the kumquats through a strainer set over a bowl to catch the syrup. Reserve the syrup for another purpose (I’m mixing mine with mineral water for drinks).

Combine the remaining sugar and fennel pollen with the ricotta and the sour cream. Spread the ricotta mixture evenly over the cooled tart shell. Place the kumquat slices in rows over the filling until the tart is fully covered. The crust is very delicate so slice carefully when serving.

Tuesday, February 23, 2010

Using Up Leftover Pasta

Photobucket

There is an Italian restaurant near my house that I frequent when I am looking for a no frills carb fest. The atmosphere is not great and the décor definitely leaves something to be desired, but the food is outstanding - great pasta dishes with rich, sometimes creamy sauces and gargantuan portions. They fit so much pasta on one plate that two maybe three people could share just one dish.

This past weekend I started craving a no frills carb fest about halfway through a seven-mile death march, I mean really lovely hike through the Santa Monica Mountains. Truth be told it was a lovely hike, but one that left all three hikers absolutely famished. Immediately after we returned home we headed off to gorge ourselves on carbs to refuel our bodies.

Starving and unable to agree on dishes to share, we each ordered our own. Not surprisingly, this left us with three to-go boxes, enough for at least another meal per person. The next day, determined not to let all those leftovers go to waste, I threw a half pound of leftover pasta with marinara sauce into a frying pan with eggs and cheese and made myself a pasta frittata.

Frittatas are always a great way to clean out the veg bin and use up leftover ingredients, but this pasta frittata is now by far my favorite. The pasta gives it a heartiness that just isn’t present when a frittata is eggs and veg alone, and if you love the sauce your favorite Italian restaurant uses on your pasta, why not give it a second chance to shine?

I’ll be heading back for more carbs shortly, and I will be denying any requests to share. From now on, I’ll be making sure we come home with leftovers.

Note - Any frittata recipe should be thought of more as a guide then a strict set of rules. The whole idea is to use up what you have on hand. No parsley? Try any number of fresh herbs, decreasing the amount you use depending on how pungent the herb. No crème fraiche? How about goat cheese or sour cream? You get the idea. Throw in what looks and sounds delicious and it will turn out well.

Photobucket

Pasta Frittata

1/2 pound of leftover pasta with sauce
5 eggs
1/4 cup chopped parsley
Salt and pepper
1/4 cup crème fraiche
1/2 cup grated parmesan

Preheat the broiler. Place the pasta in medium sauté pan over medium heat and warm through. In a separate bowl, whisk the eggs and parsley until combined and season with salt and pepper. Drop mounds of crème fraiche into the egg mixture, but do not combine. Pour the egg mixture over the pasta in the pan and cook until almost set, about six to eight minutes. Sprinkle the grated parmesan on top and place the pan under the broiler until the frittata is set and starting to brown on top. Serve with a side salad for a delicious little meal.

Friday, February 19, 2010

Grilled Zucchini Rolls for a Rainstorm

Photobucket

As we head into a weekend with nothing but rain on the docket, it’s easy for my mind to wander to soups, stews and braises. Something that will keep the oven on all afternoon and produce a dish that is warm, comforting and filling. It is easy for my mind to wander there, but I’m not letting it. I’m sticking with fresh, bright flavors in hopes of using my taste buds to pull myself out of this rainy weekend.

These little appetizers of grilled zucchini wrapped around fluffy fresh goat cheese, basil and citrus should be enough to remind me of warm evenings spent outdoors post-time change (even if the grill marks on the zucchini came from my grill pan and not the outdoor BBQ). The recipe comes from Ellie Krieger, but I’ve taken quite a few liberties with it including doubling the amount of goat cheese. After all, I wouldn’t want things too healthy - it is raining outside. If you want to read the original, and slightly more healthy version of the recipe, just click on her name below.

If all this rain continues, that duck confit I’ve been threatening to make will definitely come to fruition, but for now I’m counting on these light fresh flavors to satisfy me. Actually, even if the rain doesn’t continue, the duck is definitely coming to fruition. Perhaps after I let my mind start to wander again.

Photobucket

Grilled Zucchini Rolls
Adapted from Ellie Krieger

3 zucchini
3 oz goat cheese
1 T freshly minced parsley leaves
1/2 t lemon juice
1/3 cup basil leaves
Salt and pepper
Cooking spray

Thinly slice the zucchini on a mandolin and discard the outermost slices. Season with salt and pepper. Place a grill pan over medium heat and spray with cooking spray. Cook the zucchini until tender and grill marks appear (about four minutes per side).

In a small bowl, combine the goat cheese, parsley and lemon juice, and season with salt.

Put a small spoonful of the cheese mixture on each zucchini slice and top with a basil leaf. Roll up and place seam side down on a platter. Repeat with remaining zucchini slices.

Tuesday, February 16, 2010

Gougères with Duck Confit

Photobucket

Pâte à choux is a wonderful, versatile dough that should be part of every cook’s repertoire. I’m a bit embarrassed that it took me as long as it did to try my hand at it, but now that I’m on board, my new favorite past time is coming up with pâte à choux variations.

Variation number one was made immediately after consuming every last one of the cream puffs drizzled with dulche de leche. I had leftover dough and, knowing that they were simply pâte à choux with cheese mixed in, gougères, in other words cheese puffs, seemed like the next logical incarnation. After all, we were all suffering from a pretty bad cream puff sugar high and needed something savory to get our feet back on the ground.

Photobucket

While researching pâte à choux the first time around, I read that a friend of Michael Ruhlman’s used up leftover duck confit by piping pâte à choux over little mounds of it. I had been obsessed ever since and figured if I was already adding parmesan to the mix, why not throw some duck confit in there as well?

Excellent idea friend of Michael Ruhlman! These were even more addictive than the cream puffs. Something about the warm dough wrapped around the salty parmesan and rich duck was totally irresistible. Next up, I am going to have to make my own duck confit so I have a supply at the ready whenever the craving hits – not to mention the added benefit of avoiding the $13 per leg of duck confit.

Photobucket

Gougères with Duck Confit
Ratio from Michael Ruhlman

2:1:1:2
(Water: Butter: Flour: Eggs)

1 cup (8 oz) water
4 oz butter (a bit less than a stick – weigh if you can)
4 oz flour
4 eggs (large eggs are about 2 oz per egg)
1/2 cup finely grated parmesan
1/2 cup of shredded duck confit (one duck leg will yield close to 1 cup)

Preheat oven to 425*
Place the butter and water in a medium saucepan and heat over medium heat until the butter is melted and the liquid is simmering. Add the flour and stir vigorously with a wooden spoon until the dough pulls away from the side of the pan. Transfer the dough to a stand mixer fitted with the paddle attachment. Add one egg at a time, making sure each egg is fully incorporated before adding the next. You can mix the eggs in by hand, in the same pot if you prefer. Stir in the parmesan.

Place the dough in a piping bag with a plain tip or a large Ziploc bag with one corner cut off. Place 1 t mounds of duck confit about two inches apart on a baking sheet lined with parchment paper. Pipe the dough over the mounds so the confit is completely covered and place in the 425 oven for 10 minutes. Lower the heat to 375 and continue cooking until fully cooked - about 20 more minutes depending on the size. Just look for them to be golden brown all over and you’ll know you’re done.

Wednesday, February 10, 2010

When The Cream Is Worth It

Photobucket

Sometimes the cream is worth it. Actually, in my book the cream is often worth it. However, as the January leanings towards a healthier diet continue into February, sometimes I find myself doing silly things like replacing all the cream in a recipe with low-fat buttermilk.

Perhaps you have found yourself doing the same thing. In theory I think it’s a good idea. After all, low-fat buttermilk has a thick texture that is similar to cream. Unfortunately, in practice, all that missing fat is noticeably missing.

Photobucket

I realized this recently while making a zucchini and goat cheese tart. All the shredded zucchini that the recipe called for seemed too healthy to bury under a mountain of cream and frankly, I did not feel like consuming most of my daily calories in one sitting. I replaced all of the cream with low-fat buttermilk and hoped for the best.
Photobucket

Even with the buttermilk, the tart ended up just fine. In fact, a friend who doesn’t eat a lot of rich food thought it was delicious, but for me, there was something missing (mainly all that fat).

I’m including the recipe as it was originally published in the current issue of Donna Hay. The next time I make this I will likely replace some of the cream with buttermilk, probably a third at most and see if I can be satisfied with that compromise.

Photobucket

Zucchini and Goat’s Curd Tart
Donna Hay Magazine Issue 47
Serves 4 - 6

2/3 cups butter, melted
8 sheets phyllo dough
5 zucchini grated
9 eggs
1 1/2 cups single cream
Salt
Pepper
7 oz goat’s curd or goat cheese

Preheat oven to 325*
Butter the base of a 12” x 15” pan (I ended up using a 9” x 13” brownie pan and it worked perfectly). Layer the sheets of phyllo, brushing butter between each sheet. Place the grated zucchini in the pan on top of the phyllo. Lightly beat the eggs and cream together, season with salt and pepper and pour over the zucchini. Top with spoonfuls of goat cheese and bake for 45 – 50 minutes until set. Let cool slightly before slicing.

Thursday, January 21, 2010

Bacon-Wrapped Dates

Photobucket

Wrap anything in bacon and I’ll try it, at least once. Wrap something sweet with salty bacon and stuff it with cheese and I am probably going to get addicted. If you haven’t been to AOC in Los Angeles, you should know that you can feed your addiction to the perfect combination of sweet, salty and cheesy with Suzanne Goin’s bacon-wrapped dates. The first time I had them I was hooked and have ordered them on every subsequent visit (and there have been many).

Photobucket

It’s hard to believe that such a flavorful appetizer is made up of only three ingredients, but its simplicity makes it an easy dish to recreate at home. The first time I made these I replaced the bacon with what I saw as a more sophisticated option – prosciutto. Mistake. Serious mistake. This dish is perfect as is. Don’t mess with it.

Photobucket

When Gourmet printed this recipe in their October 2005 issue, they allotted three dates per person. I have modestly increased that number to five per person. People will not be able to stop eating these so make sure you make plenty.

Photobucket

Bacon-Wrapped Dates
Adapted from Suzanne Goin
Makes 30, allow 5 per person

10 slices of bacon cut crosswise into thirds
30 dates
3 - 4 oz of Parmigiano-Reggiano, broken or cut into small pieces about the size of a date pit

Preheat oven to 450*
If the dates are not already pitted, use a paring knife to make a small slit to remove the pit. Replace the pit with a piece of parmesan and reform the date around the cheese. Wrap each date with a piece of bacon. Place on a rack set over a rimmed baking sheet. Bake for 15 – 20 minutes until the bacon is browned (cooking time will vary depending on the thickness of your bacon). Remove from the oven and serve immediately while still warm.

Tuesday, January 19, 2010

Finagling Ravioli with an Egg Inside

Photobucket

My significant other has gotten it into his head that Italian food is some kind of a cop-out. I don’t know where it comes from, but I’m pretty sure when he hears Italian food, he thinks boil pasta, throw canned tomato sauce on top, possibly with some meat or cheese to finish the dish and you’re done. As a result and much to my chagrin, I have a very difficult time convincing him to go out for Italian food.

In order to finagle a dinner at Osteria Mozza, I had to use my birthday dinner – no input from him, all my choice. Knowing I wouldn’t be able to convince him to try the pasta tasting menu (everyone at the table has to participate) I very carefully selected one pasta dish to add to the selections for the evening – fresh ricotta and egg ravioli. It was mentioned in almost every review (both professional and in the blog and Yelp worlds) and I generally fall in love with any dish that serves up a runny egg yolk. In this case that yolk comes from boiling ravioli with a whole egg yolk inside, just barely poaching the yolk in the process.

Photobucket

At the time, and still to this day, Osteria Mozza is not the easiest Saturday night reservation to secure. We ended up with a table at 10pm. Not a problem for us as we like to eat on the late side, but a huge problem for the fresh ricotta and egg ravioli. They had run out. It’s a popular dish and eating on the later side of things means risking the kitchen running out of favorites.

Photobucket

Of course it was still an amazing meal watching Nancy Silverton at work behind the mozzarella bar and eating the tenderest pasta I have ever been served. Even the “Italian food is a cop-out” boyfriend was impressed. Though in spite of the great meal, a strange, insatiable craving was set off in me for pasta and runny egg yolks.

Photobucket

Thank goodness for the internet. Batali + egg yolk ravioli = exact recipe I needed to satisfy that craving at home. Of course my homemade pasta can’t rival that found at Osteria Mozza, nevertheless the ricotta filling with runny egg yolk was completely satisfying.

If you can find it, do use sheep’s milk ricotta. If not, cow’s milk is a fine substitute. Definitely make your own pasta dough as you’ll need its quick cooking time to make sure your egg yolk doesn’t overcook and become hard. Two of these huge raviolis were enough per person, but if you’re hungry, maybe plan for three. They can be a bit addictive.

Photobucket

Uova da Raviolo (Ravioli with an Egg Inside)
Adapted from Mario Batali (adaption includes leaving out half of a truffle – making the recipe a more affordable, though slightly less luxurious at-home version)
Makes 6 large raviolis

1/2 cup Parmigiano-Reggiano, grated, plus more for garnishing pasta
1/2 cup fresh sheep's milk ricotta
1/2 cup spinach, blanched, drained and chopped
Pinch of nutmeg
Salt and pepper to taste
1 recipe basic pasta dough, recipe follows
6 very fresh eggs
6 tablespoons butter

Combine the parmesan, ricotta and spinach. Season to taste with nutmeg, salt and pepper. Start with a third of the pasta dough and roll it out to the thinnest setting on a pasta rolling machine. From the thin pasta sheets, cut 12 squares about six inches in length (roll out more of the dough if you need it). Set six squares on a tray dusted with flour and cover with plastic wrap. Divide the ricotta mixture evenly between the remaining six squares, placing it in mounds in the center of each square. Use the back of a spoon to create a well for the egg yolk in each mound. Carefully break an egg into a small bowl, and transfer one yolk and a bit of white into the center of each well. Don’t break the yolk! Repeat for the remaining squares. Cover each filled square of pasta with an unfilled square, and press the edges together with fingers to seal.

Bring a large pot of water to a boil and salt generously. Melt the butter in a large sauté pan. Gently lower each ravioli into the boiling water to cook for two minutes. Remove from the water and place into the sauté pan with the butter. Add a generous grating of parmesan, sauté for one to two minutes and serve.

Batali’s Basic Pasta Dough
3 1/2 cups flour, with more as needed
4 eggs
1/2 teaspoon extra-virgin olive oil

Place the flour in a mound and make a large well in the center. In a separate bowl, whisk the eggs and olive oil together. Pour the egg mixture into the well in the flour. Slowly start incorporating the flour into the eggs without breaking the well. The mixture should start to come together when half of the flour is incorporated. When all of the flour is incorporated, start kneading the dough, adding more flour as necessary to keep the dough from sticking to your hands. Knead the dough for about five minutes until the surface is smooth and just the slightest bit sticky. Flatten the dough into a disc shape, wrap with plastic wrap and set aside at room temperature for 30 minutes before rolling out for the raviolis.

Wednesday, December 9, 2009

Poutine, Freezing and Stewing

Photobucket

It is freezing and I am stewing.

As already established on this blog, I am aware that freezing is a relative term so please, don’t all you Midwesterners jump on me at once. It has dropped into the 40s at night this week and for Los Angeles, by definition, that is freezing. Not to mention that I just returned from Wisconsin where it was, ahem, in the low 40s at night.

As far as the stewing is concerned, it mainly centers on meat, not my emotional state of mind – a much more delicious alternative. I just can’t help myself; I don’t want to turn my oven off in this cold weather. Already there have been soups and stews; braises and bread baking; even pastries on one choice afternoon.

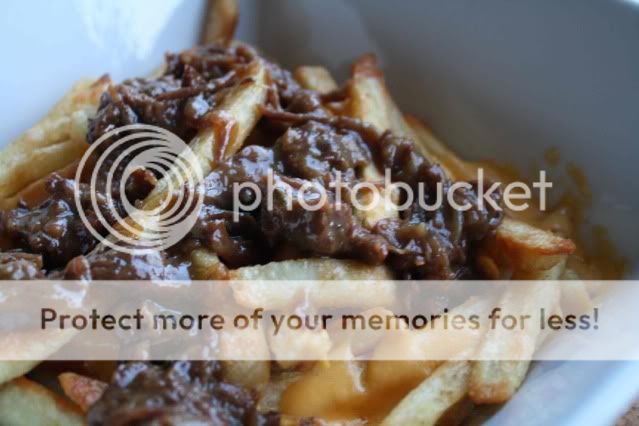
The most celebrated winter dish, new to my kitchen this year, is poutine. It’s only been celebrated by one person so far, but he has done enough on his own to earn it that designation. Poutine sounds pedestrian in theory – fries, covered with melted cheese curds, covered with gravy – but the right gravy can elevate the dish to something else entirely.

I originally created a poutine recipe of my own to avoid the $120 dinners at Animal that were threatening to turn into a weekly occurrence. My boyfriend had it bad for poutine and unlike the Canadian creators of the dish, we seemed hard-pressed to find it on many menus. As we would start planning for our weekend and the inevitable question of where to eat came up, I could see his eyes start to glaze over as he thought about the dish and subsequently pleaded with me to go to Animal, just one more time.

Not that I have a problem eating at Animal every weekend. It is by far my favorite restaurant in L.A. at the moment, but my pocketbook and my arteries started begging for mercy. So, into the kitchen I went determined to save our health and our finances and according to the boyfriend, I succeeded. He even thinks my poutine is better than Animal’s. I’m not certain about that but it is good enough to satisfy his craving and easy enough that I think you’ll enjoy making it at home.

Use this recipe only as a guide. I have varied it each time I’ve made it according to what I already had on hand and it is still delicious, even with modifications. Make sure you use real deal cheese curds - Trader Joes sells them if you have trouble locating them - and feel free to make your own fries, I just like to make the process slightly easier by using the frozen variety. I make my gravy with oxtails because that’s what Animal uses, but if you have a favorite recipe, by all means have at it. And finally, apologies in advance if this is your first introduction to poutine. I take no responsibility for resulting addictions.

Poutine
Serves 2

Gravy:
1 – 1 1/2 pounds oxtail (4 – 6 meaty pieces)
1 quart chicken (or beef) stock, preferably homemade
1 onion, roughly chopped
2 carrots, roughly chopped
2 pieces celery, roughly chopped
1 bay leaf
2-3 sprigs thyme
2 T olive oil
Salt and pepper

To Serve:
French Fries (I use one bag of frozen fries from Trader Joes)
1/2 cup cheese curds

Preheat oven to 375*
Sprinkle the oxtails with salt and pepper. Heat the olive oil in a Dutch oven over medium high heat and brown the oxtails on all sides. Remove to a plate. Add more oil if the pan is dry and sauté the onions, celery and carrots for five minutes, until just starting to soften. Return the oxtails to the pan and add the stock, bay leaf and thyme. If the stock doesn’t almost cover the oxtails, add water until the tops of the oxtails are just peaking out of the stock (but no more than two cups of water). Cover and place in the oven. Cook for three to four hours until the meat is tender and falling off the bone.

When the meat is finished, turn off the oven, remove the oxtails to a plate and set the pan over medium high heat. While the remaining stock is reducing (it should already be significantly reduced after four hours in the oven) pick all of the oxtail meat off the bone. When the stock is looking thick and gravy-like, add the meat to the gravy to warm through.

If you haven’t already, and you should have already, make your French fries. Transfer the French fries to an oven-safe serving dish and sprinkle with cheese curds. Place in your cooling oven for five – 10 minutes until the cheese is melted. Top the fries with gravy and serve while piping hot.

Tuesday, September 29, 2009

Making Cheese Even Better

Photobucket
I’m a sucker for a pretty picture. Especially if that picture is of food and in this particular case if that picture is of oil-dressed tomatoes piled high on top of slices of fried cheese. I have a few cookbooks that I adore that have absolutely no pictures of food, Marcella Hazan’s Essentials of Italian Cooking to name just one, but for the most part, beautiful pictures are what draw me in to a recipe, a book or an ingredient. It’s called food porn and it’s why, in addition to my obscene cookbook collection, I have subscriptions to every major food magazine.

Back to the tomatoes piled high on fried cheese. There isn’t much you can do to cheese to make it better than it already is, but frying it is certainly one way to try. Most cheeses can’t stand up to the heat, but one exception is Halloumi. Mentioned many times before on this blog, Halloumi is a Mediterranean cheese that has a very high melting point – in other words, you can pan fry it and it will keep its shape, but even more importantly something magical happens. The saltiness of the cheese is set off by the warm, melting creaminess and if you’ve left the Halloumi in the pan long enough, at a high enough heat, the crunchy crust that forms on the surface of the cheese finishes everything off with a seriously good contrast of textures. It’s cheese heaven so whenever I see a recipe that calls for it, I take note.

My latest ‘the pictures are just too pretty to pass up’ purchase is The Family Chef by Jewels and Jill Elmore. In a feeble attempt to stunt the growth of my cookbook collection, I stopped myself from buying this book the first time I saw it back in June, but after reading more about the sisters in this month’s Sunset Magazine, I knew I had to go back for a second look. I realized my first instinct was right and quickly purchased the book. It has been my bedside reading for the past week and their Halloumi Cheese with Cucumber Lentil Salad is the first recipe I made from it.

An added bonus with this recipe is that I discovered the boyfriend likes lentils! I didn’t think it was possible that such a healthy powerhouse could be on his list of, ‘please make me more of this right now,’ foods, especially after our phone conversation the day before I made the dish. He called me while I was browsing the aisles of Whole Foods and when told I was getting lentils, he responded with, “Why on earth would you be doing that? Lentils are gross.” Not encouraging, but he rarely knows what’s good for him so I picked them up anyway, made this salad and he couldn’t get enough. He even picked a lentil dish out of another cookbook for me to make the next night. I think I’m on to something here. Maybe you can be too.

Photobucket
Halloumi Cheese with Cucumber Lentil Salad
Adapted from The Family Chef (to make a smaller portion)

1/2 cup beluga lentils cooked according to package directions
1 medium cucumber, peeled in strips, halved lengthwise and sliced into half circles
2 ripe tomatoes (preferably one yellow and one red), cut into chunks
3 T extra-virgin olive oil + more for frying cheese
2 T chopped parsley
2 T chopped mint
2 T lemon juice
Salt and pepper to taste
1 package of Halloumi cheese, cut into 8 slices

Place the first seven ingredients in a bowl, season with salt and pepper and mix together. Heat a non-stick pan over medium-high heat and add some olive oil (about a tablespoon or two). Add the Halloumi slices and cook each side until golden brown, 2 – 3 minutes per side. Place the Halloumi slices on a platter and top with the tomato and cucumber mixture. Serve immediately while the cheese is still warm.

Monday, August 17, 2009

Roasted Tomato Tart with Goat Cheese and Country Pate

Photobucket
This tart recipe is the product of a perfect Sunday – a day I woke up early, feeling well-rested and with nothing on the calendar aside from hours to spend in the kitchen, tinkering with leftover pate and trying to use up pounds and pounds of tomatoes from the bushes now bursting with fruit in my backyard. At least that’s my idea of a perfect Sunday. If it doesn’t sound appealing to you, you may be in the wrong place.

I planned on making a tomato tart to start using up the stockpile of tomatoes currently occupying my kitchen counter. On a whim, I sliced up the leftover pate from our Saturday night cheese plate and included it in the tart. It added an amazing richness, but if you’re not a fan of pate, by all means leave it out, just be sure to put something in its place to help boost the flavor. A slather of Dijon mustard along the base of the tart would be a welcome replacement. Additionally, use any cheese that you like or have on hand. This recipe was created from what was already in the pantry and your version should be too.

The following recipe is long enough so I won’t waste anymore of your time going on and on about how much I love the Pâté de Campagne from Monsieur Marcel or how, if you’re feeling particularly adventurous, you can make your own goat cheese for the topping. I’ll just leave you with the recipe for your own adaptation. Enjoy.
Photobucket
Roasted Tomato Tart with Goat Cheese and Country Pate
Dough recipe adapted from Once Upon a Tart

2 1/2 cups flour
3 T semolina
1 t salt
12 T butter (1 1/2 sticks)
3 T shortening
4 – 8 T ice water

4 large tomatoes (heirloom paste tomatoes if possible)
4 cloves garlic, peeled and minced
15 thyme sprigs
Salt and pepper to taste
1/4 cup olive oil

1/4 pound good quality country pate
2 oz goat cheese

Photobucket

Heat oven to 375*
Place the flour, semolina and salt in a food processor and pulse until combined. Cut the butter into small pads and add to the food processor along with the shortening. Pulse until small crumbs start to form. Pour the mixture into a bowl and drizzle in the water starting with 3 T and adding more, 1 T at a time, if needed until the dough comes together as you stir it with a wooden sppo. Divide the dough into two balls and form into discs. Wrap the discs in plastic wrap and refrigerate for 30 minutes (you will only need one disc for this recipe).

While the dough is chilling, slice the tomatoes to a 1/4 inch thick and place on a rimmed baking sheet. Season liberally with salt and pepper and spread the thyme sprigs and minced garlic over the tomatoes. Drizzle with olive oil and bake for 20 minutes. Remove from the oven, discard the thyme sprigs and allow to cool.

Roll the dough out on a floured surface. Transfer to the tart pan and pierce the dough all over with a fork. Chill the dough in the tart pan for an additional 30 minutes. Line the pan with foil and place pie weights in the tart shell. Bake for 10 minutes. Remove the foil and pie weights and return to the oven for an additional 15 minutes. Remove from the oven and allow to cool slightly.
Slice the country pate very thinly and lay over the base of the tart shell (the bottom may not be completely covered). Place one layer of tomatoes over the pate, sprinkle lightly with salt and repeat with a second layer. Crumble the goat cheese and spread around the top of the tart. Return the tart to the oven and bake until the edges of the cheese are starting to brown. Let cool slightly before cutting and serving with a simple mixed greens salad.

Wednesday, July 8, 2009

Tomato and Burrata Salad

Photobucket

It’s a difficult thing to admit, even to myself, but sometimes I do not want to cook. A recent virus kicked off my latest spurt of time out of the kitchen which was extended a few weeks by a trip up north and the guilt that ensued for not adding anything to Apples and Butter for weeks upon weeks. I have been here, quietly perusing your sites and finding so much inspiration, just not adding much to the conversation myself. This past weekend, the push I needed came in the form of a little red globe of perfect, first-tomato-of-the-season ripeness I found hiding at the back of one of my potted cherry tomatoes.

The day I pull the first tomato of summer off the vine may as well be a holy day in my household. At the very least it’s the equivalent of a national holiday. The anticipation begins in March when I put the first seedlings in the ground and wonder why they don’t produce tomatoes the very next day. It’s a cruel, three-month waiting period until the flowers turn to green tomatoes and the green tomatoes ripen into voluptuous red globes that seem as though they will burst at the seems if left on the vine for one more minute.

Photobucket

The cherry tomatoes I pulled off the vine needed a very basic preparation to let the homegrown tomato flavor shine through. I grabbed a fresh package of burrata out of the fridge and opened my new bottle of Valderrama olive oil (more about that another time) that was waiting patiently on the counter for the perfect first use. This was definitely it.

With burrata and homegrown tomatoes as the star ingredients, the dish only needed a sprinkling of fresh herbs to finish it. Basil would be ideal, but since my bushes had not quite jumped into production, I settled for finely chopped parsley - a decent substitute in this situation.

For a presentation worthy of photographing (though I would have gladly thrown everything together in a bowl and dug in with a fork) I shaped the burrata into quenelles, a football shape which is formed by moving the cheese back and forth between two spoons, smoothing the edges as you go. If you have no idea what I’m talking about, this, more detailed, explanation may be helpful.

Photobucket

Wherever you are, I hope it’s warm enough that you too are enjoying the first homegrown tomatoes of summer.

Cherry Tomato and Burrata Salad
Serves 1 (this recipe can easily be doubled, though if you’re pulling your first tomatoes off the vine, you, like me, may not want to share)

Handful (10 +) of cherry tomatoes
4 quenelles (or spoonfuls) of Burrata (about a 1/2 cup)
1 T best quality olive oil
1 T chopped fresh herbs of your liking
Sprinkling of Maldon sea salt

Place the burrata quenelles on four opposite sides of a plate (think north, south, east, west). Slice the cherry tomatoes in half and arrange them among the burrata. Drizzle with olive oil and finish with a sprinkling of herbs and salt to taste. Try not to inhale everything in one bite.

Monday, May 18, 2009

Empanadas

Photobucket
Summer is encroaching on my backyard – and I couldn’t be happier. Each time I step outside to check on the garden it seems the tomato plants have sprung up another six inches and the pole beans have climbed further up their trellis. I have the warm Southern California days to thank for all of this progress and it is because of those warm days that I surprised myself when I cranked the oven up to 400 degrees for the better part of the afternoon. With no air conditioning in my humble abode, this is quite the commitment, but one that was well worth it as I turned out my first batch of empanadas for a friend’s birthday celebration.

Empanadas are an enticing ethnic food that I have shied away from making at home, always assuming that indigenous hands would do a much better job than my white-bread paws could ever hope to achieve. This is also why I have yet to make any Indian dishes at home. I love my Tikka Masala and I’m pretty sure that Taj Indian delivery will always do a better job than I.

The first time I considered making empanadas was after hearing my friend Lauren recount her experience making hundreds of them for a party for her Argentine boyfriend. She, like me, doesn’t have the Latin blood pumping through her veins that I assumed was necessary for a successful empanada. Knowing that her creations were well received encouraged me.

The final push came from the recent New York Times article on empanadas. I sent the article and recipes to Lauren and we began talking about the different types of empanada filling and the kind of dough she uses - after some unsuccessful attempts at making her own, she now relies on Discos, packages of premade frozen discs of empanada dough. Lauren even happened to have a package in her freezer leftover from a recent party. She offered to give it to me and I earnestly accepted. Armed with Discos and the New York Times recipes, it was time to get over my reservations.

I didn’t want to completely cop out with the pre-made dough so I decided to make half the batch with Discos and half the batch with the New York Times recipe. As I mentioned, I was making the empanadas for a friend’s birthday celebration, which turned out to be the perfect opportunity to have a large group compare the Discos with their homemade counterpart. I am actually happy to report that the Discos beat my dough, hands down. I’m happy because it will make future attempts at empanada making even easier. Not that the dough is particularly hard to make, in fact I think we may have gone a little too fat-conscious in Los Angeles - the hardest part of the dough recipe was tracking down lard. I stopped at three stores before finally locating the animal fat at a small neighborhood market. If you’re planning your own empanada party, I recommend saving yourself the trouble and using Discos.

The traditional minced meat filling was the crowd favorite, only marginally beating out my own corn and goat cheese experiment. Both filling recipes are included below. If you want to try your hand at the dough, check out the New York Times recipe.

In addition to the empanadas, I brought a tomato seedling to the party as a gift for my friend. A recent text informed me that her tomato plant, like mine, is, “sprouting like a teenager.” I hope your gardens are having as much luck as we are here in Southern California. And, if you’re going to try your hand at empanadas, I hope you, unlike me, have central air.

Photobucket

Minced Meat Filling
Adapted (doubled) from the New York Times

1 pound lean beef, minced
3 T lard
2 cups chopped onion
Salt and fresh black pepper
1/2 t ground cumin
1/2 t smoked paprika
20-pack of 5-inch Discos
3 hard-boiled eggs, sliced
12 pitted cured black olives, chopped
30 raisins
1 large egg, beaten with 1 T water for an egg wash

Preheat Oven to 400*
If you, like me, weren’t able to find minced meat, cut your beef into chunks and process in a food processor until minced. Melt the lard in a large sauté pan. Add the onion and cook until it starts to soften, then add the beef. Cook until the beef is lightly browned and stir in the seasonings – salt, pepper, cumin and paprika.

Place the filling on half of a Disco, leaving a half-inch border at the edge. Top with a slice of egg, some chopped olive and a few raisins. Brush the border and the other half of the Disco with egg wash and fold over. Crimp the edges with a fork to make sure they are sealed.

Place the filled Discos on a baking sheet, lined with parchment paper, and bake for 10 minutes. Flip the empanadas over and cook for an additional 5 to 10 minutes until golden brown.

Corn and Goat Cheese Empanada Filling

2 T olive oil
3 shallots, chopped
2 cloves garlic, chopped
Corn cut from three ears of corn
1/2 bunch of cilantro, roughly chopped
1/2 cup of goat cheese

Preheat Oven to 400*
Heat the oil in a large sauté pan and add the shallots and garlic. Cook just until fragrant and add the corn. Cook until the corn begins to soften 8 to 10 minutes. Let the mixture cool before transferring to a food processor. Add the cilantro to the food processor and process until the corn is coarsely chopped. Stir in the goat cheese by hand and season with salt and pepper.

Place the filling on half of a Disco, leaving a half-inch border at the edge. Brush the border and the other half of the Disco with egg wash and fold over. Crimp the edges with a fork to make sure they are sealed.

Place the filled Discos on a baking sheet, lined with parchment paper, and bake for 10 minutes. Flip the empanadas over and cook for an additional 5 to 10 minutes until golden brown.

Photobucket
If you are making your own dough, a lid or other round surface makes a good guide.

Thursday, April 30, 2009

Whole Wheat Flatbread and Dinner Rolls

Photobucket
Artisan Bread in Five Minutes a Day is the best thing that has happened to my bread baking and my comfort food cravings. Rough day at work? Spend a few minutes preheating the oven and shaping the dough and fresh baked bread, hot enough to melt butter on contact is yours. Unfortunately, because of the ease of the whole process, Artisan Bread in Five Minutes a Day is not the best thing that has happened to my waistline. C'est la vie.

My latest artisan dough of choice is the light whole wheat bread. It's turned out to be quite the gateway dough for whole wheat breads as I now have a batch of their full force whole wheat bread in the fridge waiting for its first use. 

The light whole wheat dough is perfect for flatbread. I discovered this when I was looking for something small to serve before a dinner that was taking longer than expected to finish. I also had the last of my homemade goat cheese to use up. While the dough rested, I whipped up a half batch of these caramelized onions and with the toppings finished, appetizers were jut about served.

This dough also works really well for dinner rolls. Be sure to save some of the caramelized onions from the flatbread to use as a topping for the rolls. Delicious. Just remember to re-read the first paragraph and consider yourself forewarned if your pants start to fit a little snug.

Artisan Light Whole Wheat Bread

3 cups lukewarm water (100* - 110*)
1 1/2 T yeast
1 1/2 T salt
1 cup whole wheat flour
5 1/2 cups unbleached all-purpose flour

Combine the water, yeast and salt in a 4 - 6 quart container. Mix in the flour and cover the container loosely. Let the dough rise for two hours. The dough can be used immediately or stored in the fridge until you're ready to use.

Flatbread
Sprinkle the dough with flour and pull off a fistful of dough (about a pound) and form into a ball. Stretch the surface of the dough around to the bottom on all four sides, rotating the ball a quarter turn as you go. Let rest on a floured work surface for 20 minutes. Preheat the oven to 450*. Roll or stretch the dough out into a long oval. Top with caramelized onions, goat cheese, herbs or any desired toppings. Slip the flatbread onto a baking stone in your preheated oven and bake for around 30 minutes (start checking after 20 minutes as there are a lot of variables - toppings used, amount of dough - that can change the baking time).

Photobucket

Dinner Rolls
Sprinkle the dough with flour and pull off a fistful of dough (about a pound). Form the dough into a ball and stretch the surface around to the bottom on all four sides, rotating the ball a quarter turn as you go. Let rest on a floured work surface for 20 minutes. Divide the ball into six equal portions and form into smooth balls. Let rest again on a floured surface for 40 minutes. Preheat oven to 450*. Dust each roll with flour and slash an x on the top. Place one tablespoon of caramelized onions in the indentation the x leaves. Bake the rolls for 20 - 25 minutes. If you have a broiler tray, pour 1 cup of water into it after you put the rolls in the oven to create steam to help with forming a crust.