Showing posts with label Tart. Show all posts

Thursday, March 11, 2010

Individual Potato and Onion Tartes Tatin

Photobucket

If I could take one indulgent, calorie and fat-laden ingredient and make it good for you without changing the makeup or taste of the product at all, it would be puff pastry. Unless of course I could choose the entire category of cheese, but if I had to choose just one cheese, I would stick with puff pastry.

Its rich buttery flavor and flaky layers are totally addictive and such a good complement to so many sweet and savory applications. I love using it as an easy tart crust, rolling it into palmiers or using it for a simple dessert. Not only is it delicious, but all the hard work is already done or you. You just cut the pastry to size and use as desired.
Photobucket

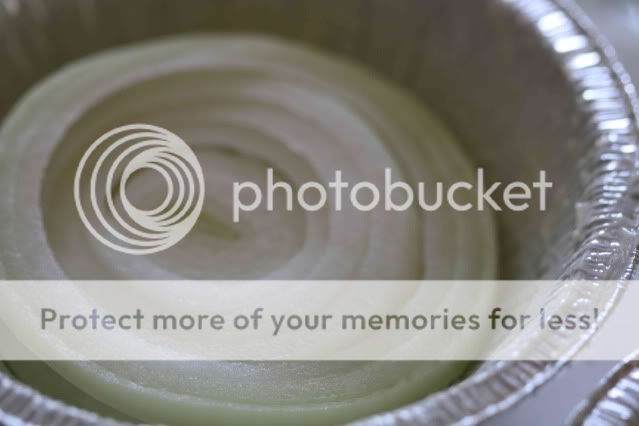
That ease of use is what makes these individual tartes tatins so brilliant. It’s an exercise in slicing more than cooking. Onion and potato slices are placed in individual pie pans and topped off with puff pastry. You can assemble them in about 15 minutes and after 30 minutes in the oven they emerge with the onions meltingly tender and sweet, and the crust perfectly puffed and golden. The hardest part, at least for me, is trying not to cut yourself on the mandoline as you slice the potatoes. I always cut myself. I probably need to give in and order a set of these to save my hands from total annihilation.

Photobucket

While I love any reason to purchase a new kitchen product, I actually could not find any 5-inch pie pans. Not even my trusted Surfas had them in stock. They are available online, but if you do not want to purchase small pie pans, I found that disposable 5-inch tins worked well (and only $3.99 for 15 of them).

Photobucket

Individual Potato and Onion Tartes Tatin
Adapted from Martha Stewart

4 T butter, cold and cut into small pieces, plus more for the pans
1 package puff pastry (17 ¼ oz)
4 medium yellow onions, peeled and cut into ¼-inch slices
5 small new potatoes
Salt and pepper
¼ cup balsamic vinegar
Pinch of sugar

Preheat Oven to 425*
Generously butter six 5-inch pie pans (or 5-inch disposable tin pans). Cut six 4 ½-inch rounds from the puff pastry and place in the refrigerator to chill while you finish the tarts.

Place two to three slices of onion on the bottom of each pie pan. Use a mandoline to cut the potatoes into ¼-inch (or thinner) slices. Lay the potato slices in a circle covering the onions, overlapping the slices as pictured above. Generously sprinkle the potatoes with salt and pepper. Place the puff pastry rounds over the potatoes and bake until golden (20 minutes in Martha’s oven, closer to 30 in mine).

Invert the tarts onto a serving platter or individual plates and allow to cool slightly while you prepare the glaze. Heat the balsamic vinegar and sugar in a small saucepan. Simmer until slightly reduced and syrupy, about four minutes. Whisk in the cold butter, one piece at a time. Season with salt and pepper. Using a pastry brush, brush the glaze over the onions topping each tart and serve warm.

Monday, March 8, 2010

Candied Kumquat Tart

Photobucket

There was a kumquat tree in my front yard when I was young. Unfortunately, it met the chopping block when my parents re-landscaped the front yard. I’d like to think the gardeners lovingly transplanted the tree elsewhere, but this was the eighties and sustainability wasn’t exactly “in” at the time. Sadly, I didn’t enjoy kumquats when I had an abundance of them at my fingertips. My young taste buds couldn’t appreciate the tartness of the tiny citrus fruit and something about eating the whole thing, rind and all, was off-putting to a six-year-old.

Photobucket

I’m certain I have eaten a kumquat at some point between the time the tree was removed and now, but the moment escapes me. So, this weekend when there were bags upon bags of kumquats available at the farmers’ market, I couldn’t resist the opportunity to try them again.

It turns out that my adult taste buds very much appreciate the balance of sweet and tart along with the convenience of eating the entire fruit, rind and all. In fact, I started popping the little suckers like candy. I knew I needed to make something with them before I worked my way through the whole bag.

Photobucket

I was already working on a tart crust made primarily of quinoa flour and almond meal for my first experiment in gluten-free cooking. I don’t have any problem digesting gluten, but I have girlfriends who do and to be honest, I was more curious than anything. I still needed something to fill the tart and the kumquats, with their bright orange color, promised to at least make the tart look appetizing if nothing else.

Appetizing indeed. I candied the kumquats which turned out to not only be delicious, but the process actually intensified their orange color. The crust was a partial success. It was tasty and imparted a peanut butter flavor to the tart, but it was a bit crumbly and could have held together better. This may have been my fault for rolling the dough out too thinly in an attempt to stretch it between two tarts. Either way, it was good enough to try again. Will I be giving up my all purpose flour and butter and lard-laden crusts? Absolutely not. But this will be a nice alternate to have on hand, especially when my gluten-free friends are coming over for dinner.

Photobucket

Candied Kumquat Tart
Crust adapted from a Whole Foods recipe
Filling adapted from Epicurious

Crust
1 cup quinoa flour
1/2 cup almond meal
1/4 cup sugar
1/2 t xanthan gum
1/4 t salt
1/2 cup (1 stick) unsalted butter
1 egg yolk

Filling
1 lb fresh kumquats
1 cup water
2 cups plus
2 T sugar
1 t fennel pollen
2/3 cup ricotta
1/3 cup sour cream

Crust
Place the quinoa flour, almond meal, sugar, xanthan gum and salt in a food processor and pulse to combine. Cut the butter into small cubes and add to the food processor. Pulse until the mixture looks like wet sand, but the butter is not fully incorporated. Form the dough into one disc for a round tart or two oblong discs for two smaller rectangular tarts and chill for 30 minutes.

Preheat oven to 400*
Remove the dough from the refrigerator and roll out to the shape of your tart pan. In order to keep the dough gluten-free, use quinoa flour to dust the dough while rolling it out. Transfer the dough to your tart pan and use a fork to prick the crust all over. Bake the crust for 15 – 20 minutes until golden brown. Remove from the oven and allow to cool on a wire rack.

Filling
Thinly slice the kumquats and remove any seeds. Bring the water and 2 cups of sugar to a boil and simmer for 5 minutes. Add the kumquats and simmer for 10 minutes. Drain the kumquats through a strainer set over a bowl to catch the syrup. Reserve the syrup for another purpose (I’m mixing mine with mineral water for drinks).

Combine the remaining sugar and fennel pollen with the ricotta and the sour cream. Spread the ricotta mixture evenly over the cooled tart shell. Place the kumquat slices in rows over the filling until the tart is fully covered. The crust is very delicate so slice carefully when serving.

Wednesday, February 10, 2010

When The Cream Is Worth It

Photobucket

Sometimes the cream is worth it. Actually, in my book the cream is often worth it. However, as the January leanings towards a healthier diet continue into February, sometimes I find myself doing silly things like replacing all the cream in a recipe with low-fat buttermilk.

Perhaps you have found yourself doing the same thing. In theory I think it’s a good idea. After all, low-fat buttermilk has a thick texture that is similar to cream. Unfortunately, in practice, all that missing fat is noticeably missing.

Photobucket

I realized this recently while making a zucchini and goat cheese tart. All the shredded zucchini that the recipe called for seemed too healthy to bury under a mountain of cream and frankly, I did not feel like consuming most of my daily calories in one sitting. I replaced all of the cream with low-fat buttermilk and hoped for the best.

Photobucket

Even with the buttermilk, the tart ended up just fine. In fact, a friend who doesn’t eat a lot of rich food thought it was delicious, but for me, there was something missing (mainly all that fat).

I’m including the recipe as it was originally published in the current issue of Donna Hay. The next time I make this I will likely replace some of the cream with buttermilk, probably a third at most and see if I can be satisfied with that compromise.

Photobucket

Zucchini and Goat’s Curd Tart
Donna Hay Magazine Issue 47
Serves 4 - 6

2/3 cups butter, melted
8 sheets phyllo dough
5 zucchini grated
9 eggs
1 1/2 cups single cream
Salt
Pepper
7 oz goat’s curd or goat cheese

Preheat oven to 325*
Butter the base of a 12” x 15” pan (I ended up using a 9” x 13” brownie pan and it worked perfectly). Layer the sheets of phyllo, brushing butter between each sheet. Place the grated zucchini in the pan on top of the phyllo. Lightly beat the eggs and cream together, season with salt and pepper and pour over the zucchini. Top with spoonfuls of goat cheese and bake for 45 – 50 minutes until set. Let cool slightly before slicing.

Monday, August 17, 2009

Roasted Tomato Tart with Goat Cheese and Country Pate

Photobucket
This tart recipe is the product of a perfect Sunday – a day I woke up early, feeling well-rested and with nothing on the calendar aside from hours to spend in the kitchen, tinkering with leftover pate and trying to use up pounds and pounds of tomatoes from the bushes now bursting with fruit in my backyard. At least that’s my idea of a perfect Sunday. If it doesn’t sound appealing to you, you may be in the wrong place.

I planned on making a tomato tart to start using up the stockpile of tomatoes currently occupying my kitchen counter. On a whim, I sliced up the leftover pate from our Saturday night cheese plate and included it in the tart. It added an amazing richness, but if you’re not a fan of pate, by all means leave it out, just be sure to put something in its place to help boost the flavor. A slather of Dijon mustard along the base of the tart would be a welcome replacement. Additionally, use any cheese that you like or have on hand. This recipe was created from what was already in the pantry and your version should be too.

The following recipe is long enough so I won’t waste anymore of your time going on and on about how much I love the Pâté de Campagne from Monsieur Marcel or how, if you’re feeling particularly adventurous, you can make your own goat cheese for the topping. I’ll just leave you with the recipe for your own adaptation. Enjoy.
Photobucket
Roasted Tomato Tart with Goat Cheese and Country Pate
Dough recipe adapted from Once Upon a Tart

2 1/2 cups flour
3 T semolina
1 t salt
12 T butter (1 1/2 sticks)
3 T shortening
4 – 8 T ice water

4 large tomatoes (heirloom paste tomatoes if possible)
4 cloves garlic, peeled and minced
15 thyme sprigs
Salt and pepper to taste
1/4 cup olive oil

1/4 pound good quality country pate
2 oz goat cheese

Photobucket

Heat oven to 375*
Place the flour, semolina and salt in a food processor and pulse until combined. Cut the butter into small pads and add to the food processor along with the shortening. Pulse until small crumbs start to form. Pour the mixture into a bowl and drizzle in the water starting with 3 T and adding more, 1 T at a time, if needed until the dough comes together as you stir it with a wooden sppo. Divide the dough into two balls and form into discs. Wrap the discs in plastic wrap and refrigerate for 30 minutes (you will only need one disc for this recipe).

While the dough is chilling, slice the tomatoes to a 1/4 inch thick and place on a rimmed baking sheet. Season liberally with salt and pepper and spread the thyme sprigs and minced garlic over the tomatoes. Drizzle with olive oil and bake for 20 minutes. Remove from the oven, discard the thyme sprigs and allow to cool.

Roll the dough out on a floured surface. Transfer to the tart pan and pierce the dough all over with a fork. Chill the dough in the tart pan for an additional 30 minutes. Line the pan with foil and place pie weights in the tart shell. Bake for 10 minutes. Remove the foil and pie weights and return to the oven for an additional 15 minutes. Remove from the oven and allow to cool slightly.
Slice the country pate very thinly and lay over the base of the tart shell (the bottom may not be completely covered). Place one layer of tomatoes over the pate, sprinkle lightly with salt and repeat with a second layer. Crumble the goat cheese and spread around the top of the tart. Return the tart to the oven and bake until the edges of the cheese are starting to brown. Let cool slightly before cutting and serving with a simple mixed greens salad.

Wednesday, February 11, 2009

Puff Pastry Tarts

Photobucket
I’m very lucky to have a lot of friends and family that appreciate good food. It means I have lots of partners in crime when it comes to discovering a new favorite restaurant (Animal), plenty of people to co-sign on my newly developed $30-a-weekend cheese habit, and best of all, no shortage of friends to try out my creations.

I was invited to a small gathering of some of these friends last weekend and, along with everyone else, was asked to prepare something for the meal. One of our friends is a vegetarian and that, along with the food’s portability, needed to be taken into consideration.

Pizza and flatbread creations always come to mind in these situations. They’re great finger food, easily transported and straightforward enough that I could make two – one with the vegetarian in mind and one for everyone else. To be sure to keep it simple, I decided to use puff pastry as my crust and turn my attention to the toppings.

Roasted vegetables seemed like the clear topping choice for a vegetarian. I decided to leave the selection of veggies open until I saw what looked good at the farmers' market. I don’t always like to do this because if I don’t have a focus, I tend to buy everything on site (as mentioned here), but looking for good veggies to roast seemed like enough direction.

I settled on small red onions, petite carrots and brussels sprouts. If you can’t find these or don’t particularly like them, choose whatever vegetables you prefer to roast for the topping. Try to keep color in mind - the more vibrant the colors, the more appetizing your tart will look.

The meat toppings were a cinch. Shredded chicken along with ridiculously thick cut bacon I picked up at Surfas matched perfectly with ricotta. I used fresh ricotta from Surfas, but if you’re feeling adventurous and want to make your own, you can find a recipe here.

I’m a carnivore to end all carnivores (just check out the menu at my new favorite restaurant listed above), but I have to say the vegetarian tart was my favorite. They were both delicious, but something about the way the roasted vegetables melded with the pea shoot pesto was really perfect.

Photobucket
Vegetable Puff Pastry Tart

1 small red onion
8 petite carrots (or 4 large)
1/2 basket of brussels sprouts (about 10)
2 T olive oil
3 – 4 thyme sprigs
1/2 sheet-sized piece puff pastry
1/2 recipe pea shoot pesto
Egg wash
1/2 cup shredded Cabra Romero
Salt and pepper to taste

Preheat oven to 400*
Cut the carrots on the diagonal into 1/8” thick pieces. Slice the onion so some of the rings remain intact. Quarter the brussels sprouts. Toss the vegetables with the olive oil and the thyme. Roast until beginning to soften and slightly brown on some edges (about 30 – 40 minutes). Leave the oven on at 400*. (recipe continues below)

Photobucket

Score the puff pastry with a pairing knife to create a 1-inch border. Spread the pea shoot pesto inside the border and use a pastry brush to apply the egg wash to the 1-inch border area (as shown above). Spread the roasted vegetables over the pea shoot pesto and bake the tart for 20 minutes. Remove from the oven and sprinkle the Cabra Romero over the vegetables. Bake for 5 – 10 more minutes until the cheese is melted and the border is golden brown.

Note – Cabra Romero is a hard Spanish goat cheese that is encased in rosemary. It’s faint note of herb is really delicious here, but if you prefer, a good parmesan would work as well.


Photobucket

Chicken and Bacon Puff Pastry Tart

1/2 sheet-sized piece puff pastry
Egg wash
1/2 recipe pea shoot pesto
1 roasted chicken breast
4 pieces of thickest cut bacon you can find
1 T olive oil
1/2 pound ricotta

Preheat oven to 400*
Score the puff pastry with a pairing knife to create a 1-inch border. Spread the pea shoot pesto inside the border and use a pastry brush to apply the egg wash to the 1-inch border area. Shred the chicken breast. You may use the method of taking two forks and pulling the chicken apart, but I prefer my hands. Cut the bacon into lardons (slices about 1/4" wide) and fry in olive oil. When well-browned, drain on paper towels. Spread the chicken and bacon evenly over the pesto and top with chunks of ricotta. Bake for 25 minutes until the ricotta is just starting to brown on some edges.

Monday, October 6, 2008

Fingerling Potato Tart

I'm getting together with some girlfriends this week and needed something I could make ahead of time and reheat later. I adore savory tarts and seeing as they stand up pretty well to reheating, decided one would be perfect for this event. I've seen potato pies with layer upon layer of thinly sliced potato and gooey, melty cheese and have always wanted to make one. This is my attempt at something similar in a tart. The caramelized onions are what really pull the flavors together.

Fingerling Potato Tart
Serves 6

1 1/2 cups flour
1 t salt
4 dill sprigs
6 T butter
2 - 4 T ice water
3 medium onions
2 - 4 T olive oil
1 T dijon mustard
1 lb fingerling potatoes
1/2 cup shredded Italian cheese
2 eggs
1/2 cup heavy cream
1/4 t nutmeg
1/4 cup parmesan

Place the flour, salt and dill in a food processor and pulse until well blended and dill is chopped and distributed throughout the flour. Cut the butter into small pads and add to the food processor. Pulse until small crumbs start to form. Pour mixture into a bowl and drizzle in the water starting with 2 T and adding more if needed to get the dough to come together. Form a disc with the dough, wrap in plastic wrap and refrigerate for 30 minutes.

Peel the onions, cut in half lengthwise and slice thinly. Heat 2 T olive oil in a small pan. Add the onions and cook until brown and caramelized, stirring occasionally. If the onions begin to stick to the bottom of the pan, add more olive oil 1 T at a time.

Preheat oven to 375*. Place the fingerlings in a pot and cover with water. Bring to a boil and cook for 3 minutes until just starting to get tender. Drain and let cool slightly before slicing lengthwise into very thin slices.

Roll the dough out on a floured surface to fit a 9" tart pan. Transfer to the tart pan, line with foil and fill with pie weights. Bake for 30 minutes until golden on the edges and let cool.

Spread the mustard over the bottom of the tart crust. Sprinkle half the caramelized onions over the mustard, followed by 1/4 cup of the shredded Italian cheese. Layer fingerling slices in a concentric pattern and repeat (onions, cheese then potatoes). Beat eggs, cream and nutmeg together in a bowl and pour over the tart. Bake for 20 minutes, remove from the oven and sprinkle the parmesan cheese over the top of the tart. Return to the oven and bake for an additional 20 minutes. Let cool slightly before serving and enjoy!