Friday, December 17, 2010
Chicken Liver Pâté Round ??
Chicken liver pâté is one of my favorite things to make and to eat. The first time I prepared it, I was living with my parents for a short period of time after graduating from college and before starting to work. I was trying to make up for playing the part of the typical college student who returned home jobless, by making dinner for them on a semi-regular basis. I was just starting to delve into the world of cooking and my meals were always the result of experiments with new dishes. It is unlikely that we ate the same thing twice during those few months.
I remember my osso bucco being a particular hit with my father. Of course, there was also the day I fell asleep on the couch while there were chicken thighs braising on the stove. I awoke to a house filled with smoke and some chunks of carbonized, used-to-be-chicken thighs permanently fused to the now ruined pan. Luckily, I was just cooking for one that night and my parents were out of town.
The first time I made chicken liver pâté it seemed as if I was embarking on quite the endeavor. After all, pâtés and charcuterie, though delicious, were still a mystery to me and not the sort of things you made at home. My mother assured me over and over again that it was a very simple dish to make, but I did not believe her. It was too exotic. How could pâté be easy?
Turns out, it is easy. It is also cheap. A pound of chicken livers is never over $2 and that includes the livers that I picked up from high-end, specialty retailer Eataly, here in New York. Once I discovered how easy it is to make this rich, delicious and often impressive dish, it became part of my regular repertoire. Chicken liver pâté at the holidays, chicken liver pâté to go with every cheese plate, my mom and I even made it for an event during the weekend of my brother’s wedding. We have bounced back and forth between recipes and I am always on the lookout for new ones to try.
So, when I saw this latest recipe while perusing Sweet Paul, a visually stunning online magazine, I knew I would be making it that weekend. This is a great chicken liver pâté. I will not go as far as to say that it is my favorite (that title still belongs to this recipe), but it is delicious and, unlike my favorite recipe, perfect for placing in a beautiful jar, under a thick layer of clarified butter and giving as a gift this holiday season.
Chicken Liver Pâté
Sweet Paul Magazine
1 pound chicken livers, cleaned
1 cup milk
3 T butter
1 small yellow onion, chopped
1 t fresh thyme
1/2 t salt
1/2 t pepper
1/4 cup cognac (I used white wine)
4 T butter
Topping
1 stick butter
6 sprigs thyme
Place the chicken lives in the milk and soak in the refrigerator overnight (24 hours if possible). Drain the livers. In a large pan, melt 3 tablespoons of butter and sweat the onions until beginning to soften. Add the chicken livers and thyme and sauté until the livers are browned on the outside (about five minutes). Season with salt and pepper and cook for one more minute. Add the cognac or wine and cook until almost all of the liquid is gone. Transfer the mixture to a food processor and puree until smooth. Spoon the pâté into six ramekins.
For the topping: Melt a stick of butter in a small saucepan. As the milk solids float to the top, remove them with a spoon until the butter is totally clear and you are left with clarified butter (alternately you may purchase clarified butter and melt it until pourable). Cover each ramekin with a layer of clarified butter. Place one thyme sprig in the butter for decoration and chill until solid.
Tuesday, December 14, 2010
Comfort in a Bowl
Most days I push myself pretty hard. I work full time and go to school at night. In my spare minutes I compose posts for Apples and Butter, do a bit of freelance writing and work my tush off at making contacts within my industry here in New York. During my best weeks, I even get up early to stop by the gym on my way in to work.
Today is not one of those days and it is certainly not one of those weeks.
I took my level three final last night at The French Culinary Institute. It was the midterm for the entire program at FCI and worth 50 percent of my grade. In other words, a big deal. While it is a relief to have the thing over with, I am feeling a bit worn down from the whole process.
The flip side of pushing myself so hard is that I also have learned how to hit the brakes and indulge myself a bit when it is truly needed. Today I have plans for a lunchtime trip to Strand to treat myself to a new (used) cookbook or two to flip through while I lay in my cozy bed watching movies, and a big bowl of warm, comforting soup for dinner.
There is something so restorative about a bowl of soup.
This is yet another riff (or shall I say variation? Somewhere between this week and last, I began to hate the word riff, which is entirely unfortunate since it seems to be the favored word of bloggers and established writers alike when referring to their own take on something: ‘My riff on Suzanne Goin’s bacon-wrapped dates,” or “we were riffing on different potato-based soups.” Ugh). I digress. This is yet another way to use my vegetable soup formula. Specifically, this is an example of how to use the formula to make a roasted vegetable soup. Butternut squash is the main ingredient, but I also threw in some roasted mushrooms. I find the savory flavor of mushrooms in pureed soup to add a creaminess that is particularly comforting and I may have mentioned this already, but today I am in need of some comfort.
Refer back to the original vegetable soup formula if you would like to make some changes to this basic variation. And by all means do. Your perfect bowl of comfort may not look exactly like mine.
Roasted Butternut Squash and Mushroom Soup
1 lb cubed butternut squash
8 oz domestic mushrooms, sliced or quartered, plus more for garnish if desired
Canola oil
1 small onion, or half of a larger one, diced
A few sprigs of tarragon
A few springs of thyme
1 1/2 – 2 quarts of vegetable stock (6 – 8 cups)
Salt and pepper to taste
Walnut oil (optional)
Preheat oven to 375˚
Toss the mushrooms and butternut squash with a bit of oil and salt pepper. Spread out the vegetables on a roasting pan and bake until the squash is tender, about 30 to 40 minutes. Add a bit of canola oil to a soup pot placed over medium heat. Add the diced onion and sauté until softened. Add the thyme and tarragon and sauté for a minute or two longer. Add the roasted vegetables to the pot and cover with vegetable stock. Simmer for 30 minutes. Remove the thyme and tarragon and transfer the mixture to a blender to puree, in batches if necessary. Return the pureed soup to the pot and season with salt and pepper. If desired, serve with a garnish of roasted mushrooms and a bit of walnut oil.
Monday, December 6, 2010
Meatballs for The Sunday Cook
Few and far between are the weeknights I have time to cook a meal at home. I work full time and run straight from work to school on Mondays, Wednesdays and Fridays. The other two nights I catch up with girlfriends or attempt to check off an endless to-do list and by the time I make it home, I am too tired to move, let alone cook.
The thing is, I am one of those peculiar people who gets energized from being in the kitchen. I know that if I can just get started on something, I will catch my second wind and be left with a delicious, often affordable and usually healthy dinner.
In order to increase the likelihood that I will get cooking on the rare night I find myself at home, I am always on the lookout for simple dishes (love a good stir-fry or fried rice) or a dish that has me doing most of the prep work ahead of time, on a weekend, when I have more time. This is known as being a Sunday cook.
If you are looking to expand your Sunday cook repertoire, try these Thai-inspired turkey meatballs. They were the result of a recent Sunday project that kept me well-fed on Tuesday nights for an entire month. The recipe itself is more an exercise in mixing than cooking, but having a bag of these frozen meatballs in the freezer meant I was never more than 15 minutes away from an easy, home-cooked meal. Simply thaw a few of the meatballs in the refrigerator overnight, or use the defrost setting on your microwave if you are pressed for time. Add a bit of canola oil to a small sauté pan and cook these up over medium heat. They make a great addition to many dishes—think soups, stews, pastas, or my favorite application, over a bowl of wheat berries with a poached egg—or just serve them on their own with a salad on the side.
Thai-Inspired Meatballs
Adapted from Everyday Food
2 pounds ground turkey
6 scallions
3 T Japanese fish sauce (2T if you do not have the Japanese variety which has a milder flavor)
2 T Sriracha
1 T sugar
2 garlic cloves, minced
1 cup cooked barley
Place the ground turkey in a large bowl. Cut the scallions in half lengthwise and thinly slice white and light green parts only. Place the dark green sections in your freezer bag for collecting vegetable scraps for stock. Add the chopped scallions to the turkey. Mix the fish sauce, Sriracha, sugar and garlic in a small bowl. Add the fish sauce mixture to the ground turkey, along with the cooked barley, and mix gently. I prefer to wear disposable gloves and mix with my hands, just until combined.
Place a piece of parchment paper on a cookie sheet. Shape the turkey mixture into meatballs of your desired size and place on the cookie sheet. Cover with plastic wrap and freeze until solid. Transfer frozen meatballs to a Ziploc freezer bag and use as needed.
Friday, December 3, 2010
Cookies for the Holidays - Updated with Winner
A random number generator selected comment number 11 as the winning comment. Congratulations Terri. I will contact you to arrange delivery of the items. Enjoy!
In honor of the start to the shopping, err I mean holiday season, Apples and Butter is hosting a giveaway of yummy treats and a cookbook filled with lots of tempting, delicious recipes. I don't know about you, but one way I manage to get everyone checked off my list is by baking their presents. It is more affordable than purchasing gifts for everyone on my list and it has the added bonus of putting me in the holiday spirit.
Last year I undertook the major project of truffle making. The truffles were delicious and I hope enjoyed by all recipients, but I will not be repeating that process in my tiny New York kitchen. This year cookies are on the gift-giving menu and I have every intention of finding some of those recipes in the cookbook from Tate's Bake Shop.
Tate's is a bakery based in Southampton that makes crisp, delicious cookies as well as cakes, brownies and squares. I generally consider myself more of a puffy, chewy chocolate chip cookie kind of girl, but I devoured half of the chocolate chip cookies within 20 minutes of their arrival. Oops. Luckily for you, since I have none left to share, you have the opportunity to win your own gift box of Tate's cookies and the Tate's cookbook to find your own baking inspiration. Just leave a comment here telling me what recipe you make as a holiday gift and you are automatically entered in the drawing. If you become a fan of Tate's on facebook, you get to enter twice. Just leave another comment letting me know you became a fan and that will serve as your second entry. Sorry to all you foreign readers, but for shipping reasons, the giveaway is only open to U.S. residents.
Not a baker? Tate's doesn't want you to miss out either. You can still check everyone off your holiday list by ordering cookies online. Tate's will even give you 15 percent off your online order. Just enter the code 'cookie' anytime before December 31st and the discount will be automatically applied.
Tuesday, November 30, 2010
Vegetable Soup Formula
Vegetable soups are quickly becoming my savior as I enter my first, cold New York winter. I used to bring salads to work in Los Angeles year-round and they proved sufficient for a quick meal at my desk. I tried that here in New York during the first few weeks of November and it turned out to be less than satisfying. So much so that when faced with the green leaves staring back at me from the office refrigerator, I quickly turned and walked out the door in search of something warm and a bit more comforting.
The main problem with my new lunchtime ritual is the detrimental effect it has had on the snugness of my wardrobe. Add that to the battle already underway with the culinary school bulge and it is a recipe for disaster. One more trip to Guy & Gallard for lobster bisque and no amount of Saturday morning boot camp in Central Park is going to bring me back.
Enter the humble vegetable soup. This is the perfect comfort food compromise. It is warm, thick and packed with the flavors of fall, but if you keep the ingredients to vegetables, stock and a few key flavorings, it is supremely healthy and nourishing.
This recipe, as with most, is just a guideline. Be sure to experiment with your favorite flavors. Keep this simple formula in mind and you will produce a successful soup every time:
1. Sauté diced onions in a bit of oil. After the onions soften add any garlic, ginger or other such flavorings (not herbs) and sauté a bit more. Season with salt and pepper.
2. For a roasted vegetable soup, dice the vegetables and roast at 375˚ until tender. Alternately, you can add the vegetables to the pot with the onions and sauté a bit to achieve some color. If roasting, add the vegetables to the pot with the softened onions after roasting.
3. Add enough vegetable stock to cover everything, toss in any herbs you want to use and simmer for at least 30 minutes. If you did not roast the vegetables, make sure they are tender before proceeding.
4. Remove the herbs and use an immersion blender or a standard blender to purée the soup.
5. Return the puréed soup to the pan and season to taste with salt and pepper.
There. You just made delicious and healthy vegetable soup. The only thing I must insist on is that you, if at all possible, make your own vegetable stock. It is so simple, yet it adds so much to the final product. Not to mention that it is a great way to use up vegetable scraps. For a refresher on vegetable stock, go here. If you are not quite ready to experiment on your own, here is the recipe for my latest concoction, carrot ginger pear soup.
Carrot Ginger Pear Soup
Makes about 2 quarts
1 small onion, diced
2 T vegetable oil
1 pound carrots
2 ripe pears
2 slices fresh ginger
1 1/2 quarts vegetable stock
Salt and pepper
Heat a medium pot over medium high heat. Add the oil and diced onion and sauté until soft. Add the ginger slices and continue to sauté. While the onions are sautéing, peel and roughly chop the carrots and pears. Add the carrots and pears to the pot and sauté until beginning to soften, five to 10 minutes. Season with salt and pepper. Add enough stock to cover the vegetables and simmer for 30 minutes until the carrots are tender.
To temper the spice of the ginger, remove the slices before pureeing. If you want more zip, leave the ginger in. Purée the mixture using an immersion or standard blender. Return the purée to the pot and season with salt and pepper to taste. If the soup is too thick, add a bit more vegetable stock to thin it out. Serve or cool and divide into containers for storage.
Monday, November 22, 2010
Dem Bones
I used to love the knowing looks butchers would flash my way when I would ask for beef bones, chicken carcasses or offal. I once received a marriage proposal after requesting three pounds of oxtail. Rather, I think the butcher told my boyfriend, who was with me at the time, to ask me to marry him right away. ‘Put a ring on that,’ may have been the exact words. You get the point.
That was at least four years ago when I first started making my own stocks and needed to ask butchers for things like chicken carcasses. Those days are pretty much over. It seems it is no longer uncommon for someone to make their own stock or request lesser known cuts of meat. This, in itself, is a good thing. I love that the food revolution has carried quality product and more homemade—fewer processed—ingredients into the kitchen of your average home cook. However, if I am being totally honest, I miss the knowing looks. And the marriage proposals.
One key thing I have learned about stocks at The French Culinary Institute, is that any kitchen without veal stock is an ill-equipped one. On occasion I have the opportunity to bring home from school a quart container of veal stock, or excess demi glace (veal stock that has been reduced by half), but last week I found that all of my reserves had been used up. It is getting cold here in New York and I am going to need a freezer full of stocks to accommodate all of the soup and stew making I have planned for the coming weeks. Unfettered by the lack of butcher attention received in recent years, I set out last week to gather the ingredients for a batch of veal stock.
Though not a difficult task, veal stock is slightly more complicated than the chicken or vegetable stock I make. Since I make a brown veal stock, I have to roast the bones and mirepoix before leaving everything to gently simmer on the stove for hours. Still, considering what a difference using a homemade stock makes in the final flavor of many, many dishes, the effort is minimal in relation to the payoff.
The recipe included below does not need to be followed exactly (I try to use up whatever vegetable trimmings I have stashed in the freezer when making stock), but a good guideline is to aim to include mirepoix (carrots, onion, celery) equivalent to about 20 percent of the weight of bones being used. So, for my seven pounds of veal bones, I included about one and a half pounds of mirepoix.
Once the stock has simmered for roughly eight hours, cool it down quickly by breaking it into smaller containers and chilling them over an ice bath. Once cool, place the containers in the fridge if you are planning on using the stock in a day or two. Otherwise, store them in the freezer for the next soup, stew or braise you make, all of which can benefit from a little homemade stock flavor.
Veal Stock
Makes about 5 quarts
7 pounds veal bones
Vegetable oil as needed
1/2 pound carrots or carrot trimmings cut into 3-in lengths
1/2 pound onions or onion trimmings, peeled and quartered
1/2 pound celery or celery trimmings, cut into 3-in lengths
Greens from one leek, thoroughly rinsed
1/2 cup tomato paste
1/2 cup tomato trimmings or 1 plum tomato, roughly chopped
6 cloves garlic, smashed
Bouquet garni (bay leaf, thyme sprigs, peppercorns, parsley sprigs)
Preheat oven to 450˚
Place a heavy bottomed roasting pan in the oven to preheat. Coat the veal bones in oil and place in the pan. Roast the bones for 30 minutes then turn the bones over and continue roasting for 30 more minutes. Toss the carrots, onions, celery and leek greens with the tomato paste and add them to the roasting pan for the last 15 minutes of cooking (after the bones have been roasting for 45 minutes). Place the roasted bones and mirepoix in a large stockpot. Deglaze the roasting pan with some water to loosen the browned bits, scraping them up if necessary. Add the water and browned bits to the stockpot along with the tomato trimmings. Add cold water to the stockpot until the bones are fully submerged (about 6 quarts of water depending on the pot) and bring to a boil. Reduce the heat to a simmer and skim well. Add the tomatoes, garlic and bouquet garni. Continue to simmer for eight hours. It should be a very low simmer with just a few bubbles breaking the surface every few seconds. Continue to skim the surface while the stock is simmering. Removing the scum that floats to the surface will result in a clear stock - a sure sign of success in a finished stock.
After the stock has simmered for eight hours, strain it and place in smaller containers to cool over an ice bath. I plug up my sink and fill it with an ice and water mixture. I then pour the stock into metal bowls and place the bowls in the ice bath to cool. Pour the cooled stock into quart containers and freeze or place in the refrigerator for later use.
Sunday, October 31, 2010
Tarte Aux Pommes
Lest all of you think that I skipped out of town with my extra copy of the Thinkfood cookbook, I think it is high time I announced the winner. Thank you all for the beautiful stories you shared in the comments section on the last post. I love hearing about other people's food memories.
I used a random number generator to select a number between 1 and 25 (I know this is a cop out, but there were just too many good stories and I was having a really hard time choosing just one). The web site selected number seven, so, Saint Tigerlily, you are the winner! I will get in touch with you to arrange delivery of the cookbook.
In the meantime, as fall is most certainly upon us here in New York City, I think it is time to get down to some apple business. My friend Tanitra, FCI classmate and fellow food blogger, brought me a bag of apples from her recent apple picking outing to Mead Orchards. They are delicious, juicy and just the right balance of sweet and tart. I am using some of them this afternoon to make the Apple Vinaigrette from Phil and Lauren Rubin's new book, The Comfort of Apples. I will be sure and share that vinaigrette and the resulting salad with you shortly, but first I want to get to the apple tart that we are now making nightly in level 3 at The French Culinary Institute.
Get all ideas of apple pie out of your head before you make this tart. There is not a lot of sugar in this filling. If you are looking for a sweet, syrupy interior, stick with your favorite apple pie recipe. However, if you love recipes that let the natural flavor of ingredients shine, definitely give this a go. The tartness of the apples really comes through in the final product.
Tarte Aux Pommes
4 large Granny Smith apples
2 T water
4 T sugar
2 Golden Delicious apples
4 T butter, melted
1/4 cup apricot jam
2 T water, more as needed to thin the jam
Lemon juice as needed
1 recipe of your favorite tart or pie dough
Preheat oven to 400°
Roll out your dough and fit it to an 8" tart shell and place it back in the fridge to rest. If you have just made your tart dough, be sure and let it rest in the refrigerator for an hour before rolling it out.
Peel the granny smith apples and roughly chop them. Add them to a saucepan with two tablespoons of water and 4 tablespoons of sugar. Loosely cover and cook until the apples start to break down. You want the mixture to be approaching applesauce consistency, but with some remaining apples chunks. Set aside to cool.
Peel and core the golden delicious apples. Cut them in half vertically. Cut each half into very thin slices, no more than 1/8". These slices will be used to decorate the top of the tart. If you are not decorating the tart right away, toss the slices with a little lemon juice to prevent browning.
Remove the tart shell from the refrigerator and fill it with the cooled apple filling. The filling should come about 3/4 of the way up the tart shell. Arrange the thin apple slices in two concentric circles. No filling should show through the topping. Place in the preheated oven for 10 minutes. Reduce the heat to 350° and continue cooking for an additional 50 minutes.
Combine the apricot jam and two tablespoons of water in a small pan. Heat gently to thin out the jam. Use a pastry brush to glaze the tart with the jam. Let the tart cool to room temperature before serving.
Wednesday, October 6, 2010
Thinkfood Cookbook Giveaway
This past summer I was asked to contribute a recipe to the Thinkfood Cookbook published by Posit Science. I was thrilled to be invited to participate and had so much fun working on the project. One of the highlights of the whole experience was hearing from a Posit Science contact that while out at a dinner in the Bay Area, she was discussing the cookbook with her dinner companions when she was interrupted by someone at the table next to her. The woman wanted to tell her that she had heard about the Thinkfood cookbook from a blog she reads, Apples and Butter (I would love to know who you are if you are still a reader!). So many great things have happened as a result of this project, but I do not think anything could match the thrill of seeing the published cookbook for the first time a few weeks ago.
It is a beautiful book, filled with delicious and brain-healthy recipes. I would tell all of you to head over to the Posit Science site to order your copy today (which you should all do), but I am more excited to tell you that I have one copy to give away here today.
I created the recipe included in Thinkfood for my boyfriend. I was trying to satisfy a craving for a dish he had enjoyed many times in England with his father when he was growing up. We could not find proper lamb kofta in Los Angeles so I came up with this recipe to appease him until we made our next trip to London with his family.
Have you ever had to recreate a dish at home for someone you love, in an attempt to satisfy their food craving? Were you successful? Tell me about your story in the comment section and one reader will receive a copy of the Thinkfood book, lovingly shipped by yours truly. Bonus points if you are willing to share your recipe so we can try it out on Apples and Butter!
In the meantime, the original recipe for lamb kofta can be found on the Thinkfood cookbook page. If you stopped by today as a result of the Posit Science newsletter, thank you for visiting and please leave a comment with your recipe story so you can have a chance at winning the cookbook!
Tuesday, September 28, 2010
A Healthy Breakfast to Combat Culinary School's Pastry Section
Last night was day two of our two-week section on pastry. The French Culinary Institute believes that culinary students should have at least a background in pastry, and I couldn’t agree more. Take Top Chef as a prime example. Every season at least one, if not two, competitors get sent home for the ill-advised action of taking on a dessert course. We culinary students need to earn our chops in the fine art of dessert-making.
I have an insatiable sweet tooth and while it usually craves chocolate, I am happy to oblige it with a couple of weeks of pastry crèmes, tarts, ice creams, mousses, soufflés, puff pastry and crepes. Unfortunately, I can feel my pants tightening just from writing that list. That, in conjunction with the aftereffects of a serious sugar high in class last night, left me craving something good for my body this morning (when I say serious sugar high I mean serious. By the end of class, no one could stop laughing long enough to listen to the instructor, and after I got home at 11:30 pm, it still took me two hours to be able to go to sleep).
Luckily, in addition to the many food magazines I read, I also have subscriptions to a number of health and fitness publications. Someone who loves to eat as much as I do needs all the help she can get making sure she does not need to buy a new wardrobe every few months. These blueberry pancakes are from Health Magazine’s September issue and a part of their new CarbLovers Diet. I am not someone who has ever in her life been able to stick to a diet (please see previous comment about loving to eat and did I mention I am in culinary school?). However, I do love to take some of the best, healthy recipes from publications like Health, Cooking Light, Family Circle and others, and incorporate them into my cooking routine to bring balance back to my meals. These blueberry pancakes are delicious and easy to make, a combination that should earn them a repeat appearance in your cooking repertoire. At least, if like me, you need a healthy addition to your diet every now and then.
Blueberry Oat Pancakes with Agave-Sweetened Yogurt
Adapted from Health Magazine
Serves 2
1 cup rolled oats
1/2 cup low-fat cottage cheese
2 large eggs
1 t vanilla bean paste (or vanilla extract)
1 cup blueberries
Cooking spray
3/4 cup 0% Fage (or other low or non-fat Greek yogurt)
1 T agave (or maple syrup as the original recipe calls for)
Combine first four ingredients (through vanilla) in a blender and process just until smooth (if you take it too far as I did with my first batch the pancakes will turn out gummy). Place the batter in a medium bowl and stir in the blueberries. Heat a nonstick skillet over medium heat and coat with cooking spray. Spoon a few tablespoons of batter per pancake into the pan. Cook until golden, about three minutes per side. Combine the yogurt and the agave or maple syrup and serve with the pancakes.
Tuesday, September 21, 2010
Tabbouleh
Tabbouleh is a go-to dish when cleaning out the vegetable bin which I seem to be doing a lot these days. I am still learning to adjust my shopping list to more appropriate levels for someone who is in culinary school. Three nights a week I get fed at school and I bring home leftovers of all the foods I prepare during class. There is a surplus of food in my fridge and sometimes I forget to purchase less when I head out to the store.
Even if you don’t need to clean out the veg bin, tabbouleh is a great dish to have on hand. It keeps well, and even gets better as the flavors meld together over the course of a day or two. I snack on it throughout the day and if you need a quick side for dinner, it is always great to have this sitting in the fridge waiting for you. Love those time savers.
Tabbouleh is traditionally made with bulgar wheat, which is what I used here, but I often use couscous, wild rice, wheat berries or basically any grain (or pasta in the case of couscous) that I have on hand. Traditional vegetables include tomatoes and spring onions with a healthy does (usually an entire bunch) of chopped parsley, but since I use this salad as a dumping ground for leftover vegetables, I do not always stick to the traditional and neither should you. In this rendition I use tomatoes, cucumbers and shallots, but in the past my tabboulehs have also included zucchini, eggplant (cooked), celery, squash and so on. The only real guidelines you should follow are to chop the vegetables small - I usually aim for a similar size to the grain I am using – and to use lots and lots of parsley.
Tabbouleh
1 cup bulgar or other desired grain or pasta
1 cucumber
3 roma tomatoes
1 small shallot
1 bunch parsley
Juice from 1 lemon
Olive oil to taste (start with 3 T and add from there)
Salt and freshly ground pepper to taste
Cook the bulgar or other grain according to package directions. Spread the cooked grains out on a parchment paper lined baking sheet to cool quickly. While the grains are cooking, chop the cucumber, tomatoes and shallot finely. Sprinkle the vegetables with salt and pepper and set aside. Chop the parsley finely, rocking your knife back and forth through the herb to make quick work of the bunch. Once the bulgar has cooled, combine it with the vegetables, parsley and lemon juice. Add 3 tablespoons of olive oil. You want the salad to seem moist, but not oily. If necessary, add more olive oil. Taste and add more salt and pepper to your liking. The salad is ready right away, but gets even better after some time in the refrigerator.
Thursday, September 9, 2010
Years That Answer
There are years that ask questions and years that answer. So says the text on the card I received from my parents today for my 30th birthday. According to my mother, I am in one of those years that answers.
At the moment, I still feel as though as I am asking a lot of questions. Where will this year of culinary school take me? Where will I be working? At the end of this year will I get to stay in New York or head back to Los Angeles? Or somewhere else?
At least one question has been answered. Will I ever go to culinary school? Yes. In fact, I am doing that at this very moment. Every now and then I have to stop and remind myself that I am, in fact, doing that very thing. I have been putting this dream together for years and it is so easy to forget that I am finally here living it.
I feel particularly grateful today. It is 1:30 in the morning and I am up late riding the adrenaline of a day that included the 30th anniversary of my birth and the practical and written finals for level one of culinary school. As we were waiting in the hall at school for our exam to begin, a man walked by and asked if there was a final going on. I glanced up and realized that Jacques Pepin was standing in front of me wishing our class good luck. “Cook from the gut,” were his final words as he continued down the hall after graciously posing for pictures with some of my classmates.
Chef Pepin is a dean at FCI, but it’s not as though the man is there every day roaming the halls. It was, without a doubt, a celebrity sighting. I had already decided it was very apropos that I should spend the night of my 30th birthday chopping vegetables during the level 1 final, but Chef Pepin provided the icing on the cake for a notable evening.
There is a bit more icing in my life right now as I lay in bed eating the slice of devil’s food cake I picked up on my way home from school tonight. Final or no final, a girl has got to have cake on her birthday. Lest you start thinking I eat cake every night, I am including the recipe for one of my more common evening snacks.
By the time we finish with school and I catch the subway home, it is usually at least 11:30 pm. To help myself wind down from a busy and late night in the kitchen, I make a quick snack of pears on rye toast with ricotta and agave nectar. The pears and rye feel judicious after an evening that inevitably includes a butter-enriched something and the ricotta and agave sufficiently satisfy my sweet tooth to spare me yet another visit to Billy’s Bakery and a subsequent trip to the gym.
If you are not a fan of the combination of savory and sweet, you can leave out the salt and cracked pepper, but I think it would be a mistake. The more pepper the better and make sure it is freshly ground. It is the perfect offset to the creamy ricotta and sweet agave.
Pear and Ricotta on Rye Toast
1 large slice of rye bread
1/2 small pear
1/3 cup fresh ricotta
Sea salt and freshly ground pepper to taste
Agave nectar for drizzling
Toast the rye bread. Slice the pear thinly and place the slices on the rye bread. Spread the ricotta over the pear and sprinkle with salt and pepper. Drizzle the agave nectar over everything.
Thursday, September 2, 2010
Ice-Pop Diaspora
It turns out that if you like to cook, you have a secret weapon when it comes to making friends in a new city. People like to eat and if you happen to throw say, an ice cream party, and have a bunch of people over to your house and feed them, people will like you for letting them eat good food for free.
I didn’t plan my ice cream party as a ploy to make friends, but in hindsight, it wouldn’t have been such a bad idea. It was meant to be a housewarming party, but really any party, at its base, is just a chance to get together with friends, strengthen relationships and hopefully make some new ones. I think the ice cream succeeded in bringing everyone together which, by the way, is what I love about food and cooking
I made a couple of my favorite frozen treats that you can find on Apples and Butter (lemon thyme sorbet, olive oil gelato and apple pie frozen yogurt) and one new recipe courtesy of Saveur Magazine. If you have made it even just a few pages into the current issue of Saveur (The Greece Issue) then you probably noticed the article on the ice-pop that changed a town in Mexico. We were not changing the social makeup of any town or creating a popsicle diaspora at our party, but the unexpected flavors (at least for American palates) of sweet mango and ancho chile powder did manage to start a few conversations. In other words, they served as the perfect icebreaker.
If you like the idea of salty and sweet combinations, then this combination of spicy and sweet won’t be too much of a reach for you. If it seems a little daunting, cut back on the amount of ancho chile powder so that the spiciness is more of an aftertaste. I will be making these again exactly as Saveur suggests. I think the recipe is perfect as is.
Mango-Chile Ice Pops
Saveur Magazine
1 cup store-bought mango juice or nectar
1/4 cup sugar
2 t fresh lemon juice
1/2 cup water
1 t ancho chile powder
I large mango, peeled, seeded and diced
Heat mango juice, sugar, lemon juice and water in a medium saucepan over medium heat until the sugar dissolves. Chill mixture in the refrigerator. Stir in the ancho chile powder and mango chunks. Transfer mixture into popsicle molds of your choice and freeze until solid.
Monday, August 23, 2010
Nori Rolls or How To Use Up All Those Julienned Vegetables
I was pretty sure that when I moved to New York, at least 10 pounds were going to melt off of me with very little effort on my part. I knew I would be walking everywhere instead of driving and I guessed that the heat and humidity would be enough to serve as my own personal sweat lodge.
This may be true for some new inhabitants of New York, but not for me. If, like me, you happen to be attending culinary school, The French Culinary Institute in particular, then the increase of butter and cream in your diet is enough to offset any good that pounding the pavement of New York might have done.
Needless to say, when I am not in school, I am doing my best to keep my meals on the lighter side. These nori rolls have become one of my go-to snacks. I eat them like hand rolls, but I have also been known, in my lazier moments, to thrown some brown rice in a bowl, top it with veggies and use a sheet of nori to scoop everything up with my hands. These are delicious and good for you either way. Also, if you happen to be in culinary school, they have the added benefit of using up all those julienned vegetables you have laying around if you have been practicing your knife skills. If you haven’t been practicing, these rolls will give you a great excuse to start.
Nori Rolls
Makes 4 rolls
2 sheets roasted nori
1 cup cooked brown rice (leftovers work great here)
1 T Japanese fish sauce (preferably Ayu for its great, mild taste)
1/2 carrot, julienned
3 green onions, julienned
1/4 avocado, sliced thinly
Toss the brown rice with the fish sauce and set aside. If you just cooked the rice, let it cool before assembling the rolls. Cut one sheet of nori in half lengthwise to make two strips. At one end of each strip of nori, pile 1/4 cup of rice, leaving the bottom corner of the nori sheet exposed so you can use it to start rolling. Place a quarter of the julienned carrots and green onions on the rice on each sheet along with one or two slices of avocado. Fold the bottom corner of the nori sheet over your pile of rice and vegetables and continue rolling the sheet into itself until you form a hand roll. Use a bit of water to moisten the end of the nori sheet to get it to stick to the roll. A bit of brown rice may fall out as you are rolling. Just tuck it back in to the roll when you are finished. I eat these plain, but you may also serve them with soy sauce or extra fish sauce for dipping.
Friday, August 13, 2010
A Simple Salad for a Simple Summer Morning
It is only 73 degrees outside right now. I think that is the coolest it has been since I moved to New York. The boyfriend is in town for the weekend and I cannot wait to get outside and take advantage of the drop in temperature.
Tomorrow morning we head to Philadelphia for the day to visit the neighborhood where my boyfriend grew up, picnic in Valley Forge and if I’m lucky, eat a cheesesteak on South Street before heading back to New York.
Before I get started with all of that, I need to share this delicious summer salad with you. It is so simple. If you can use a knife to cut a tomato, you can make this salad. Because of its simplicity, it is vital that you find the juiciest, ripest, heirloom tomato you can get your hands on. I recommend hitting your local farmers market, even better if you have a plant or two going in your own backyard. If all you can get your hands on is a flavorless, bred-for-shelf-life grocery store tomato, don’t bother with this salad. Everything hinges on the flavor of the tomato.
If you haven’t had raw corn before, trust me, it is delicious. Cut straight from the cob into the salad, it tastes even juicer and sweeter than if you were to cook it for a few minutes on the stove or grill. Finish the cut vegetables with a few torn leaves of basil and a glug (technical term) or two of olive oil and you are finished. It is that simple. You do not need the recipe, but I will include one below just in case. Now get outside and enjoy the summer weather.
Simple Summer Salad
1 juicy tomato
1 ear of corn
6 – 8 leaves of basil
1 T good quality olive oil
1 t vinegar (your choice, I used balsamic)
Kosher salt to taste
Cut the tomato into thick slices and arrange on a plate. Sprinkle generously with kosher salt. Cut the corn from the cob and arrange around the tomato slices. Tear the basil leaves in half or quarters and add to the plate (smell your hands to enjoy the basil scent left behind). Drizzle the salad with a little olive oil and vinegar and share with someone you really like. This is summer on a plate.
Sunday, August 8, 2010
A New York View
This, to me, is a quintessential New York sidewalk scene. Perhaps if I had shot it looking through the fire escape that sits outside my living room window, it would be even more so, but then I would have interrupted the beautiful view.
My quiet (relatively), tree-lined street is why I love where I live. The trees, the front stoops, the fire escapes, they make me feel as though I am walking through a movie set as I walk though New York. It all has a tendency to feel a bit surreal. At least it did.
This is the end of my third week in New York and I noticed yesterday that, even if just ever so slightly, New York is starting to feel a little less like a movie set and a bit more like home. It happened in the simplest of ways.
I was heading out to meet a friend from out of town. I had a place to be and a set time to be there (a rare occurrence for me these days). I arrived at my subway station only to learn that the train I needed was not running this weekend. No bother. I came back up to the street, and without even a glance at my subway map, walked one crosstown block to the next line over. Then, when I reached the end of my train ride, I came back up to street level and started walking to my destination. No pause to try and sense which way was North, no reaching for the iPhone to use the direction of the one-way streets to orient myself, I just walked. I walked and I reached my destination five minutes before I was supposed to be there.
It was a small victory, but a victory nonetheless and one that made me feel I may just get to know this movie set (err city) after all.
Thursday, August 5, 2010
Rice Pudding, I’m just not that into you (usually) and why I want to be Noelle Carter
I’m not that into rice pudding. I’m really not. So, when I heard that I needed to try the rice pudding at Lazy Ox Canteen in Los Angeles, I didn’t give it a second thought. Thank goodness not everyone is as chocolate-focused as I am when it comes to dessert. On visit number three, a dining companion ordered it and I got a bite of what is now possibly my favorite dessert in any restaurant in Los Angeles. It is unlike any rice pudding I have ever had. It is light and fluffy and most importantly, lacking the gloppy quality that I associate with rice pudding It is so good that it set off a month-long craving and a newfound need to sample rice pudding wherever I went to see if I had been wrong all this time and was ignoring a dessert that I should actually love.
I was not wrong. I do not like rice pudding. I threw away the rice pudding from my otherwise favorite market on Third in Los Angeles and never took more than one bite of the stuff anywhere else. It always has that gloppy consistency and glop is not appetizing.
So, as one of my last meals in Los Angeles before moving to New York, I returned to the Lazy Ox in an effort to quell the rice pudding craving. A month of hankering had not grotesquely raised my expectations; it was even better than I remembered. I tried to sweet talk the waiter, but he wouldn’t offer forth so much as a hint. I then stooped lower. I waited for my boyfriend to leave the table, put a big smile on my face and let the waiter know I was moving to New York and wouldn’t be able to return to eat rice pudding for a year (poor me). Still no movement. I pushed harder and pleaded with him, letting him know that I was moving to attend culinary school and wanted to be a food writer and I was sure there was some whipped cream folded in at the end, but what else was going on that made this rice pudding such a standalone…nothing.
Enter Twitter one month later. I was checking my feed and noticed that Krista Simmons of the L.A. Times was on her way to Lazy Ox. I immediately messaged her to let her know that she would be my hero if she could secure the rice pudding recipe for publication. She then responded with surprising news. Noelle Carter had secured the recipe and it was already published.
If you are a measly culinary student begging a waiter for even just a hint at the recipe you get nothing. If you are Noelle Carter, head of the L.A. Times test kitchen wielding the power to provide a restaurant with mass amounts of publicity through publication in the L.A. Times food section, you get a full written recipe. Have I mentioned that I want to be a food writer?
Thank goodness for Twitter and that I happened to see that Krista Simmons was heading to Lazy Ox. I had missed the Culinary S.O.S. column the week the rice pudding was included because I was coordinating my move to New York. I am certain I would have found it eventually when the craving struck and I again tried a desperate Google search for any semblance of a recipe, but now I have been saved the trouble, and you, dear reader, are about to experience dessert bliss. Seriously. Make this now. I do not care if rice pudding isn’t your thing. It wasn’t mine and I think I would be happy eating only this dessert for at least the next year or so. Make it! And thank Noelle Carter for getting us what I was unable to secure.
Lazy Ox Canteen Rice Pudding
Adapted from Chef Josef Centeno by way of the L.A. Times
I did not make the almond brittle included in the original recipe found here
Rice Pudding Base
1/2 cup Arborio rice
2 cups water
Salt
1 (3-inch) cinnamon stick, preferably Mexican (canela)
1 quart half and half, more if needed
1/2 to 1 cup heavy cream
1/2 cup light brown sugar
1/3 cup condensed milk
1 t vanilla bean paste (the recipe calls for extract which is fine too)
2 cups whipped heavy cream to finish
Rinse the rice several times until the water runs clear. Bring the 2 cups of water, cinnamon stick and a pinch of salt to a simmer. Add the rice and simmer until of the water is absorbed, about 10 minutes. Add the half and half and bring to a boil. Reduce to a gentle simmer and cook for 30 minutes, occasionally stirring to keep anything from sticking and burning on the bottom of the pan. Stir in 1/2 cup of cream, the brown sugar, condensed milk and vanilla. Continue to simmer 20 – 30 minutes until the mixture is very creamy and the rice has no bite. Remove from the heat and add up to another 1/2 cup of cream if the mixture is too thick. The pudding will continue to thicken as it cools so you want a loose consistency. Place plastic wrap directly on the surface of the pudding and chill until firm (overnight in my case).
Fold the whipped cream into the rice pudding to achieve a light and fluffy consistency. Spoon into bowls or shape into quenelles (as pictured above and demonstrated here) and drizzle with caramel sauce (recipe included below).
Caramel
1 cup sugar
1/2 cup water
1 orange peel
1 cup heavy cream
2 T unsalted butter
Salt
Place the sugar and water in a medium saucepan and bring to a boil. Reduce to a simmer and cook until the mixture caramelizes to a light golden brown. Keep a pastry brush in a glass of water nearby and occasionally brush the sides of the pan to keep sugar from crystallizing on the sides. While the caramel cooks, place the cream and orange peel in a separate saucepan. Scald the cream and set aside to steep. As soon as the sugar caramelizes, use a wooden spoon to slowly stir in the butter. Remove the orange peel from the cream and slowly add the cream to the caramel. Season the caramel with a pinch (or two or three in my case) of salt and set aside to cool slightly.
Monday, August 2, 2010
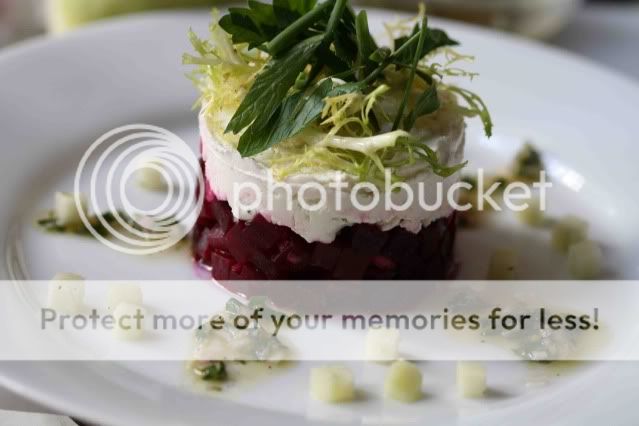
Roasted Beet Timbale
Week one of culinary school is officially behind me. In only four classes we covered knife skills, taillage, tournage (turning vegetables into cocottes and other maddening seven-sided football shapes that I am pretty sure are going to give me carpal tunnel), ServSafe and all the many ways I can kill you if I don’t handle food properly, cooking a l’anglaise and a l’etuvee, ratatouille, timbales, and a vegetable dish made up almost entirely of cocottes. At least, it was supposed to be made up entirely of cocottes. I have a long way to go before those seven sides come out evenly. It was an exciting if not slightly frenetic week and though I am not yet working during the day, I was grateful for this past weekend to catch my breath, find my footing and prepare for this week’s lessons.
A roasted beet timbale was the most attractive dish we made last week. For that reason, and because of its surprisingly simple preparation, I recreated the dish at home to share with you here. Well, those reasons and I snagged the extra roasted beets from class. Aside from the precarious beet juggling it took to get them home on the subway without a bag, I was thrilled. Extra beets meant I could make this timbale for you without even turning on my oven. At the risk of beating a dead horse I must say, the idea of turning on my oven for anything is still a bit off-putting.
Once your beets are roasted (or donated by a generous culinary school instructor), this salad is just a few simple steps of chopping, mixing and stacking. It looks slightly intimidating because of its lovely composition, but trust me, this is simple stuff. I did not even look at the recipe the second time I made it.
In a few hours I am off to school for lesson five – stock night. I have made my fair share of chicken and vegetable stocks so I am hoping for a beef or veal stock assignment. Though I am not sure we will even make those in class this evening as they need to simmer for longer than the five hours we have available. Perhaps we will set them to simmer overnight and tomorrow’s day class will take it from there.
Roasted Beet Timbale
Adapted from The French Culinary Institute Level 1
Yield 4 Servings
3 large beets (approximately 1 lb), roasted
2.5 oz extra virgin olive oil
1 oz white wine vinegar
1 shallot, finely chopped
1/2 bunch fresh tarragon, chopped
1 granny smith apple
4 oz goat cheese
1 T chopped parsley
6 chives, cut into 1-inch segments
1 T chopped chervil
1/4 head frisee, picked, washed and dried
Salt and pepper to taste
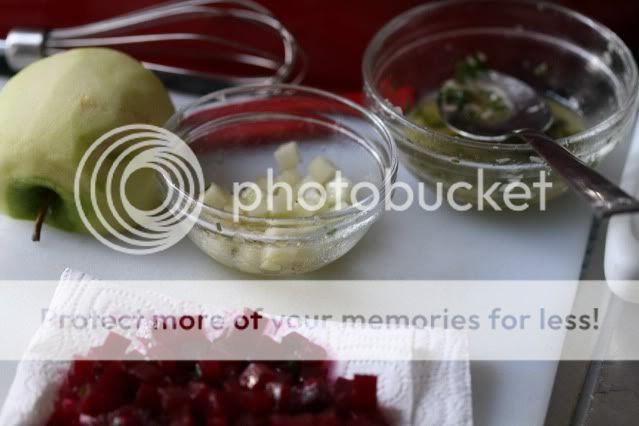
Peel the beets and cut into a small dice (to be exact, we cut them into a shape called macedoine which is a 1/2 cm x 1/2 cm cube). Place the chopped shallots in a small bowl and add the vinegar and a sprinkling of kosher salt. While whisking, slowly pour in the olive oil. Add the tarragon leaves and adjust the seasoning. Use a few spoonfuls of vinaigrette to dress the beets and set aside.
Peel the apple and cut into a small dice (again a macedoine if you want to be exact). Dress the apple with a bit of vinaigrette to slow oxidization and set aside.
Bring the goat cheese to room temperature. In a small bowl, work the goat cheese until it is spreadable and season with salt and pepper. Blot the beets with a paper towel to remove any excess liquid. Place a 3-inch ring mold on a plate and put the beets in the mold, pressing down slightly to create an even layer. Top with the goat cheese, smoothing the top so it is flush with the mold (my ring mold was too tall so the goat cheese was not flush with the top of the mold). Gently remove the ring mold.
In a separate bowl, mix together the herbs and frisee and season with salt and pepper. Add olive oil to lightly coat the leaves. Top the goat cheese with the small herb salad. Place some of the apples around the plate and spoon the vinaigrette over the plate in a decorative manner.
Note – you may have some leftover vinaigrette, salad and apple. Do not feel as though you have to fit it all on the plate. Toss them together and enjoy separately from the timbale.
Wednesday, July 28, 2010
Finally a Food Photo
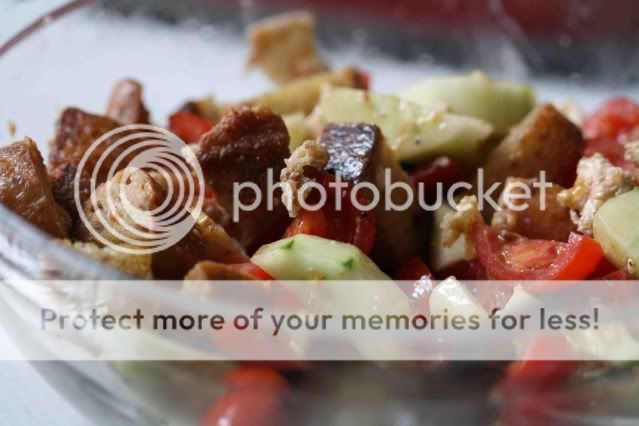
I find it appropriate that Panzanella is the first thing I made in my New York kitchen. After a week-long restaurant binge that could rival my best vacation eating on record (Cookshop, Tipsy Parson, Crema Restaurante, Oyster Bar, Bleecker Street Pizza, Txikito, Shake Shack, a culinary tour through Chinatown, and Otto Enotecca) I needed to slow down and make a simple and affordable dish.
Panzanella is considered peasant food in Italy. At least it was when the salad was created as a way to use up stale bread. A bit of a peasant myself these days (no paycheck in site and a culinary education to pay for) I am trying to take on my own waste-not-want-not mentality. Rather than discarding stale bread, I can chop it up, sauté it with a little olive oil and garlic and toss it with some chopped vegetables already on hand. It means lunch is thrown together without running out for additional ingredients. Simply put, Panzanella is delicious and makes me feel good about my grocery budget. Added bonus? I do not have to preheat my oven in the sweltering New York heat.
I ate this salad right away, but it gets even better after a few hours as the flavors meld together.
Next up – finding ways to use up mounds of julienned carrots without turning on my oven. Practicing my knife skills at home, where there is no industrial pot of chicken stock waiting at the ready for my carrot donations, may turn me orange from carrot consumption.
Panzanella
7-inch long piece of baguette (multigrain or other)
3 T of extra-virgin olive oil, divided
1 garlic clove, smashed and skin removed
1/2 cucumber
6 baby roma tomatoes (or 2 regular roma tomatoes, roughly chopped)
2 oz buffalo mozzarella
2 t balsamic vinegar
Salt and pepper
Cut the baguette into 1-inch chunks. Heat a large sauté pan over high heat. Add 2 tablespoons of olive oil to the pan and fry the garlic clove for one minute. Add the bread and salt liberally. Reduce heat to medium and sauté until bread is crisp and golden brown, about 10 minutes. While the bread is cooking, peel the cucumber and chop into 1-inch pieces. Cut the tomatoes into quarters. When the bread is crisp, place it in a medium bowl along with the cucumber and tomatoes. Using your hands, rip the mozzarella into small pieces and add to the bowl. Drizzle the balsamic vinegar and remaining tablespoon of olive oil over the bread mixture. Season to taste with salt and pepper.
Thursday, July 22, 2010
New York Lessons
I am sitting in the living room of my Chelsea apartment, as close to the air conditioner as I can get, with my feet elevated. It is nearing midnight on day three in New York and I am wiped out. So much has happened in the past 72 hours and I feel as though it may all pass me by in a whirlwind if I do not start documenting it.
Things I have learned about New York so far:
1. It is July and air conditioning is supremely important. I am grateful for the powerful unit in our living room and even more grateful for my favorite Chelsea discovery: Manhattan Fruit Exchange. The entire place is refrigerated like a walk-in cooler and they have at least 12 varieties of mushrooms at wholesale prices. Though I must admit, 12 is an estimate because I forgot to count. I was too happy about being cold.
2. For some reason, a lot of well-cooled retail establishments have their doors open. Walk slowly as you pass these places.
3. They say you are a real New Yorker when you stop looking up. I think you are a real New Yorker when you stop talking about air conditioning in July.
4. Your feet are going to hurt. Your feet will hurt slightly less if you change shoes often and vary the height of the heel.
5. Even with my Ray-Ban sunglasses, I am not fashionable enough to be mistaken for a local.
I am sure there are more New York lessons on the way, but by all means, if you are a local and can save me the trouble of having to learn them the hard way, please help a girl out.
Thursday, July 15, 2010
Pantry Cooking and Boxes
Welcome to my breakfast. This is what I have come to call pantry eating. I have not been to the grocery store in a week and a half. I refuse to buy new groceries in an attempt to use up the many boxes of various grains that crowd my pantry and the stocks, proteins and numerous containers that are taking up my freezer. I am hoping to use, not throw away, the contents of my kitchen before I clear out.
The picture is of the grits and eggs and that are quickly becoming a staple for breakfast. I wish I had something more elegant to show you or even a recipe to share, but it is just not in the cards this week. My kitchen is in boxes halfway to New York and I have done next to no cooking.
Instead, my week has been filled with finding places to store boxes, trips to Goodwill and realizations that I really did not ever need so much stuff anyway. I think any move is a good time to go through your belongings and trim the fat, but a move to a small New York apartment will really show you how little you need to exist comfortably.
Today is day four of official unemployment and as I awake to find that I have already found a home for every box and that most of my furniture is spoken for, I realize it is time to slow down and start to say my goodbyes to those I care about in Los Angeles. I am much better at the busy ‘doing’ rather than the slow and sometimes painful feelings associated with goodbye. Unfortunately, with no more boxes to move and only four days left in Los Angeles, I cannot avoid the goodbyes any longer.
Wednesday, June 30, 2010
Decisions, Decisions.
What is a girl to do?
At last count my cookbook collection had grown to include between 80 and 90 books. Even if you don't live in New York, which I still do not, you probably have at least heard about the size of New York apartments. I lucked out with my place. It is the only apartment I looked at that had a full-size stove and fridge. Unfortunately, that is where you must stop using the words full and size to describe anything in my apartment. So, sadly, I must leave the majority of my cookbooks at home.
My boyfriend has agreed to hold onto the surplus of books. I would like to believe he is doing this out of the kindness of his heart, but I have a feeling his motivations have more to do with the leverage he will have when trying to convince me to come home at the end of a year.
My dilemma now lies in trying to decide which 10 books come with me. How do you whittle down a collection of 90 to just 10 books? As I stare at the pile of half-packed boxes sitting in my living room, this question is just a bit too overwhelming. I need your help. If you were moving across the country and could take just one book with you, what book would that be?
Monday, June 21, 2010
This is Not a Food Photo
So this is not a photo of food. ‘Obviously,’ you might point out. Well, it is obviously not a food photo, but it is actually, not so obviously, food-related. I know it is just a building and the residents would probably disagree, but to me, it is absolutely food-related. This photo is of the building I will be living in one month from now, when I move to New York City to attend culinary school.
There. I said it. It’s out.
I have researched and considered and pondered the thought of going to culinary school for years. I finally decided it was time to stop waiting to start the rest of my life. The timing was never going to be perfect, the circumstances were never going to be ideal and I certainly couldn’t wait for someone else to make it happen for me. So now I have made the decision to leave and low and behold, the timing couldn’t get much better, the circumstances are as good as they’re ever going to be and the best part, I made it happen for myself (with the help of a huge support network).
So, I am leaving. I am packing up and I am leaving. I am leaving behind my boyfriend, a steady paycheck, the comforts of a comfortable life and risking it all in the hope that someone will pay me to play with food.
The French Culinary Institute in SoHo will be my home away from home for the next nine months as I complete their Classic Culinary Arts program. I’ll be living not too far away in Chelsea, doing my best to take advantage of all that New York has to offer and sharing as much of it as I can with you here, at Apples and Butter.
No recipe today. Just this really exciting (for me) news.
Friday, June 18, 2010
Layer Cake - The Frosting
As promised, it is time to finish up that layer cake. The last post on layer cake brought us through baking and freezing the cake. Today is frosting day.
The first step is to pick your frosting. I wanted to match, not contrast, the rich, nutty flavor of my brown butter cake. Martha Stewart’s brown sugar buttercream seemed like it would provide a great flavor that would go well with the cake. Plus, I happen to like the sound of brown butter cake with brown sugar buttercream. Follow the recipe below or choose any frosting you like to complement your cake.
Once the frosting is made, take your cake layers out of the freezer and let them thaw slightly before trying to frost them. They do not need to thaw all the way, in fact a cool and slightly hard cake is a little easier to frost, but I found that my layers had warped ever so slightly in the freezer. 20 minutes on the counter was all they needed to return to their frostable (yes, I made up a word), level shape.
While researching layer cakes I discovered what it seems most of you already knew – if you want a smooth final product, you need to start with a crumb coat. It is unfortunate that I am just learning this now because it’s a genius step that results in a professional looking product.
If you, like me, are new to the crumb coat, here are the basics. After stacking your layers with whatever filling you are using (in my case, more frosting) slap a very light coat of frosting over the entire cake. It doesn’t need to completely cover the cake and it doesn’t need to be smooth. I like to think of it as frosting spackle. It fills in the nooks and crannies so after a bit of chill time in the fridge, it is 10 times easier to get the final layer of frosting looking fabulous.
Once your crumb coat is on, let your cake hang out in the fridge for at least an hour. The frosting will firm up and hold onto the cake as you apply the final layer. If you have time, chill the cake one more time after the final layer of frosting is on before adding any decorations. I was ready to be finished with my cake so my decoration consisted of a pint of raspberries scattered over the top of the cake. A move more lazy than calculated, it paid off as the fresh raspberries were a welcome break from the sugary frosting. Serve your cake at room temperature and enjoy the end result of all your hard work!
Brown Sugar Frosting
Adapted from Martha Stewart
6 large egg whites
1 1/2 cups brown sugar
4 1/2 sticks butter, cold and cut into tablespoons
Place the egg whites and sugar in the heatproof bowl of a stand mixer and set over a pot of simmering water in a double boiler set up. Whisk the egg whites and sugar together until the mixture reaches 160* (a candy thermometer comes in handy here).
Place the bowl on a stand mixer fitted with the whisk attachment and whisk until the egg white and sugar mixture holds stiff peaks, then continue whisking for six more minutes until the mixture is cooled. Switch to the paddle attachment and beat on medium-high while you add the butter, a few tablespoons at a time. Once all the butter is incorporated, stir with a spatula until smooth.
Wednesday, June 16, 2010
My First Cookbook
Okay, so in all fairness it's not my cookbook, but it is the first time an original recipe of mine will be included in a published book. A few months ago, I was contacted by the people at Posit Science who were putting together a book on food for brain fitness. They were looking for recipes from food bloggers that include brain-healthy ingredients and I was delighted to participate.
The hardcopy of the book won't be available until July, but starting today you can sign up to receive their weekly recipe e-mails at http://www.thinkfoodcookbook.com/.
Sign up and keep an eye out for the week that they feature the recipe from Apples and Butter. Be sure and stop back by here that week because I will be giving away a free copy of the ThinkFood cookbook.
Saturday, June 5, 2010
Layer Cake - The Cake
Special occasion baking is not my forte. I love to make cookies and cupcakes and even the occasional truffle, but cakes of mine have never crept above two layers.
Enter my first multi-day project cake. It turns out that tackling a huge and impressive layer cake can be completely manageable if you stretch the whole affair over a few days. This is good news because as much as I love to be in the kitchen, I do not want to spend an entire day baking, frosting, chilling and re-frosting when I have people coming over for some kind of celebration.
There are just a few easy steps to make sure your not-baked-today cake still turns out moist, delicious and professional looking:
1. After the cake layers have cooled, wrap them tightly in plastic wrap and freeze them.
2. Allow the layers to defrost slightly before frosting to get rid of any warping from the freezer.
3. Apply a crumb coating of frosting to the cakes and chill for at least an hour before applying the final layer of frosting.
My cake schedule looked something like this: Thursday night brown the butter for the cake and chill; Friday night after work bake, cool and freeze cakes; Saturday afternoon make frosting (I always make more than I think I’ll need and I always use it); Sunday morning apply crumb layer of frosting and chill; Sunday afternoon finish frosting and leave cake out for everyone to admire before serving.
If you’re interested in making your own layer cake, I highly recommend the following recipe for brown butter and vanilla birthday cake. It is from Kate Zuckerman’s book about desserts from the now closed Chanterelle in New York. It is the best cake I have ever tasted and that is coming from a self-admitted chocoholic.
In keeping with the multi-day theme, I’ll post the cake recipe today and the frosting recipe, along with crumb coat instructions, in a post later this week.
Whipped Brown Butter and Vanilla Birthday Cake
Adapted from The Sweet Life to make three layers
1 1/2 t vanilla bean paste
4 1/2 sticks of butter (18 oz)
2 1/2 cups sugar
3 whole eggs at room temperature
6 egg yolks at room temperature
3 3/4 cups + 3 T flour
4 1/2 t baking powder
1 1/2 t salt
1 3/4 cups milk + 2 T at room temperature
Place the butter in a saucepan over medium-high heat. Cook the butter, stirring occasionally, until it caramelizes and emits a nutty aroma. Stir in the vanilla paste. Pour the butter into a bowl. If desired, you can pour the butter through a strainer to catch any browned milk solids that have formed at the bottom of the pan. Chill the butter for at least two hours or overnight.
Preheat oven to 350*
Grease and flour three 9-inch cake pans.
Place the chilled butter in a stand mixer fitted with the paddle attachment and beat on medium for one minute. Add the sugar and beat until creamed (at least 10 minutes). Add the eggs and additional egg yolks one at a time until incorporated.
Combine the flour, baking powder and salt in a separate bowl. Set the mixer to low and add the dry ingredients to the batter in three additions, alternating with the milk until both are fully incorporated.
Divide the batter evenly between the three cake pans and bake for 40 to 45 minutes. Let the cakes cool slightly in their pans, then invert the cakes onto a wire rack to cool completely. If not using the cakes right away, wrap tightly in plastic wrap and freeze.
Thursday, May 20, 2010
Squash Blossom Pizza
It has been far too long since I last posted! I left for vacation with the best of intentions of logging on and sharing a few recipes while I was off traveling, but of course, it never happened. I had some great food while out and about and even managed to snag the recipe for a delicious Thai curry that I promise to share with you soon. I’m also working on getting the recipe for a citrus marmalade we enjoyed in England. If I can get permission to share it with you, I’ll have that one up soon as well.
In the meantime, let’s take a look at what to do with all the squash blossoms that should be appearing in your kitchen garden right about now. Each time I have the pleasure of dining at Mozza Pizzeria, I order the squash blossom pizza. It’s my favorite dish on the menu and as I eagerly await any news about Nancy Silverton’s forthcoming Mozza cookbook, I am resigned to trekking to West Hollywood and paying $20 for a pizza. Or so I thought.
Saveur’s recent Los Angeles issue was a pleasure to read. I saw some of my favorite places in Los Angeles getting the credit they deserve and learned about some new restaurants, food trucks and taco stands that I must try. The most exciting discovery was the publication of not only Mozza’s famous pizza dough (adapted for the home kitchen) and not only Mozza’s tomato-based pizza sauce, but the entire recipe for Mozza’s squash blossom pizza. I think it might just be enough to hold me over until the Mozza cookbook is published.
In case you missed the Los Angeles issue of Saveur, I feel a sense of duty to share the recipe with you here. This could easily be the best pizza you’ve ever had. Make sure you take the time to track down the best burrata you can find. The creamy cheese, coupled with a healthy dusting of salt is really what makes this pizza so spectacular.
Next step? Build a wood burning pizza oven in my backyard so I can get just a little closer to pizza nirvana that Nancy achieves at Mozza.
Mozza’s Squash Blossom Pizza
9 T extra-virgin olive oil
1 T active dry yeast
1 T sugar
1 t kosher salt, plus more to taste
6 cups flour
2 cups pizza sauce (recipe below)
60 squash blossoms, stemmed
1 pound burrata
Combine 1T of the oil, the yeast, sugar, salt, and 2 cups of 115˚ water. Let sit until foamy, about 10 to 12 minutes. Add the flour and mix until the dough comes together. Transfer the dough to a floured surface and knead until smooth. Divide the dough into four equal parts and roll into balls. Put the balls on a floured baking sheet, cover with plastic wrap and let sit in a warm place until tripled in size, about 2 hours.
Place a pizza stone on a rack in the lower part of your oven and preheat the oven at 500˚ for 1 hour. Transfer 1 dough ball to a floured piece of parchment paper. Working from the center, gently flatten dough with fingertips to a 10" round. Cover the dough with a barely damp towel and let rest for 15 minutes. Brush the edges of the dough with2 T oil and season liberally with salt. Spread 1⁄2 cup of pizza sauce over the dough, leaving a 1" border. Arrange 15 squash blossoms over the sauce in concentric circles. Place the pizza (still on the parchment paper) on the pizza stone and bake until golden brown, about 10 to 14 minutes. Top with spoonfuls of burrata, a drizzle of olive oil and final sprinkling of salt.
Pizza Sauce
28-oz. can of whole peeled San Marzano tomatoes
1 T extra-virgin olive oil
1 t dried basil
2 garlic cloves, minced
½ medium onion, grated
Put all the ingredients in a food processor and purée. Season to taste with salt and pepper.
Wednesday, April 28, 2010
Butter Bean Salad
I love butter beans. Growing up, we had what we called lima beans as a side dish at least twice a week. My mother would drain the lima beans (always from a can – never fresh in those days), heat them up and serve them with butter. I used to mash up the beans on my plate, incorporating their silky butter coating into a butter bean mash. I didn’t know it at the time, but I was creating one of my favorite ways to serve butter beans (and most beans for that matter) - whizzed with a little butter and served as a side dish in place of mashed potatoes.
The other way I serve butter beans is in a cold, deli-style salad. I make healthy, hopefully delicious, deli-style salads almost every Sunday. I whip up a large batch and bring it with me to work for a week’s worth of lunches.
This butter bean salad is very simple to make and holds up well (actually improving in flavor) after a few days in the refrigerator. Beans, tuna, a little lemon for brightness and green onions are the stars. Add salt, pepper and olive oil and you have a great salad that will keep you fed throughout the week.
I like this salad just on its own, but I added some toasted, garlic-rubbed slices of baguette for a little more heartiness for the boyfriend. It would also be great served over a bed of lettuce or added to pasta for a cold pasta salad.
Butter Bean Salad
Serves 3 – 4
1 can butter beans
2 cans solid white tuna (I use water packed)
Zest of one lemon
Juice from one lemon
2 – 3 T of extra virgin olive oil
4 green onions, cut in half lengthwise and thinly sliced
½ t salt
¼ t of freshly ground pepper
Drain and rinse the butter beans. Drain the tuna. In a medium bowl combine the lemon zest, lemon juice, 2 T of olive oil, the onions and salt and pepper. Taste the dressing and if it is too tangy from the lemon, add an additional tablespoon of olive oil. Add the tuna and beans to the dressing and stir until combined.
Thursday, April 8, 2010
Ham and Eternity
“Eternity is two people and a ham," wrote Irma S. Rombauer in the original Joy of Cooking. Perhaps you can relate to this statement. I certainly know I can. It's the week after Easter and in my house that means we are diligently trying to use up the leftover Honey Baked Ham.
Every year I order more than we need. Perhaps I forget how hard it was to use up all the ham the year before or perhaps, because I only order Honey Baked Ham once a year, I get excited and order much more than could ever be consumed by two people in a reasonable amount of time. Whatever the reason, here I am, left with my piles of ham.
The ham bone was frozen for use in split pea or navy bean soup somewhere down the road, a half pound of ham was neatly diced and stowed in the freezer to have at the ready as a flavor base or to add to soups, and a ham and cheese quiche is on the menu for this weekend; still, I was in need of some new inspiration.
It came in the form of slices of ham and cheese sandwiched between two pieces of sourdough and smothered in a cheesy béchamel. In other words it came in the form of a croque monsieur. This happens to be my boyfriend's favorite sandwich and I am baffled at how it managed to escape me as a way to use up leftover ham.
The thick-cut Honey Baked Ham works perfectly in this sandwich. Gruyere is a traditional accompaniment, but I found that a blend of gruyere and swiss was particularly delicious. There is something about ham and swiss that just works.
This isn't the lightest or healthiest way to follow up Easter dinner, but let's be honest. Who hasn't already had a few too many pieces of Easter candy this week? Can one croque monsieur really do that much damage?
Croque Monsieur
Adapted from Ina Garten
2 T unsalted butter
3 T flour
2 cups hot milk
1 t kosher salt
½ t pepper
Pinch nutmeg
6 oz grated gruyere or gruyere / swiss blend
½ cup grated parmesan
8 slices sourdough bread
Dijon mustard
4 – 6 slices of Honey Baked Ham, or any thick-cut, cooked ham
Preheat oven to 400*
Melt the butter in a saucepan over medium heat. Sprinkle the flour over the butter and use a rubber spatula to combine. Cook the butter and flour for about two minutes, stirring constantly with the spatula. Add the milk, a half cup at a time, making sure the milk is fully incorporated before adding more. Let the béchamel simmer until thickened, stirring constantly for about five minutes. Turn off the heat and add the salt, pepper, nutmeg, ½ cup of gruyere and the parmesan cheese. Set aside.
Place the bread slices on a baking sheet and toast in the oven for five minutes. Turn the slices over and toast for an additional two minutes. Brush half the bread slices with mustard on one side and place one to one and a half slices of ham on top. Sprinkle the ham slices with half the remaining gruyere. Spread about a ¼ cup of béchamel over each of the remaining other slices and use them to top the sandwiches (béchamel side down). Spread the remaining béchamel evenly over the top of the four sandwiches and sprinkle with the remaining gruyere. Bake for five minutes. Turn the broiler on and place the sandwiches under the broiler until bubbly and browned, about five minutes.
Monday, April 5, 2010
Herbed Salad Dressing
From time to time, I get asked to teach people how to cook. The request usually comes from close friends and typically right after I’ve spent 10 minutes expounding on how anyone who hates anchovies hasn’t tried Spanish anchovies packed in salt or some other obscure topic, in other words, making it abundantly clear that I spend way too much time thinking about food. I am hugely flattered when people ask because I love to share what I know and help people discover how easy it can be to cook at home.
When my friend Meghan asked me to help her learn how to cook to “keep her from starving” (her words, not mine), I immediately suggested we make some of the basics I think every cook should know: how to properly cook a chicken breast, a good bolognese sauce and a salad dressing made from scratch.
Meghan quickly made it clear that she didn’t understand why she needed to know how to make a salad dressing when she can just buy one at the store. I suppose she’s right and I think most of us will get along just fine never knowing how to make our own salad dressings, but I am of the belief that the five minutes or less that it actually takes to make a salad dressing is time very well spent.
When making a salad dressing, a very basic formula to follow is three parts oil to one part vinegar with a little salt and pepper and any additional flavorings you want to throw in. It’s easy to remember, easy to make and will elevate any simple salad you throw together to something just a bit more special.
I try to keep vases of fresh herbs on my kitchen counter. They’re beautiful to look at and having them out encourages me to use them more in my cooking – most often they end up as the ‘additional flavorings’ in my herbed salad dressing that I make almost weekly, or as soon as my last batch is gone (I make three or four times what I need for one salad and keep the extra on hand for use throughout the week).
I intentionally didn’t specify which herbs to use in the recipe below. You should use whatever you have on hand, or if you’re going shopping, whichever herbs sound best to you. My favorite combinations include chive and basil (one bunch of chives and the leaves from four or five basil stems) and scallion, parsley and mint (two thinly sliced scallions combined with a handful of chopped parsley and a few mint leaves). Tarragon also works brilliantly in salad dressings. The key here is to try your own flavor combinations and determine what you like best.
This recipe calls for the best extra virgin olive oil you can afford. Sometimes that means the $6 jumbo bottle from the grocery store. Please know that that is perfectly acceptable here. Since the recipe calls for a good amount of olive oil, I tend not to use my $30 bottle of olive oil because that’s a lot of money going into one salad dressing. That being said, if I could afford to buy a countless supply of $30 olive oil, I would definitely use it in salad dressings because the flavor is so prominent and the quality really does come through. So, use the best you can afford, whatever that may be.
Herbed Salad Dressing
Makes about 1 ¼ cups
¾ cup extra virgin olive oil (the best you can afford)
¼ cup champagne vinegar
2 T dijon mustard
½ cup chopped herbs
Salt and pepper to taste
Pinch of sugar
Combine the vinegar, mustard and herbs in a mason jar, screw the lid on and shake to combine. Pour the olive oil in and shake vigorously to emulsify. Season to taste with salt and pepper. If the dressing still has too much of a vinegar bite, add a pinch of sugar to help balance it out. This dressing will keep for about a week in the fridge.
Tuesday, March 30, 2010
Fava Bean Assembly Line
This weekend I decided that one of the things I am looking forward to about having children is setting up my own fava bean shelling assembly line. I am not pregnant, nor do I have plans to become pregnant anytime in the near future, but after working my way through two pounds of fava beans on Saturday, to be left with only a scant half cup of shelled beans, I am in need of that assembly line.
There are pictures of me as a child, saddled up to the kitchen counter, dutifully snapping the ends off of green beans as my mother prepares the other and slightly more challenging components of a family meal. She was all about child labor in the kitchen and I plan on taking the same route – especially when it comes to favas. The shelling, followed by blanching, followed by peeling is a lot of work for the small amount of food you’re left with. It is worth it, but you really have to set aside a chunk of time if you’re tackling the task on your own.
If there are any idle hands in your household, put a bowl of fava beans in front of them and demand help. This salad from Jamie Oliver really is worth all of the effort. The favas are paired with a fresh pea dressing and smoky pancetta. This is the first time I’ve made a salad dressing out of pureed vegetables and I’m a bit bothered that Jamie Oliver beat me to the punch. It’s a particularly great idea in this case; the pureed raw peas taste quintessentially fresh and the bright green color really pops.
The fava bean prep is the most difficult part of this recipe. If you have helpers, get extra fava beans. You’ll be grateful if you have leftovers.
Fava Bean and Pancetta Salad
Adapted from Jamie Oliver
1 garlic clove, peeled and left whole
10 ½ ounces of shelled fava beans (from about three pounds of whole favas)
8 pieces of pancetta (about a quarter pound)
1 handful of almonds
5 ½ ounces of shelled fresh peas (from about one and a half pounds)
2 ½ ounces of Pecorino cheese, grated plus more for scattering over the plates
15 mint leaves (a handful), plus more for scattering over the plates
6 – 8 T extra virgin olive oil
Juice of 1 – 2 lemons
Salt and pepper
Preheat the oven to 475*
Bring a medium saucepan of water to a boil and do not add any salt, which would toughen the favas while cooking. Add the garlic and cook for three minutes. Add the shelled fava beans and cook for an additional three to five minutes until the favas can be easily squeezed from their skins. Drain, set the garlic aside and remove the skins from the fava beans and discard.
Place the pancetta and the almonds on a baking sheet and bake just until the pancetta is crisp, about 10 minutes. If the almonds start to get too dark, remove them and continue cooking the pancetta.
To make the dressing, place the peas and reserved garlic clove in a food processor and process until smooth. Add the cheese and mint leaves and process until combined. Add 6 T of olive oil and 4 T of lemon juice and blend. This dressing should be thick, but if it seems too pasty, add more olive oil and lemon juice until your desired consistency is reached (I added about 1 T more of each). Season with salt and pepper to taste.
Divide the fava beans among four plates. Drizzle the dressing over the fava beans - you may not need to use all of it. Scatter the pancetta and the almonds evenly over the four plates and finish with a sprinkling of mint leaves and pecorino if desired.
Subscribe to:
Posts (Atom)