Thursday, April 30, 2009

Whole Wheat Flatbread and Dinner Rolls

Photobucket
Artisan Bread in Five Minutes a Day is the best thing that has happened to my bread baking and my comfort food cravings. Rough day at work? Spend a few minutes preheating the oven and shaping the dough and fresh baked bread, hot enough to melt butter on contact is yours. Unfortunately, because of the ease of the whole process, Artisan Bread in Five Minutes a Day is not the best thing that has happened to my waistline. C'est la vie.

My latest artisan dough of choice is the light whole wheat bread. It's turned out to be quite the gateway dough for whole wheat breads as I now have a batch of their full force whole wheat bread in the fridge waiting for its first use. 

The light whole wheat dough is perfect for flatbread. I discovered this when I was looking for something small to serve before a dinner that was taking longer than expected to finish. I also had the last of my homemade goat cheese to use up. While the dough rested, I whipped up a half batch of these caramelized onions and with the toppings finished, appetizers were jut about served.

This dough also works really well for dinner rolls. Be sure to save some of the caramelized onions from the flatbread to use as a topping for the rolls. Delicious. Just remember to re-read the first paragraph and consider yourself forewarned if your pants start to fit a little snug.

Artisan Light Whole Wheat Bread

3 cups lukewarm water (100* - 110*)
1 1/2 T yeast
1 1/2 T salt
1 cup whole wheat flour
5 1/2 cups unbleached all-purpose flour

Combine the water, yeast and salt in a 4 - 6 quart container. Mix in the flour and cover the container loosely. Let the dough rise for two hours. The dough can be used immediately or stored in the fridge until you're ready to use.

Flatbread
Sprinkle the dough with flour and pull off a fistful of dough (about a pound) and form into a ball. Stretch the surface of the dough around to the bottom on all four sides, rotating the ball a quarter turn as you go. Let rest on a floured work surface for 20 minutes. Preheat the oven to 450*. Roll or stretch the dough out into a long oval. Top with caramelized onions, goat cheese, herbs or any desired toppings. Slip the flatbread onto a baking stone in your preheated oven and bake for around 30 minutes (start checking after 20 minutes as there are a lot of variables - toppings used, amount of dough - that can change the baking time).

Photobucket

Dinner Rolls
Sprinkle the dough with flour and pull off a fistful of dough (about a pound). Form the dough into a ball and stretch the surface around to the bottom on all four sides, rotating the ball a quarter turn as you go. Let rest on a floured work surface for 20 minutes. Divide the ball into six equal portions and form into smooth balls. Let rest again on a floured surface for 40 minutes. Preheat oven to 450*. Dust each roll with flour and slash an x on the top. Place one tablespoon of caramelized onions in the indentation the x leaves. Bake the rolls for 20 - 25 minutes. If you have a broiler tray, pour 1 cup of water into it after you put the rolls in the oven to create steam to help with forming a crust.

Thursday, April 23, 2009

Strawberry Jam and Tea Together

Photobucket

I’m certain my great-grandmother would be very confused if she found out that learning to can and preserve was a novelty for me. I never met the woman, but raising nine children in a very rural section of Mississippi would have made the process a necessity, not a novelty in her life. The reality of my life includes a farmers’ market almost every day of the week in the greater Los Angeles area as well as a 24-hour grocery store a mile from my house that carries every imaginable fruit and vegetable including corn and tomatoes in the dead of winter. I won’t comment on the flavor of those winter tomatoes, or the distance they likely had to travel to make it to my market but they’re there which means the thought of canning or preserving my backyard produce for use throughout the year has never been a priority of mine. This year, I’m determined to change that.

It may be the expansion of the growing area in my backyard and the knowledge that if all goes well our garden really will runneth over this summer or it could be the impulse purchase of canning supplies on a recent Sur La Table trip; either way it was time to try my hand at canning. The garden is filled with more seedlings than actual food at this point in the season so I headed off to the farmers’ market in search of organic strawberries to make jam. I found a flat of organic camarosa strawberries that the farmer was willing to let go for $20. He assured me that of his three different varieties, these strawberries would make the best jam.

I used a recipe that was featured in a Los Angeles Times story on Edon Waycott, the woman who makes jams for La Brea Bakery. I figured if her preserves were good enough for Nancy Silverton, then they would certainly pass muster in my kitchen. The process itself is very simple, just slightly time consuming. The strawberries are hulled, left at room temperature while they macerate in lemon juice and sugar and then cooked down over medium heat until they gel. The jam is then cooled slightly before starting the canning process.

Photobucket

Full instructions for canning can be found here. Just keep in mind that you shouldn’t touch the jars, especially their lids, until they are completely cool. And that popping sound you hear coming from the kitchen? Don’t worry, those are the lids sealing shut, not popping open. For a seasoned canner, I’m sure that seems obvious, but for this beginner those pops sounded like the whole process going to ruin.

*Be sure to keep reading after the recipe for info on the best store-bought jam I have ever tried.

Photobucket

Strawberry Jam
Makes 12 8 oz Jars

3 - 4 quarts strawberries (12 pint baskets)
2 cups sugar
3 T lemon juice

Rinse and hull the berries. Combine the berries, sugar and juice in a nonaluminum bowl and let them sit at room temperature, stirring occasionally (once an hour or so), for 3 to 4 hours (after the strawberries had macerated for 4 hours, I covered them and put them in the fridge overnight to allow plenty of time the next day for the cooking and canning process, but this is not necessary).

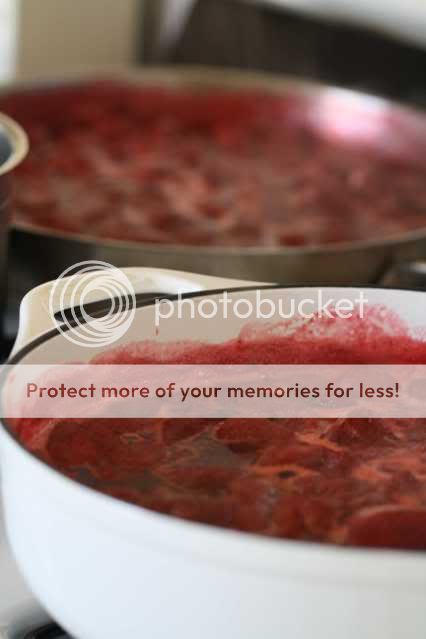
Scoop the strawberries and their juices into two wide, shallow saucepans (or one if you have a pan that big) and place over high heat. Bring to a boil, skim the foam that collects on the surface, then reduce the heat to low, making sure the mixture continues to simmer. After 20 - 30 minutes, the berries will give up additional juices. When you notice the extra liquid, continue cooking and skimming the foam for another hour. Let the mixture cool slightly before continuing with the canning process found here.

Photobucket

The preserves turned out deliciously. I was a bit concerned that the whole mixture was too runny and didn’t look as thick as store-bought jam, but lucky for me, providence stepped in. The day after I finished making my preserves, I was contacted by a company called Tea Together. They make small-batch, handmade organic jams, preserves and chutneys in Northern France and wanted to send me some samples to try. Having just finished my own batch of preserves using organic fruit, I was thrilled to have something from the professionals to compare it to. I had no idea what I was in for.

As soon as the samples arrived I pulled out the jar of strawberry preserves to compare to my own. I was thrilled to see that their batch was just as runny and chunky as mine. In fact while doing some research I found that Judith Gifford, one of the founders of Tea Together, had the perfect advice for me:

“Erase from your brain all notions about jam that you have from the shop-bought variety," says Judith. "The big producers can always do smooth, bright, bland and tidy much better than you can. So don't waste precious cooking time fishing out the pips, straining or trying to achieve a rigor-mortis set. Instead, consider the fruit you have chosen to immortalize (well, for a little while, anyway) as jam. What is it exactly about this perfume, this taste, this texture, that does it for you? Aim to end up with a jam that has character, vibrancy, individuality, and that gives back to you, in spades, what it is you love about that fruit.” (As reported by Anita Chaudhuri)

Photobucket

After reading that quote, I knew I was in love. How could you not be drawn in by a company that feels that way about food? And trust me, that philosophy is apparent in their jams. They don’t seem processed or mass-manufactured at all. It’s as though your mother sent you a bottle of homemade preserves and your mother is the best jam maker you have ever met. I knew we (the boyfriend and I) had to hold a taste test for the other products, so I made a batch of these scones and down we sat, resigning ourselves to the fact that we would have to spend the morning eating some of the best jam I’ve ever laid my hands on, slathered all over fresh-from-the-oven scones. Poor us.

My favorites are #33 (strawberry jam) and #14 (rhubarb, lemon and angelica). The boyfriend, with his British roots, fell in love with #15 (summer pudding with vanilla pod) based on the British dessert, Summer Pudding (note to self, make Summer Pudding for the boyfriend). Did I mention the founders are British ex-pats? That helps to explain the delightful British aesthetic of the packaging. In case it wasn’t already abundantly clear (PG Tips, boyfriend’s British side of the family, inappropriate squeals upon hearing someone say “the tube”), I’m an anglophile.

You can check out the company and products online at Tea Together or, if you happen to live in New Jersey, they’ve just opened a shop in Millburn. If you’re lucky enough to live in France, be sure to check out the list of local French suppliers. The jams are not cheap, but if you share my philosophy that good food costs money and that the artisans who create flavorful, good-quality food products deserve to be compensated for their efforts, then the cost will not seem off-putting. If you have yet to be convinced of this philosophy, I suggest you plant an edible garden. The flavor of the fruits and vegetables you get from your own yard will far surpass that which you find in the grocery store, but the real lesson will be in the amount of work it takes to get those plants to production stage. It certainly opened my eyes to the hard work of farm life. By the way, no judgment here at all - we’re all watching our pennies these days, but for something this special, I’m willing to splurge. Maybe you are too.


Photobucket

Wednesday, April 15, 2009

Making Chevre

Photobucket

I fantasize about things that may not be considered normal for a girl living in the middle of Los Angeles. I like to imagine starting each day by gathering eggs from backyard chickens, ending my weekly trips to the farmers’ market (even though I love them so) because I have every vegetable and fruit already growing in my backyard, and, as of late, having my own herd of goats. I’m a big fan of goat cheese, well any cheese really, but I love the tang of goat cheese that makes it the perfect addition to so many salads and the occasional savory or even sweet tart, so the idea of having my own herd and fresh goat milk available for cheese making sounds too good to be true. Since I still rent and have yet to acquire my own flock of chickens, I’ve resigned myself to the fact that the goats will have to wait. However, I recently discovered that the homemade cheese does not.

After a successful attempt at homemade ricotta, I started looking around for different cheeses that I could try my hand at in my own kitchen. It turns out that making goat cheese is a relatively simple process. Heat the goat milk, add the culture, let sit, drain, hang and let sit some more and that’s it! The active time needed is really only about 30 minutes and the taste is definitely worth the effort (allow two days for the sitting and hanging times needed). I really wasn’t prepared for the creaminess of the homemade chevre. I had to stop myself from eating the majority of it straight out of the bowl. You can salt and season to your liking, but so far, I’ve found the tart creaminess perfect as it is. I have enough that I may make an herbed version to serve with bread or to use as the cheese on a rustic pizza. Experiment with different flavors and let me know how it goes.

If you’re in the LA area, I got my chevre culture at Surfas. If you don’t have a good gourmet shop or restaurant supply store in your area, there are online sources including this one. I got my goat milk in one quart containers from Whole Foods.

Photobucket

Fresh Chevre

2 quarts pasteurized goat milk
1/2 packet of chevre culture meant for 1 gallon of milk
Lots and lots of cheesecloth
Twine

Heat the goat milk in a stainless steel pot to 86* and whisk in the chevre culture. Remove from heat and let sit at room temperature for 12 – 24 hours. I let mine sit for about 20 because I kept waiting for the curds to form. It turns out that hard curds will not form, but you will notice a much thicker, creamier texture to the milk. When you see that thickness, drain the milk in a colander lined with lots of cheesecloth set over a bowl. Rather than pouring the milk through the colander straight from the pan, use a ladle to gently pour it in. You may only be able to fit half the milk in at a time. That’s fine. You’ll hang the first batch before laying out more cheesecloth to drain the second.

After the milk has drained slightly and you see some whey collected in the bowl, gather the cheesecloth together and secure with twine (as shown in the picture above). Use the twine to hang the cheese where it can continue to drain for 10 hours. Do not try to rush the draining process, it takes time. Repeat until all the milk has been drained and is hanging. After 10 hours has passed, open up your cheesecloth packets to find creamy, tart, fresh (!) goat cheese. Salt and season to taste or use as is.

Friday, April 10, 2009

Minted Fettuccine with Petite Pea Dressing

Photobucket

One thing I have come to expect in cooking is that not all of my experiments will turn out favorably. If you’ve been cooking for a little while and are comfortable trying different things and not using recipes, then you also know this to be true. That is why, when a dish turns out right and tastes delicious on the first try, I am always so pleasantly surprised.

I’d been craving goat cheese, peas and mint in a pasta filling for some time and was just waiting for the mint in the backyard that seeds itself each year to spring back into action (pun intended). I harvested the first good sprigs last week and was finally ready to get to work. By then, I wasn’t feeling the filled pasta anymore so I processed some of the mint with the flour for the pasta dough to make minted fettuccine. Instead of a pasta filling I used the peas, goat cheese and mint along with minced shallot, fennel pollen and egg to make a quick dressing that would cook from the heat of the drained pasta when the dish was tossed together. For good measure I sautéed some pancetta and mushrooms to throw in at the end for a little substance.

There was enough of this dish to easily feed two, but it only fed one (me) and was eaten very quickly (read inhaled). It was quickly added to my list of spring staples and it didn’t come from a recipe so don’t think you have to stick to this one. Scallions or spring onions would be delicious in place of the shallot and you could just as easily sub in ricotta for goat cheese and so on.

Are you planning a big Easter meal this weekend? Or perhaps you’ve just finished all of the cooking for your Seder? I am letting myself off the hook this year. The honey baked ham is already ordered and with the addition of some oven baked asparagus and rolls, Easter dinner is served. If you do want to do some cooking this weekend, this pasta is a great way to acknowledge the flavors of spring without putting forth too much effort. Yes I make the pasta from scratch, but if you have a Cuisinart and a pasta machine (even easier with the KitchenAid pasta attachment) then that really isn’t a difficult task.

Photobucket


Minted Fettuccine with Petite Pea Dressing
Serves 2 (in theory)

Pasta
Leaves from 2 sprigs of mint
1 1/2 cups all purpose flour
1 1/2 t salt
1 1/2 t olive oil
2 eggs

Place the flour and salt in a food processor with the mint leaves and blend until the mint is minced and well incorporated. Add the olive oil and eggs and process until the dough pulls away from the sides of the bowl and forms a ball. Flatten dough into a disc about 4 inches across, wrap with plastic wrap and let sit for at least 30 minutes. Process according to your pasta maker directions, using the fettuccine attachment to cut the pasta.

Dressing
8 oz (half bag) of frozen petite peas
4 oz goat cheese
1 small shallot
1 – 2 t fennel pollen
Leaves from 1 sprig of mint
Salt and pepper to taste
1 egg

Place all the ingredients aside from the egg in a food processor or blender and process until smooth. Taste and adjust seasoning, then add the egg and process until incorporated.

Finishing the dish
1 t olive oil
1/3 cup cubed pancetta
1 cup sliced mushrooms

Bring a large, salted pot of water to a boil. While the water is heating, place the oil in a pan over medium heat. Add the pancetta and cook for 2 – 3 minutes before adding the mushrooms. Continue cooking until the mushrooms are soft and set aside.

Cook the pasta and begin to check for doneness after just 2 minutes. Fresh pasta cooks much faster than dried. When fully cooked, drain and return to the pot along with the dressing and the mushroom mixture. Toss well until the sauce is warmed through and serve.

Tuesday, April 7, 2009

Buratta Sundae

Photobucket

"A dessert without cheese is like a beautiful woman with only one eye." - Brillat-Savarin

I have never started a post with a quote, but I thought it appropriate in this situation as it was this quote that led to the discovery of my new favorite dessert that really isn’t a dessert at all, but should be. Let me explain.

While visiting a dear friend in New Mexico recently, we consumed an exorbitant amount of an unbelievable cheese called Brillat-Savarin. Upon my return to Los Angeles, I embarked on a mission to find it and buy more of it immediately. It was that good. The first stop was Dean & Deluca’s site where I knew the cheese had been ordered as a birthday gift for my friend (and yes, I try to only surround myself with people who love cheese as much as I do). Unfortunately, it is sold as part of a $90 set that included two cheeses I did not want. A quick google search revealed that the cheese is in fact named for Jean Anthelme Brillat-Savarin who authored the book, The Physiology of Taste, which is familiar to American foodies because it was translated into English by M.F.K. Fisher. Spurred on by the discovery that this cheese really is something special and has a great back story, I contacted my cheese dealer and learned that they do not carry Brillat-Savarin at this time. Somewhat disappointed, I shared the quote I had found while researching Jean Anthelme and we began discussing cheese as dessert. It was at this point that David shared with me an idea so brilliant, I am truly and completely disappointed I did not think of it myself.

David is extremely creative with uses for cheese so it never surprises me when he comes up with great pairings and new ideas, but this was truly something spectacular. Burrata is a wonderfully creamy cheese made of mozarella and cream that unfortunately, has a very short shelf life. That means when it comes in, David has to move it quickly. In order to show customers another way to use burrata, David came up with Burrata Sundaes. He uses burrata as the base of a “sundae” that subs in pink peppercorns and chives for the sprinkles and aged balsamic for the chocolate sauce. I could picture the flecks of pink and green as he described the dish and being a die-hard fan of burrata, I knew I had to make this at home. David let me know when the next shipment of burrata was coming in and I set a calendar reminder to get over to Surfas before they sold out.

Photobucket

I think I can safely say that Burrata Sundaes are the new favorite dish of everyone I served them to at the BBQ I hosted this past weekend. Totally unexpected and novel this makes great party food. Or, if you’re like me, it also makes great, “eat at home while no one is looking so you don’t have to share even one morsel of it” food.

Burrata Sundaes
This served 5 of us as a dessert, but I could have eaten all of it myself

1 16 oz container burrata
1 T freshly-cracked pink peppercorns
2 T finely chopped chives
1 T Spanish olive oil (or fruity, low acidity olive oil of your choice)
2 T aged balsamic vinegar (preferably Surfas’s balsamic with blackberries and ginger)

Use a small ice cream scoop to fashion burrata scoops resembling ice cream. Place 2 – 3 scoops in each bowl depending on the size of your scoop. Drizzle just a few drops of olive oil over the top of each scoop. Scatter the peppercorns and chives over each sundae and finish with a generous drizzle of vinegar so it looks as though you have chocolate sauce running down the sides. Warn your guests, or don’t, about the curious nature of the dessert coming their way.

Photobucket

Thursday, April 2, 2009

Olive Oil Cake

Photobucket
The first time I grasped the fact that all olive oils aren’t created equal, I was sitting in the back office of the public relations agency where I worked, taking part in an olive oil tasting. We had just landed a new California olive oil company as a client and the owner was taking us through a tasting to point out the significant differences between oils. While up until this point I had been entirely happy to use cheap brands found in every grocery store, after having sipped a tiny bit of the stuff (yes you’re supposed to sip olive oil during a tasting), I swore it off for good. It was rancid. It would have been clear to the most unsophisticated palette that it was rancid and our taste test director assured us the bottle had just been purchased that morning.

The test went on and we were able to recognize the differences between the good oils as well. Some were fruity, some were peppery with an almost spicy finish felt just at the back of your throat and my favorite was a bright grassy one that luckily belonged to my new client. I was thrilled with my education on what had just hours before seemed a most basic and somewhat boring ingredient. Little did I know the bill I would run up in years to come as I sought out distinctive bottles of oil with varying characteristics.

Don’t think I’m suggesting that you must spend lots of money in order to have a nice olive oil. My standby, use-in-everything-oil, is the California Estate Olive Oil from Trader Joe’s. It costs just under six dollars. I save the more expensive oils for finishing dishes and salad dressings where I know the flavor will be most prominent. If you’re interested in learning more about California olive oils, visit the California Olive Oil Commission. You’ll find a wealth of information including locations in California where you can visit producers and have your own olive oil tasting.

Since I’ve developed this appreciation for olive oil I took note when recipes for olive oil cakes started showing up in a number of places. A few weeks ago it came up again when Melissa Clark wrote about her olive oil cake in the New York Times. I clipped the article and decided it was finally time to try my hand at one. The opportunity presented itself last weekend when my father was in town visiting for the wedding of a family friend. We needed a quick pick me up before the wedding and this, along with a pot of PG Tips, was the perfect solution. I would recommend eating this cake the same day you make it. It did not have the same delicious flavor the next day. It may have been my imagination, but it tasted as though the oil was off. Don’t let that deter you. It really was delicious the first day it was made.

Photobucket

Blood Orange Olive Oil Cake
From Melissa Clark in The New York Times

3 blood oranges
1 cup sugar
1/3 – 1/2 cup buttermilk
3 eggs
1 3/4 cups flour
1 1/2 t baking powder
1/4 t baking soda
1/4 t salt
2/3 cup extra virgin olive oil

Preheat oven to 350*
Grease a loaf pan (mine was 9-by-4). Grate the zest from two of the blood oranges into a medium bowl. Add the sugar to the zest and rub together until the zest is well incorporated and the mixture resembles damp sand. Supreme the zested oranges (Clark gives great instructions for this in the New York Times article). Break up the resulting orange segments into small pieces in a bowl. Go small - I did not go small enough. Clark suggests 1/4" pieces. Mine were probably closer to 1/2" so make sure you follow her suggestion.

Juice the remaining orange into a glass measuring cup and then add enough buttermilk to bring the liquid to 2/3 cup. Add the liquid to the sugar mixture and then whisk in the eggs. In another bowl, whisk together the dry ingredients (flour, baking powder, baking soda and salt) and gently add them to the wet ingredients. Use a spatula to fold in the olive oil, a little bit at a time. Fold in the orange pieces and pour the mixture into your prepared loaf pan.

Bake the cake for 55 minutes (I started checking mine after 45 and it needed the full cooking time). Let the cake cool slightly in the pan and then unmold onto a cooling rack to cool completely before serving.