When I was a child the holidays seemed to go on for months. At the beginning of December the decorations would go up and as schedules slowed and school let out, we were left with plenty of time to sit around the tree with a cup of cider or hot cocoa and take in the season.
Today, I’m lucky if it feels like Christmas the week leading up to the 25th. Usually I get in the holiday spirit as I run around town, fighting crowds in an effort to cross off my Christmas list. While I love finding gifts for the important people in my life, I find it somewhat sad that I can’t get in the spirit until the shopping begins.

I didn’t know this was true for me until my family decided not to do Christmas gifts this year. In an effort to focus on what’s most important – time together – this year we are cooking meals with each other instead of buying gifts. Though I did just receive notification that one Thomas H. Durff has sent me a gift subscription to The Atlantic Monthly (someone’s cheating!).
The sad news is that without the many shopping trips in search of the perfect gift, I found myself totally lacking in Christmas spirit. Determined to redefine Christmas traditions so I can get in the holiday mood without racking up a huge credit card bill, I turned to the kitchen.

I wanted to make something in bulk so I could use the resulting product as gifts, but I didn’t want to make cookies. Decorated cookies may look festive, but I don’t really care for the way they taste. Then I stumbled on an article about homemade truffles in one of the Martha Stewart publications. I knew I could get creative with flavored ganache fillings and really how difficult could they be? Note to self: If I ever think, ‘really how difficult could they be,’ again, I will clear my calendar for the weekend and prepare to make seven trips to the store for more toppings, chocolate and gift boxes. When you’re doing something for the first time and not really using a set recipe, look out, things are going to get ugly.
While Martha’s ganache truffles seemed to stay perfectly firm with no coating, mine melted on contact with any finger that was near room temperature. And while all the articles I could find on coating truffles with chocolate seemed to think it wasn’t really necessary to temper the chocolate, my coating turned into a clumpy glob when I did not. I’m still attempting to make up with the boyfriend who was the recipient of, “get the f*$% out of the kitchen,” when the coating wasn’t going on smoothly.

So, did I fail miserably at getting myself into the Christmas spirit? Not entirely. First, the crazed trips to the store seemed to bring back that sense of holiday urgency that had been missing from my December. Second, by the time I got through the fifteenth bag of chocolate and had the kinks worked out, I was left with some decent looking truffles and the feeling that I would be able to spread a little chocolaty holiday cheer after all.
If you have time left in your holiday schedule and want to try these at home, I’ve included the basic ratio of cream to chocolate for the ganache filling as well as the four variations I created to add more flavor. If you don’t want the truffles melting on contact, coat them with chocolate that has been tempered. You can read about how to temper your chocolate here. It’s not that difficult and worth the time.

Ganache Truffle Filling
Makes about 40 truffles
16 oz chocolate (dark, semi-sweet or milk – your choice)
1 2/3 cups heavy cream
To use these variations, add the flavoring to the cream right as it comes to a simmer, but before you turn off the heat:
Chile truffles – 3/4 t cayenne pepper
Peanut butter truffles – 3/4 to about 1 cup of creamy peanut butter
Mint truffles – replace 12 oz of the chocolate with mint flavored chocolate
Earl Grey truffles – place 12 bags of Earl Grey in the cream, turn off the heat and let steep for 20 minutes. Remove the tea bags and reheat the cream slightly before adding to the chocolate.
Place 16 ounces of the chocolate of your choice in a heatproof bowl. Place the cream in a small saucepan and bring just to a simmer. Keep a close watch as simmering cream will very quickly boil over. Add any of the flavorings included above to the cream or create your own variations. Pour the warm cream over the chocolate and whisk until fully incorporated. Allow the mixture to cool slightly and then let it set in the refrigerator overnight.
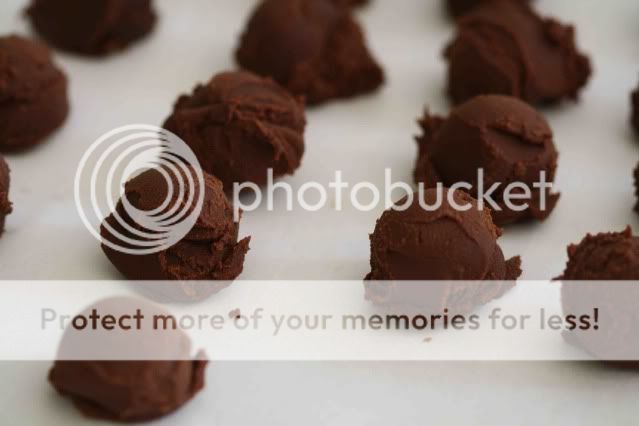
Cover a cookie sheet with parchment paper and use a small ice cream scoop or melon baller to portion out the ganache into small spheres, about 1-inch in diameter. Roll the ganache pieces between your hands to make a smoother circle. It’s not necessary, but I highly recommend using disposable, protective gloves for this part. It’s more sanitary if you’re giving the truffles as gifts and you’ll be washing your hands every five minutes if you don’t. Allow the ganache pieces to chill in the refrigerator again while you prepare the chocolate coating.
Select your chocolate coating (again, your choice of dark, semi-sweet, milk, etc.). I found that it took about 24 ounces to coat 80 truffles. Temper the chocolate according to the directions found here and use a dipping tool or toothpicks to submerge the ganache in coating. I read everything I could find on the best way to dip, but trial and error seemed to be the most helpful. Just submerge the ganache in the coating and try to get the excess off before setting it back on the cookie sheet to harden. If you’re topping the chocolate coating in anything (chopped nuts, sea salt, candy cane pieces, etc.) do this right away before the chocolate begins to harden. Place the coated truffles in the refrigerator overnight or for at least four hours, if you’re in a hurry, to fully harden.
Package as desired and spread your own version of chocolaty holiday cheer.


