Showing posts with label Cucumbers. Show all posts

Wednesday, July 28, 2010

Finally a Food Photo

Photobucket

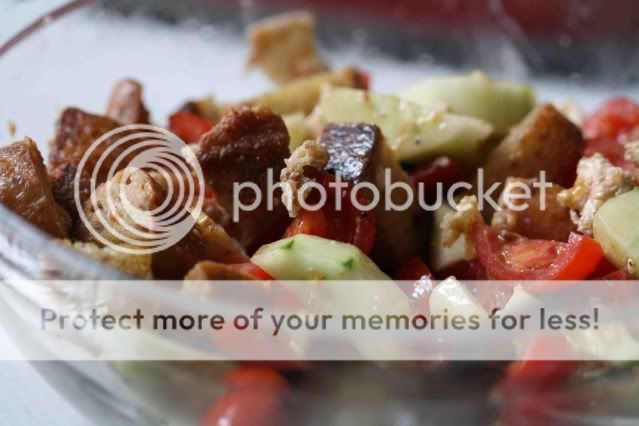
I find it appropriate that Panzanella is the first thing I made in my New York kitchen. After a week-long restaurant binge that could rival my best vacation eating on record (Cookshop, Tipsy Parson, Crema Restaurante, Oyster Bar, Bleecker Street Pizza, Txikito, Shake Shack, a culinary tour through Chinatown, and Otto Enotecca) I needed to slow down and make a simple and affordable dish.

Panzanella is considered peasant food in Italy. At least it was when the salad was created as a way to use up stale bread. A bit of a peasant myself these days (no paycheck in site and a culinary education to pay for) I am trying to take on my own waste-not-want-not mentality. Rather than discarding stale bread, I can chop it up, sauté it with a little olive oil and garlic and toss it with some chopped vegetables already on hand. It means lunch is thrown together without running out for additional ingredients. Simply put, Panzanella is delicious and makes me feel good about my grocery budget. Added bonus? I do not have to preheat my oven in the sweltering New York heat.

I ate this salad right away, but it gets even better after a few hours as the flavors meld together.

Next up – finding ways to use up mounds of julienned carrots without turning on my oven. Practicing my knife skills at home, where there is no industrial pot of chicken stock waiting at the ready for my carrot donations, may turn me orange from carrot consumption.

Photobucket

Panzanella

7-inch long piece of baguette (multigrain or other)
3 T of extra-virgin olive oil, divided
1 garlic clove, smashed and skin removed
1/2 cucumber
6 baby roma tomatoes (or 2 regular roma tomatoes, roughly chopped)
2 oz buffalo mozzarella
2 t balsamic vinegar
Salt and pepper

Cut the baguette into 1-inch chunks. Heat a large sauté pan over high heat. Add 2 tablespoons of olive oil to the pan and fry the garlic clove for one minute. Add the bread and salt liberally. Reduce heat to medium and sauté until bread is crisp and golden brown, about 10 minutes. While the bread is cooking, peel the cucumber and chop into 1-inch pieces. Cut the tomatoes into quarters. When the bread is crisp, place it in a medium bowl along with the cucumber and tomatoes. Using your hands, rip the mozzarella into small pieces and add to the bowl. Drizzle the balsamic vinegar and remaining tablespoon of olive oil over the bread mixture. Season to taste with salt and pepper.

Tuesday, September 29, 2009

Making Cheese Even Better

Photobucket
I’m a sucker for a pretty picture. Especially if that picture is of food and in this particular case if that picture is of oil-dressed tomatoes piled high on top of slices of fried cheese. I have a few cookbooks that I adore that have absolutely no pictures of food, Marcella Hazan’s Essentials of Italian Cooking to name just one, but for the most part, beautiful pictures are what draw me in to a recipe, a book or an ingredient. It’s called food porn and it’s why, in addition to my obscene cookbook collection, I have subscriptions to every major food magazine.

Back to the tomatoes piled high on fried cheese. There isn’t much you can do to cheese to make it better than it already is, but frying it is certainly one way to try. Most cheeses can’t stand up to the heat, but one exception is Halloumi. Mentioned many times before on this blog, Halloumi is a Mediterranean cheese that has a very high melting point – in other words, you can pan fry it and it will keep its shape, but even more importantly something magical happens. The saltiness of the cheese is set off by the warm, melting creaminess and if you’ve left the Halloumi in the pan long enough, at a high enough heat, the crunchy crust that forms on the surface of the cheese finishes everything off with a seriously good contrast of textures. It’s cheese heaven so whenever I see a recipe that calls for it, I take note.

My latest ‘the pictures are just too pretty to pass up’ purchase is The Family Chef by Jewels and Jill Elmore. In a feeble attempt to stunt the growth of my cookbook collection, I stopped myself from buying this book the first time I saw it back in June, but after reading more about the sisters in this month’s Sunset Magazine, I knew I had to go back for a second look. I realized my first instinct was right and quickly purchased the book. It has been my bedside reading for the past week and their Halloumi Cheese with Cucumber Lentil Salad is the first recipe I made from it.

An added bonus with this recipe is that I discovered the boyfriend likes lentils! I didn’t think it was possible that such a healthy powerhouse could be on his list of, ‘please make me more of this right now,’ foods, especially after our phone conversation the day before I made the dish. He called me while I was browsing the aisles of Whole Foods and when told I was getting lentils, he responded with, “Why on earth would you be doing that? Lentils are gross.” Not encouraging, but he rarely knows what’s good for him so I picked them up anyway, made this salad and he couldn’t get enough. He even picked a lentil dish out of another cookbook for me to make the next night. I think I’m on to something here. Maybe you can be too.

Photobucket
Halloumi Cheese with Cucumber Lentil Salad
Adapted from The Family Chef (to make a smaller portion)

1/2 cup beluga lentils cooked according to package directions
1 medium cucumber, peeled in strips, halved lengthwise and sliced into half circles
2 ripe tomatoes (preferably one yellow and one red), cut into chunks
3 T extra-virgin olive oil + more for frying cheese
2 T chopped parsley
2 T chopped mint
2 T lemon juice
Salt and pepper to taste
1 package of Halloumi cheese, cut into 8 slices

Place the first seven ingredients in a bowl, season with salt and pepper and mix together. Heat a non-stick pan over medium-high heat and add some olive oil (about a tablespoon or two). Add the Halloumi slices and cook each side until golden brown, 2 – 3 minutes per side. Place the Halloumi slices on a platter and top with the tomato and cucumber mixture. Serve immediately while the cheese is still warm.

Monday, September 14, 2009

Pickles at Happy Medium

Photobucket
I don’t think there is any arguing with the fact that we live in an instant gratification oriented society. I certainly know it’s true in my life of internet shopping and instant music downloads to my iPhone, but there is one area where I try my hardest to leave that fast-paced lifestyle behind – the kitchen.

I am a card carrying member of Slow Food USA and, as mentioned before on this blog, would probably be quite happy spending my days curing prosciutto in my basement and experimenting with cheese cultures for the different blues and triple creams ripening in my fridge, but the truth is I just don’t have that kind of time. The majority of us have to work for a living so those projects must wait for the occasional, lazy weekend day. Making food and food products from scratch at home is no longer a necessity to be able to eat, but a luxury for those who have the time.

Since I don’t have time to be my own cheese maker, farmer or butcher, I have done my best to find a happy medium. I do grow some of my own vegetables and what I don’t have time to do myself, I try to purchase from the artisans who are taking the time and care to do it right (farmers markets, small batch cheese producers, etc.). This doesn’t mean I’m never at Ralphs buying blueberries shipped in from Argentina. It just means I make an effort not to be there, but when I am, I don’t feel guilty and neither should you.

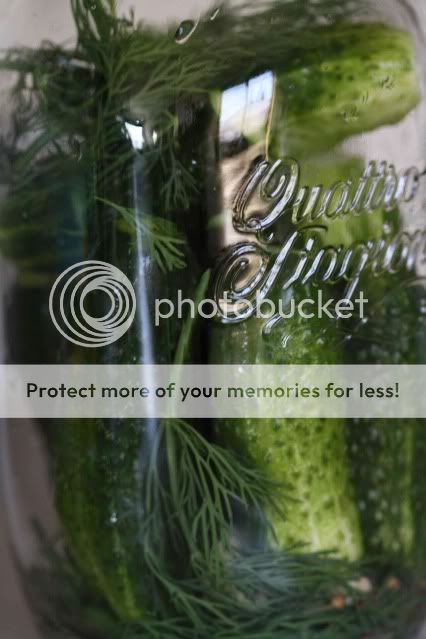
My favorite happy medium of the summer is refrigerator pickles. They’re quick and easy for the home cook who wants a pickled vegetable by next weekend, but doesn’t have the time or desire to make sure that there are pickles put up for the whole winter. It was quite satisfying and easy with pickled radishes from my own garden and even easier with my recent batch of pickled cucumbers, made from cucumbers purchased at the farmer’s market.

After I picked up two pounds of bright emerald green pickling cucumbers, I went looking for a good way to use them. Most of the recipes I found were intended for huge batches of pickles that were headed for a canning bath and wouldn’t be ready to consume for at least a month. I wanted pickles and I wanted them a lot sooner than in a month. I also wanted to be able to spend the evening with my boyfriend and not gently lowering and lifting canning jars in and out of a pot of boiling water. Instead, I mixed up a basic brine, cut the ends off my pickling cucumbers to allow the brine to quickly penetrate the cucumbers, poured the vinegary liquid over the cucumbers and let them sit, first on the counter and then in the refrigerator. Five days later I had wonderful crispy perfect pickles. Five days may not seem like instant gratification in your book, but compared to a month or two for the canned variety, I was happy. So were the rest of the pickle eaters at my BBQ the next Friday night. We all sat around a bonfire, happily crunching on some of the best pickles any of us had ever had and these are the folks who taste more of my food than anyone else. I can tell when they’re lying, and they were not.

Photobucket

Happy Medium Pickles

2 pounds pickling cucumbers
1 cup white wine vinegar
3 – 4 cups water
1/4 cup salt
4 garlic cloves
1/2 bunch of fresh dill
1 T mustard seed
1 1/2 T coriander seed
1 quart sized jar (or larger)

Rinse the cucumbers, dry thoroughly and chill in the refrigerator for at least two hours. If you've been keeping your cucumbers in the fridge, you can skip the drying and chilling steps. Heat the vinegar and three cups of water in a small saucepan and stir in the salt until dissolved. Set the vinegar mixture aside to cool just slightly. Place a few dill sprigs at the bottom of the jar along with the garlic cloves and half the mustard and coriander seeds. Cut the stem and blossom ends off the cucumbers (an eight of an inch is all you need to remove) and place them in the jar. Pour the vinegar mixture over the cucumbers, adding more water as needed to cover. Place a few more sprigs of dill and the remaining coriander and mustard seeds over the cucumbers. If the cucumbers are not fully submerged, add more dill to force the cucumbers fully under water. Leave the jar on the counter for two days and then place in the refrigerator for two to three days more. Enjoy the pickles within a week of opening the container.
Photobucket

Friday, January 9, 2009

Vinegar Cucumbers - Homemade Pickles

Photobucket
It may be my southern roots or the food that I was raised on, but there is no doubt, that I am a sucker for salt. I had the opportunity to take a great cooking class for amateurs and the chef was always reminding the other students to season their food - this was not something I had a problem with. And while I think proper seasoning is one of the fundamentals of good cooking, I always try to stop just short of where I think the salt level should be. I can always add more at the table and I want to be sure I don't over do it.

So, it should be no surprise that I've been doing some salt-focused dishes lately. The salt-cured salmon is a definite keeper, as are these vinegar and salt-cured cucumbers, aka pickles!

These could not be simpler and the flavor is great. If you don't love rice wine vinegar, experiment with other varieties and let me know how it turns out. Seasoned rice vinegar is simply rice wine vinegar that already has sugar mixed into it. It's commonly used in sushi preparation to season the sushi rice. If you can't find it, grab a bottle of rice vinegar and stir in about 2 T of sugar before pouring over the cucumbers.

Vinegar Cucumbers

4 lebanese cucumbers
2 t kosher flake salt
2 cups seasoned rice vinegar

Slice cucumbers thinly. Place the cucumbers in a small bowl and add the salt, stirring to combine. Let the salted cucumbers sit for 20 minutes and then rinse thoroughly. Cover with boiling water, then drain. Place cucumbers in a mason jar or other storage jar and cover with seasoned rice vinegar. These will keep for a week or two in the fridge.

Photobucket