Wednesday, February 25, 2009

Cornbread Madeleines

Photobucket

I have many memories from childhood that I’m not entirely certain ever happened. One is of my mother making her cornbread in individual sizes, in the shape of small ears of corn. This may seem an odd thing to remember, but I adore my mother’s cornbread. We make it every Christmas for cornbread stuffing and I spend the rest of the year craving it and wondering why I don’t make it on other occasions.

This past weekend I once again thought of the small, individual-sized cornbreads while I was staring at a beautiful madeleine pan, trying to come up with a reason to bring it home with me. I decided enough with this already - it doesn’t matter whether the memory is real or not. Small, delicately shaped cornbread sounds great to me, so why not give it a go.

When making this cornbread for stuffing I go very light on the sugar, but I’ve added it back in for this recipe. I served these warm from the oven with a little lemon curd and winter fruit tossed with balsamic and freshly cracked black pepper. I think they would be equally as good in a savory application.

Photobucket

Cornbread Madeleines
Makes about 30

1 1/2 cups cornmeal
1/2 cup flour
1 t salt
1 t baking soda
2 t baking powder
1/4 cup + 2 T sugar (I would even try a full 1/2 cup next time)
2 eggs
2 cups buttermilk
2 T butter, melted

Preheat oven to 475*
Mix first six ingredients together. In a separate bowl, whisk the eggs with the buttermilk and stir in the melted butter. Combine the wet and dry ingredients. You can make a large loaf by pouring the batter into a pre-heated cast iron skillet and baking for 20 – 25 minutes. If you prefer to make madeleines, butter and flour a madeleine pan. Fill each mold about 3/4 of the way and bake for 10 minutes.

Photobucket

Friday, February 20, 2009

Macerating Strawberries

Photobucket

Macerated strawberries are a very simple dessert component I learned during a brief apprenticeship as an assistant pastry chef at a local restaurant. The owner had tried to convince me that culinary school was a waste of money and that I could learn everything I needed to know by starting at the bottom rung of his kitchen and working my way up. While this may be true for restaurants whose style of food you appreciate and whose technique you hope to emulate, I’m not convinced the apprentice track applies to a local diner. Still, the experience provided an invaluable glimpse into the restaurant industry. Unfortunately, working at a stressful job, 50 – 60 hours a week, at the time and trying to deal with the physically grueling restaurant work on the weekends proved too much for me. After a few months, I thanked the folks for the opportunity and reclaimed my weekends spent cooking for friends and family.

One of the techniques I picked up from the pastry chef during my time there is how to macerate strawberries. Macerating is the process of softening or breaking down a food with a liquid (usually something acidic). It’s a simple process, but so versatile. I have found a multitude of uses for the delicious little red treats, not to mention how much fun it is to say you’re macerating something. Dessert is an obvious application, but I also like to use mine as a sort of relish in cheese courses and as a topping for breakfast dishes. Variations on a theme are a good thing here. Experiment with different wines, vinegars and flavored liqueurs as a macerating agent. My preference is balsamic vinegar. Also try varying the citrus you use. Lemon is often my choice, but on the morning when I made these strawberries, I had just freshly squeezed some orange juice for breakfast, so that’s what got thrown into the mix.

Culinary school is still on hold, for now. In the meantime, these strawberries are a great takeaway from an equally great learning experience. I hope you find them as useful and delicious as I do.

Photobucket

Macerated Strawberries
Makes about 2 cups

1 pint strawberries, hulled and sliced
1/4 cup balsamic vinegar
1/4 cup sugar
2 T orange or lemon juice
Pepper to taste

Pour vinegar, sugar and citrus juice over the sliced strawberries and let sit in the refrigerator for at least two hours. Before serving freshly crack some pepper over the strawberries. Mix well to redistribute the juices and serve as desired.

Tuesday, February 17, 2009

Perfect Pancakes

Photobucket

For all the food I take extra care and time to make from scratch, I find it hard to believe that until very recently, I was a lazy pancake person. The occasional German pancake made from scratch and many a Bisquick special (with blueberries thrown in for a homemade feel) are what come out of my kitchen when pancakes are on the menu.

This all changed last weekend. I was flipping through Marcus Wareing’s How to Make The Perfect… cookbook and stumbled upon a recipe for pancakes. Not just any pancakes; these are, “this guy is taking the time to whip egg whites to soft peaks and fold them into his batter” pancakes. I was immediately shamed. I looked in the fridge and was relieved to find that I had enough eggs to rectify what was clearly years and years of pancake laziness.

I can officially say that I am pancake reformed. These were the lightest and most delicious pancakes I have ever had. When I say light I don’t mean not rich, I mean that the air that’s incorporated during the whipping of the egg whites imparts a delicate lightness to these beauties. As a result, they fall slightly when you remove them from the pan, but the flavor is still amazing. If you are a lazy pancake person like I was, you have try these, even just once.

Photobucket

Perfect Pancakes
Adapted from How to Make the Perfect…
(recipe cut in half to serve two)

1/2 + 1/3 all purpose flour
1 1/4 t baking powder
1/4 t salt
1/4 t cinnamon
2 T sugar
2 eggs, separated
1 cup milk
3 T butter, melted + more for cooking the pancakes
1 egg white

Sift first four ingredients together into a bowl and stir in the sugar. In a separate bowl, whisk the egg yolks and stir in the milk, followed by the melted butter. Make a well in the dry ingredients and stir in the egg mixture to make a smooth batter. Whisk the three egg whites to soft peaks and fold them into the batter. Heat some butter in a nonstick pan and cook the pancakes over medium heat. Enjoy immediately as the pancakes will fall slightly as they come out of the pan.

Photobucket

And the perfect pancake mix-in:


Photobucket

Saturday, February 14, 2009

Starting Seeds

Photobucket
I’m in the process of reading Russ Parson’s How to Pick a Peach. In doing so, I have become more and more convinced of the need to shop at farmers’ markets and to grow my own produce when possible. I have known for awhile now that supermarket produce is bred and harvested according to how well it will ship and to achieve the longest shelf life possible. Flavor may come into play, but it’s certainly not priority one, two or three. Even though I knew this, having it spelled out by an industry expert such as Parsons really hit it home for me.

This year I’m determined to have more options than ever in my backyard. I try to supply my own summer produce with small weekly supplements from my farmers’ markets. To achieve a backyard vegetable garden, I usually rely on seedlings from my local nursery. I make a few trips in March and April and try to find all the varietals that I want to grow that year. This task is made much easier if you can take advantage of the wide selection that is available if you start from scratch with your own seeds.

I have in fact started seeds at home in the past. After taking an organic gardening workshop, I came home, armed with supplies to confidently start my own seeds indoors. I followed the process I had been taught (outlined below), step by step, and sure enough, green sprouts emerged after about a week. I carefully nursed the plants with daily sunlight and gentle watering from below, until, just after my sprouts were turning into little plants, my cats decided to use them for batting practice. Defeated, I returned to nursery seedlings the following year.

This year I am once again taking on the challenge. I have my seeds from Seeds of Change and a bookcase near a windowsill, the top of which should be safely out of reach of cat paws. We don’t really have a last frost date here in Los Angeles, so I started my seeds six weeks before I usually plant nursery seedlings (mid – late March and into April). Look on the back of your seed packet and it will tell you how many weeks ahead of the last frost you should start indoors. You can find your last frost date on sites like the one found here.

I am no expert at this, but I do have sprouts coming up on a number of my trays so I must be doing something right. If you are an expert and have an exceptionally green thumb, please share your tips!

Photobucket

Process for Starting Seeds

Organic Potting Soil
Seed Starting Trays (I use ones with 6 cells)
Sandwich Size Ziploc Bags
Selection of Seeds

Fill the tray loosely with potting soil. Water the soil so it is damp, but not wet. Place 2-3 seeds in each cell. Look at the back of the seed packet to determine the planting depth and cover the seed with the specified amount of soil. Finish off with just a touch more water, place the tray in a Ziploc bag and close it up. Place the tray by a windowsill or on top of the fridge where the tray will be kept warm (Note – my fridge gives off almost no heat so I have to keep mine near a windowsill). Now it’s time to wait. Some sprouts may emerge in 4-5 days, others will take longer.
As soon as you see sprouts emerge from a given tray, remove it from the Ziploc bag. Place the tray on a rimmed plate or baking sheet so you can water from below. To do this, pour water onto the plate/baking sheet and let the roots soak up the water from the bottom of the seed tray. The soil should always be kept damp, but not wet and the trays should stay near a windowsill to get some light.

With any luck, in 4-6 weeks you’ll have seedlings that are ready to be transplanted. I’m still determining the best timing for this and how many days I need to let the seedlings adjust to the outdoor temperature before planting them, but I will be back with more information as soon as I have a plan worked out. In the meantime, happy planting.

Wednesday, February 11, 2009

Puff Pastry Tarts

Photobucket
I’m very lucky to have a lot of friends and family that appreciate good food. It means I have lots of partners in crime when it comes to discovering a new favorite restaurant (Animal), plenty of people to co-sign on my newly developed $30-a-weekend cheese habit, and best of all, no shortage of friends to try out my creations.

I was invited to a small gathering of some of these friends last weekend and, along with everyone else, was asked to prepare something for the meal. One of our friends is a vegetarian and that, along with the food’s portability, needed to be taken into consideration.

Pizza and flatbread creations always come to mind in these situations. They’re great finger food, easily transported and straightforward enough that I could make two – one with the vegetarian in mind and one for everyone else. To be sure to keep it simple, I decided to use puff pastry as my crust and turn my attention to the toppings.

Roasted vegetables seemed like the clear topping choice for a vegetarian. I decided to leave the selection of veggies open until I saw what looked good at the farmers' market. I don’t always like to do this because if I don’t have a focus, I tend to buy everything on site (as mentioned here), but looking for good veggies to roast seemed like enough direction.

I settled on small red onions, petite carrots and brussels sprouts. If you can’t find these or don’t particularly like them, choose whatever vegetables you prefer to roast for the topping. Try to keep color in mind - the more vibrant the colors, the more appetizing your tart will look.

The meat toppings were a cinch. Shredded chicken along with ridiculously thick cut bacon I picked up at Surfas matched perfectly with ricotta. I used fresh ricotta from Surfas, but if you’re feeling adventurous and want to make your own, you can find a recipe here.

I’m a carnivore to end all carnivores (just check out the menu at my new favorite restaurant listed above), but I have to say the vegetarian tart was my favorite. They were both delicious, but something about the way the roasted vegetables melded with the pea shoot pesto was really perfect.

Photobucket
Vegetable Puff Pastry Tart

1 small red onion
8 petite carrots (or 4 large)
1/2 basket of brussels sprouts (about 10)
2 T olive oil
3 – 4 thyme sprigs
1/2 sheet-sized piece puff pastry
1/2 recipe pea shoot pesto
Egg wash
1/2 cup shredded Cabra Romero
Salt and pepper to taste

Preheat oven to 400*
Cut the carrots on the diagonal into 1/8” thick pieces. Slice the onion so some of the rings remain intact. Quarter the brussels sprouts. Toss the vegetables with the olive oil and the thyme. Roast until beginning to soften and slightly brown on some edges (about 30 – 40 minutes). Leave the oven on at 400*. (recipe continues below)

Photobucket

Score the puff pastry with a pairing knife to create a 1-inch border. Spread the pea shoot pesto inside the border and use a pastry brush to apply the egg wash to the 1-inch border area (as shown above). Spread the roasted vegetables over the pea shoot pesto and bake the tart for 20 minutes. Remove from the oven and sprinkle the Cabra Romero over the vegetables. Bake for 5 – 10 more minutes until the cheese is melted and the border is golden brown.

Note – Cabra Romero is a hard Spanish goat cheese that is encased in rosemary. It’s faint note of herb is really delicious here, but if you prefer, a good parmesan would work as well.


Photobucket

Chicken and Bacon Puff Pastry Tart

1/2 sheet-sized piece puff pastry
Egg wash
1/2 recipe pea shoot pesto
1 roasted chicken breast
4 pieces of thickest cut bacon you can find
1 T olive oil
1/2 pound ricotta

Preheat oven to 400*
Score the puff pastry with a pairing knife to create a 1-inch border. Spread the pea shoot pesto inside the border and use a pastry brush to apply the egg wash to the 1-inch border area. Shred the chicken breast. You may use the method of taking two forks and pulling the chicken apart, but I prefer my hands. Cut the bacon into lardons (slices about 1/4" wide) and fry in olive oil. When well-browned, drain on paper towels. Spread the chicken and bacon evenly over the pesto and top with chunks of ricotta. Bake for 25 minutes until the ricotta is just starting to brown on some edges.

Sunday, February 8, 2009

Pea Shoot Pesto

Photobucket
Do you ever have those moments at the market – mainly the farmers market for me – when you buy something, having absolutely no idea how you’re going to use it? I do this all the time. In fact, I do it almost every time I enter a market. I get drawn in by beautiful colors, the freshness of the produce or often just the novelty of something I haven’t worked with before.

I had the epitome of one of these moments at the farmers market last week. Even though my list was already crossed off, I returned to one of the stalls to look for smaller onions. Upon entering I noticed something I had not seen the first time around – pea shoots! I don’t think they’ve been at my market before and I’ve never cooked with them, but I had to have them. They were a gorgeous green with fresh, firm stalks that had the most delicate trailing tendrils. It may have been my overexcited imagination, but I’m pretty sure they still had garden dew on them too.

Photobucket

In most cases, when I have these “moments” I spend the next few days trying to figure out how to use the purchased item, wondering why I had bought something I had no planned use for, yet again. Not so this time! It was only a matter of hours before I got a shot of inspiration.

While working on a puff pastry tart for a date with a group of friends, I realized I really needed a sauce to serve as the base. I dismissed tapenade as not everyone loves olives (they’re crazy, but it’s true) and decided a pesto would be perfect. Unfortunately I had no arugula or basil, my usual pesto bases, but I did have pea shoots. And what if I could turn those into Pesto?

A quick internet search revealed that I’m not quite the genius I thought I was and this has in fact been done before. Even so, not that many hits came up and since it would be a new experiment for me, ahead I trudged.

The resulting pesto was delicious. This is trite, but it really tasted like spring in my mouth. Fresh, like cut grass, it hinted at the approaching season when markets will be bursting with all that spring has to offer. For now, I’m happy with my Pea Shoot Pesto to tide me over.

Pea Shoot Pesto

1 bunch (about 8 oz) pea shoots
1/4 cup toasted pine nuts
2 scallions, cut into 1-inch pieces
1 garlic clove, minced
1/4 t salt
1/2 cup olive oil
1/4 cup shredded parmesan

Add first five ingredients to a food processor and pulse until roughly chopped. With the processor running, drizzle in the olive oil. You may not need a full half cup. Just keep drizzling until the pesto comes together and reaches a consistency you like. Remove the lid from the processor and stir in the parmesan by hand.

Photobucket

Thursday, February 5, 2009

Chilled Corn Soup

Photobucket

I’ve just placed an order with Seeds of Change for the second round of veggies that I’m starting from seed this year. I already have one tray growing in my kitchen, but I’ll get around to that another day. Included in this recent order is a packet of corn seeds. Corn is something that I have never grown at home - not in my mother’s vegetable garden, not in my own garden from nursery seedlings and certainly not from seed. However, having become somewhat obsessed with the stuff over the past year, I knew I had to have it at the ready in my backyard this summer.

Paying no attention to seasonality or how far the corn has had to travel to reach my kitchen from someplace warm enough to grow it, I buy it when I see it and I use it quickly. Most of the time I don’t even bother cooking it. I cut it right from the cob and toss it with some chopped mango and a squeeze of lemon juice. The only thing that surprises me about my order is how long I’ve waited to grow my own. Did you know that the sugar in some corn varieties can turn to starch less than 24 hours after harvesting? I’m definitely looking forward to harvesting right before cooking.

With corn on the brain (and three ears in the fridge), I started flipping through recipes looking for something to make. I recently printed my first recipe off of Bravo’s Top Chef site. It’s a chilled corn soup recipe from Jamie Lauren. She rocks at making soup and I seem to remember the judges loving this one. Who am I to argue with Tom Colicchio?

The judges were not wrong. This dish is delicious and definitely not your ordinary corn soup. It’s served chilled and the hint of mint that comes through is refreshing, not overpowering. Whatever you do, don’t skip the kernels of corn as a garnish. The crunchy bursts of sweetness were perfection. And when making the chili oil (or handling chilies at any other time), don’t do what I did and accidentally touch your eye. Burn, burn, burn. A temporary distraction from the delicious soup.


Photobucket

Jamie Lauren’s Chilled Corn Soup
Adapted to serve 3 – 4

3 ears corn + kernels for garnish (an additional ear will yield more than enough)
2 oz butter
2 cloves garlic
1 yellow onion, diced
4 stalks celery, diced
1 russet potato, quartered
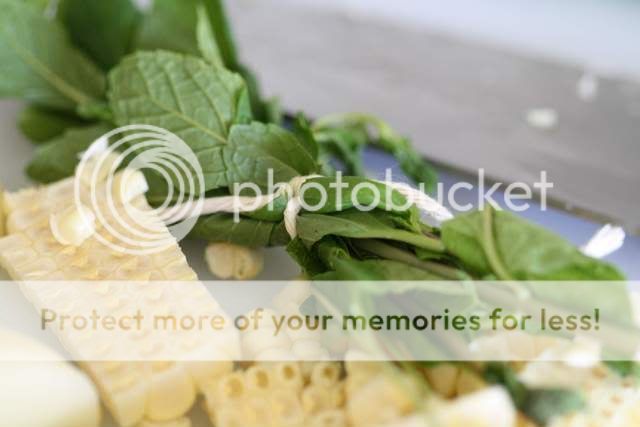
6 sprigs of mint, secured with twine
Salt to taste
1 quart vegetable stock
3/4 cup heavy cream
Chili oil to taste (recipe follows)

Cut corn off the cob. Heat butter over medium heat, smash garlic and add to pan. Fry until fragrant and just beginning to color, then add onion. Sautee until the onion is translucent and soft. Add the celery and sauté until soft. Add the potato quarters, corn and mint with a healthy pinch of salt. Cover with vegetable stock and bring to a simmer. Let simmer until the potato is soft. Remove the mint. Puree soup in a blender in three batches, adding 1/4 cup of cream to each batch. Strain the soup and chill. Serve topped with corn kernels, mint and chili oil.

Chili oil
1 t crushed chilies
1/4 cup olive oil

Heat the oil gently over low heat and add chilies. Let steep for 10 - 20 minutes until the chilies have released their flavor and some color into the oil.


Photobucket

Monday, February 2, 2009

Vegetable Stock - Cleaning Out The Veg Bin

Photobucket
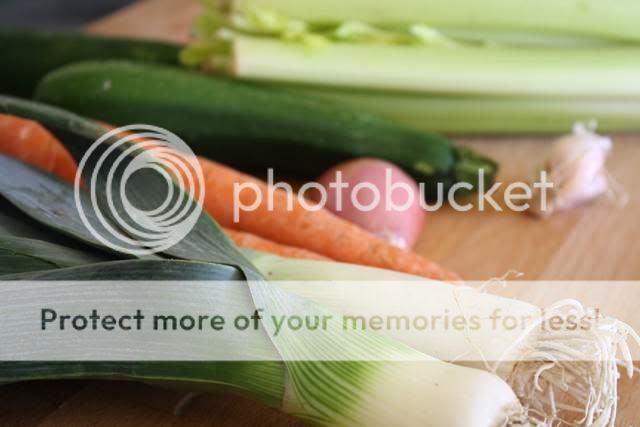
Cleaning out the veg bin is not something I love to do. The guilt of throwing away veggies that seemed like such a good idea at the store, but were never put to use is a hard task to bear. It's been made a lot more manageable by the compost bin in my backyard where most past-their-prime veggies make their way. But, if the veggies are still usable, just not at their best for a certain recipe, I've started using them for stock.

In the past I've used my homemade chicken stock whenever I make soup, even if it's vegetable-based. However, two things have happened recently to make me change my mind. First, my friend David recommended throwing a roasted duck carcass in with my next batch of chicken stock for a really rich, deep flavor. He was absolutely right about that, but the stock is now too rich and prominent a flavor for most vegetable soups. Second, I was recently preparing a dish to take to a get together of girlfriends. One of the attendees is a vegetarian and not being able to turn to my trusty stock was a problem. I decided it was time for me to start keeping my own vegetable stock on hand.

I read through the CIA's recipe for vegetable stock and this is loosely based on that process. I improvised with what I had in the veg bin and you should to. Just stay away from any starchy vegetables (potatoes) and anything with a very pronounced flavor (fennel) should be used in very small quantities. Also try to keep in mind what you'll be using the stock for and adjust flavors accordingly.

Vegetable Stock
Makes about 3 1/2 quarts

2 cloves garlic, roughly chopped
1 medium shallot, roughly chopped
2 T vegetable oil
1 1/2 pounds mixed veg cut into 1 - 2 inch chunks
(celery, zucchini, carrots, mushrooms, leeks, etc.)
4 quarts water
Salt to taste
Sachet d'epices (instructions follow)

Heat oil over medium heat and add garlic and shallots. Fry until fragrant, but not yet brown. Add remaining vegetables and sweat for 3 - 4 minutes until warmed through. Pour water over and bring to a simmer. Add a few pinches of salt and the sachet d'epices. Simmer for 45 minutes to an hour. Strain the stock and use in your favorite soup. I also freeze one quart containers for future use.

Photobucket
Sachet d'Epices

3 - 4 parsley stems
1 sprig of thyme
1 bay leaf
1 t cracked peppercorns

Wrap the items together in cheesecloth and secure with kitchen twine. You may include one garlic clove if desired, but I left it out as there is already garlic in the stock.