Showing posts with label Salad. Show all posts

Monday, March 18, 2013

Eat Your Greens Salad

 photo GreenSalad_zps872ea011.jpg

The inspiration for this latest salad obsession arrived courtesy of a catering delivery to our office that included this dish in all of its green goodness. Crisp tender vegetables (sugar snap peas, broccoli and edmame), vibrant color and lots of flavor - my only complaint was the heavy dose of vinaigrette. The oily slick on the restaurant version makes you feel like you are undoing all the good done by eating your greens. I absolutely think this salad needs some sort of dressing and a bit of fat, but for me, a drizzle of toasted sesame oil and a sprinkling of salt is sufficient to bring out an earthy, delicious flavor.

Whatever you do, do not skip the blanching step. It makes all the difference to get the vegetables just the slightest bit tender and it certainly doesn’t hurt in preserving the vibrant green color. Blanching traditionally includes a quick dunk in a bowl of ice water to arrest the cooking, but here I opt for stirring in the frozen edamame after the vegetables are drained. They help to quickly cool down the other vegetables, while the residual heat from cooking thaws the edamame. If you prefer an ice bath, by all means use the traditional method, but if you, like me, find yourself without an ice maker and vast quantities of ice on hand, stirring in the edamame works well here.

Eat Your Greens
Makes 2 Quarts

1 pound sugar snap peas
12 oz package broccoli florets
6 oz frozen, shelled edamame
2 – 3 T toasted sesame oil
Salt for cooking and to taste (Kosher – I use Diamond Crystal)

Put a large pot of water on the stove and bring to a boil. While the water is heating, prepare the vegetables.

Remove the stem-end of the sugar snap peas and if desired, the string that runs the length of the pea. Cut the peas on the diagonal into 1/4“ to 1/2“ segments. Roughly chop the broccoli florets.

Once the water comes to a boil, add a generous amount of salt (at least 1 tablespoon). Add the sugar snap peas and broccoli to the water and cook for two minutes. Drain the vegetables in a colander and stir for one to two minutes to speed cooling. Add the frozen edamame and stir until the edamame is thawed – an additional one to two minutes.

Transfer the vegetables to a bowl and stir in two tablespoons of the sesame oil and salt generously. Taste the mixture and if the sesame flavor is mild, add more to taste.

Thursday, August 9, 2012

A Multi-Purpose Dressing

Photobucket

Well hello there. So. It’s been more than a little while since I last posted. 10 months to be exact. Things got busy, I planned a wedding, got married, went on a honeymoon and now, almost two months after The Big Day, I have recovered from the whole wonderful, exhausting experience just enough to get back in my kitchen and start documenting it again for you here, that is, if there are any of you left after my prolonged absence!

The meaning of this blog’s name (balancing the healthy – apples - with the delicious, but not-so-healthy – butter) could not be any more pertinent in my kitchen than it is right now. Since getting married I feel I am fighting the constant battle of trying to find dishes fabulous and flavorful enough to keep my husband (my ever-so-slightly picky husband) coming back to the dinner table, while trying desperately not to regain those 10 culinary school pounds I managed to lose for the wedding. Fun times in the Stanbrook kitchen.

Battle number one. Teach husband that chicken does not have to be flavorless diet food. Far from it! When cooked just until done (not to a dried out, parched mess of protein) I think chicken is absolutely delicious. However, properly cooked chicken does not, on its own, a fabulous and flavorful meal make.

Enter the one-two-punch of a marinade and grill. The flavor of chicken cooked on a grill will always remind me of the Cornish game hens my father grilled for our family at least once a week when I was a child. Perfectly cooked, with just the right amount of char, it is quintessential outdoor living, Southern California food to me. Use the following dressing that pulls on some of the season’s best flavors (pesto anyone?) as a marinade and I think you’ve got the perfect summertime dinner.

This dressing lives somewhere between vinaigrette and pesto. If you have extra basil, make as much of this dressing as you can and use it as a condiment for cooked meats or a salad dressing; toss it with freshly cooked vegetables or throw it over pasta. I have included directions below for using it as a marinade for grilled chicken breasts.

Photobucket        
Summer Pesto Dressing

1-1/2 cups loosely packed basil leaves
1/3 cup walnuts or walnut pieces
1 T white balsamic vinegar
2 T fresh lemon juice
1 t honey
1/2 t salt + more to taste
1/3 cup extra virgin olive oil + more as needed

Combine first six ingredients in a mini-food processor (or a regular food processor if you only have the full size) and pulse until combined. Add the olive oil and let the processor run until the oil has blended and somewhat emulsified with the other ingredients. I like to leave this dressing chunky, but if you prefer a smoother dressing, continue blending and add more olive oil until your desired consistency is reached. Taste and adjust seasoning.

To use this dressing as a marinade for chicken breasts:

Using a sharp knife, make three slashes in each breast, only cutting about 1/8” to 1/4”-inch into the breast. Reserve 1/2 of the dressing to serve as a condiment for the cooked chicken or to use later as a salad dressing. Rub 1/2 of the remaining dressing over the breasts and let them marinate in the fridge for as much time as you can – 30 minutes to three+ hours.

Fire up your grill. Let your chicken breasts start to come to room temperature while your grill heats up. Place the chicken on the grill and adjust the flames/charcoal to prevent flare ups. Close the grill cover and only lift it occasionally to baste the chicken with the remaining dressing. I wish I could tell you how long to cook the chicken, but every grill and every chicken breast is different. My chicken breasts were not gigantic and it took about six minutes on the first side and an additional four to five once I flipped them over. If your chicken is getting too black before finishing cooking, move it to a cooler area of the grill or a raised shelf and let it finish cooking with the grill cover closed. Serve the chicken with the remaining dressing.

Tuesday, September 21, 2010

Tabbouleh

Photobucket

Tabbouleh is a go-to dish when cleaning out the vegetable bin which I seem to be doing a lot these days. I am still learning to adjust my shopping list to more appropriate levels for someone who is in culinary school. Three nights a week I get fed at school and I bring home leftovers of all the foods I prepare during class. There is a surplus of food in my fridge and sometimes I forget to purchase less when I head out to the store.

Even if you don’t need to clean out the veg bin, tabbouleh is a great dish to have on hand. It keeps well, and even gets better as the flavors meld together over the course of a day or two. I snack on it throughout the day and if you need a quick side for dinner, it is always great to have this sitting in the fridge waiting for you. Love those time savers.

Photobucket

Tabbouleh is traditionally made with bulgar wheat, which is what I used here, but I often use couscous, wild rice, wheat berries or basically any grain (or pasta in the case of couscous) that I have on hand. Traditional vegetables include tomatoes and spring onions with a healthy does (usually an entire bunch) of chopped parsley, but since I use this salad as a dumping ground for leftover vegetables, I do not always stick to the traditional and neither should you. In this rendition I use tomatoes, cucumbers and shallots, but in the past my tabboulehs have also included zucchini, eggplant (cooked), celery, squash and so on. The only real guidelines you should follow are to chop the vegetables small - I usually aim for a similar size to the grain I am using – and to use lots and lots of parsley.

Photobucket

Tabbouleh

1 cup bulgar or other desired grain or pasta
1 cucumber
3 roma tomatoes
1 small shallot
1 bunch parsley
Juice from 1 lemon
Olive oil to taste (start with 3 T and add from there)
Salt and freshly ground pepper to taste

Cook the bulgar or other grain according to package directions. Spread the cooked grains out on a parchment paper lined baking sheet to cool quickly. While the grains are cooking, chop the cucumber, tomatoes and shallot finely. Sprinkle the vegetables with salt and pepper and set aside. Chop the parsley finely, rocking your knife back and forth through the herb to make quick work of the bunch. Once the bulgar has cooled, combine it with the vegetables, parsley and lemon juice. Add 3 tablespoons of olive oil. You want the salad to seem moist, but not oily. If necessary, add more olive oil. Taste and add more salt and pepper to your liking. The salad is ready right away, but gets even better after some time in the refrigerator.

Wednesday, April 28, 2010

Butter Bean Salad

Photobucket

I love butter beans. Growing up, we had what we called lima beans as a side dish at least twice a week. My mother would drain the lima beans (always from a can – never fresh in those days), heat them up and serve them with butter. I used to mash up the beans on my plate, incorporating their silky butter coating into a butter bean mash. I didn’t know it at the time, but I was creating one of my favorite ways to serve butter beans (and most beans for that matter) - whizzed with a little butter and served as a side dish in place of mashed potatoes.

The other way I serve butter beans is in a cold, deli-style salad. I make healthy, hopefully delicious, deli-style salads almost every Sunday. I whip up a large batch and bring it with me to work for a week’s worth of lunches.

This butter bean salad is very simple to make and holds up well (actually improving in flavor) after a few days in the refrigerator. Beans, tuna, a little lemon for brightness and green onions are the stars. Add salt, pepper and olive oil and you have a great salad that will keep you fed throughout the week.

I like this salad just on its own, but I added some toasted, garlic-rubbed slices of baguette for a little more heartiness for the boyfriend. It would also be great served over a bed of lettuce or added to pasta for a cold pasta salad.

Butter Bean Salad
Serves 3 – 4

1 can butter beans
2 cans solid white tuna (I use water packed)
Zest of one lemon
Juice from one lemon
2 – 3 T of extra virgin olive oil
4 green onions, cut in half lengthwise and thinly sliced
½ t salt
¼ t of freshly ground pepper

Drain and rinse the butter beans. Drain the tuna. In a medium bowl combine the lemon zest, lemon juice, 2 T of olive oil, the onions and salt and pepper. Taste the dressing and if it is too tangy from the lemon, add an additional tablespoon of olive oil. Add the tuna and beans to the dressing and stir until combined.

Monday, April 5, 2010

Herbed Salad Dressing

Photobucket

From time to time, I get asked to teach people how to cook. The request usually comes from close friends and typically right after I’ve spent 10 minutes expounding on how anyone who hates anchovies hasn’t tried Spanish anchovies packed in salt or some other obscure topic, in other words, making it abundantly clear that I spend way too much time thinking about food. I am hugely flattered when people ask because I love to share what I know and help people discover how easy it can be to cook at home.

When my friend Meghan asked me to help her learn how to cook to “keep her from starving” (her words, not mine), I immediately suggested we make some of the basics I think every cook should know: how to properly cook a chicken breast, a good bolognese sauce and a salad dressing made from scratch.

Meghan quickly made it clear that she didn’t understand why she needed to know how to make a salad dressing when she can just buy one at the store. I suppose she’s right and I think most of us will get along just fine never knowing how to make our own salad dressings, but I am of the belief that the five minutes or less that it actually takes to make a salad dressing is time very well spent.

When making a salad dressing, a very basic formula to follow is three parts oil to one part vinegar with a little salt and pepper and any additional flavorings you want to throw in. It’s easy to remember, easy to make and will elevate any simple salad you throw together to something just a bit more special.

I try to keep vases of fresh herbs on my kitchen counter. They’re beautiful to look at and having them out encourages me to use them more in my cooking – most often they end up as the ‘additional flavorings’ in my herbed salad dressing that I make almost weekly, or as soon as my last batch is gone (I make three or four times what I need for one salad and keep the extra on hand for use throughout the week).

I intentionally didn’t specify which herbs to use in the recipe below. You should use whatever you have on hand, or if you’re going shopping, whichever herbs sound best to you. My favorite combinations include chive and basil (one bunch of chives and the leaves from four or five basil stems) and scallion, parsley and mint (two thinly sliced scallions combined with a handful of chopped parsley and a few mint leaves). Tarragon also works brilliantly in salad dressings. The key here is to try your own flavor combinations and determine what you like best.

This recipe calls for the best extra virgin olive oil you can afford. Sometimes that means the $6 jumbo bottle from the grocery store. Please know that that is perfectly acceptable here. Since the recipe calls for a good amount of olive oil, I tend not to use my $30 bottle of olive oil because that’s a lot of money going into one salad dressing. That being said, if I could afford to buy a countless supply of $30 olive oil, I would definitely use it in salad dressings because the flavor is so prominent and the quality really does come through. So, use the best you can afford, whatever that may be.

Photobucket

Herbed Salad Dressing
Makes about 1 ¼ cups

¾ cup extra virgin olive oil (the best you can afford)
¼ cup champagne vinegar
2 T dijon mustard
½ cup chopped herbs
Salt and pepper to taste
Pinch of sugar

Combine the vinegar, mustard and herbs in a mason jar, screw the lid on and shake to combine. Pour the olive oil in and shake vigorously to emulsify. Season to taste with salt and pepper. If the dressing still has too much of a vinegar bite, add a pinch of sugar to help balance it out. This dressing will keep for about a week in the fridge.

Tuesday, March 30, 2010

Fava Bean Assembly Line

Photobucket

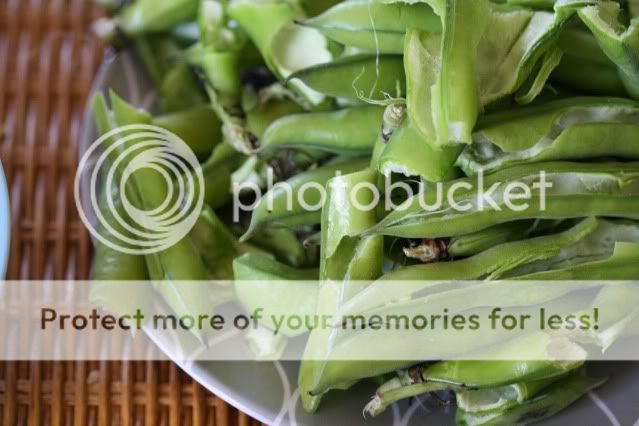
This weekend I decided that one of the things I am looking forward to about having children is setting up my own fava bean shelling assembly line. I am not pregnant, nor do I have plans to become pregnant anytime in the near future, but after working my way through two pounds of fava beans on Saturday, to be left with only a scant half cup of shelled beans, I am in need of that assembly line.

Photobucket

There are pictures of me as a child, saddled up to the kitchen counter, dutifully snapping the ends off of green beans as my mother prepares the other and slightly more challenging components of a family meal. She was all about child labor in the kitchen and I plan on taking the same route – especially when it comes to favas. The shelling, followed by blanching, followed by peeling is a lot of work for the small amount of food you’re left with. It is worth it, but you really have to set aside a chunk of time if you’re tackling the task on your own.

Photobucket

If there are any idle hands in your household, put a bowl of fava beans in front of them and demand help. This salad from Jamie Oliver really is worth all of the effort. The favas are paired with a fresh pea dressing and smoky pancetta. This is the first time I’ve made a salad dressing out of pureed vegetables and I’m a bit bothered that Jamie Oliver beat me to the punch. It’s a particularly great idea in this case; the pureed raw peas taste quintessentially fresh and the bright green color really pops.

The fava bean prep is the most difficult part of this recipe. If you have helpers, get extra fava beans. You’ll be grateful if you have leftovers.

Photobucket

Fava Bean and Pancetta Salad
Adapted from Jamie Oliver

1 garlic clove, peeled and left whole
10 ½ ounces of shelled fava beans (from about three pounds of whole favas)
8 pieces of pancetta (about a quarter pound)
1 handful of almonds
5 ½ ounces of shelled fresh peas (from about one and a half pounds)
2 ½ ounces of Pecorino cheese, grated plus more for scattering over the plates
15 mint leaves (a handful), plus more for scattering over the plates
6 – 8 T extra virgin olive oil
Juice of 1 – 2 lemons
Salt and pepper

Preheat the oven to 475*
Bring a medium saucepan of water to a boil and do not add any salt, which would toughen the favas while cooking. Add the garlic and cook for three minutes. Add the shelled fava beans and cook for an additional three to five minutes until the favas can be easily squeezed from their skins. Drain, set the garlic aside and remove the skins from the fava beans and discard.

Place the pancetta and the almonds on a baking sheet and bake just until the pancetta is crisp, about 10 minutes. If the almonds start to get too dark, remove them and continue cooking the pancetta.

To make the dressing, place the peas and reserved garlic clove in a food processor and process until smooth. Add the cheese and mint leaves and process until combined. Add 6 T of olive oil and 4 T of lemon juice and blend. This dressing should be thick, but if it seems too pasty, add more olive oil and lemon juice until your desired consistency is reached (I added about 1 T more of each). Season with salt and pepper to taste.

Divide the fava beans among four plates. Drizzle the dressing over the fava beans - you may not need to use all of it. Scatter the pancetta and the almonds evenly over the four plates and finish with a sprinkling of mint leaves and pecorino if desired.

Thursday, March 4, 2010

Shaved Beet Salad

Photobucket

Occasionally I look at a menu and find a dish that sets off a craving. It happened to me this past weekend when I spotted a roasted beet tower on the appetizer menu of a restaurant where I was enjoying a sunny Sunday afternoon on the patio. I envisioned layers upon layers of red, golden and bulls blood (pink) beets. What showed up was three very thin beet slices, each separated by a solid inch of an avocado and tomato mixture. Don’t get me wrong, I love avocados, but when I was expecting roasted beets, a plate of guacamole was pretty disappointing.

Lucky for me, the folks over at Clarkson Potter recently sent me a copy of the new Everyday Food cookbook – “Fresh Flavor Fast.” I subscribe to the Everyday Food magazine and buy their books because they have simple, get-down-to-business recipes. I may love spending hours on a dish on a quiet Saturday afternoon, but Monday through Friday, I need realistic recipes that take into account the maybe 30 minutes I have to prepare a meal.

Fresh Flavor Fast is everything I love about Everyday Food. It’s packed with new ideas to get you out of the cooking ruts that are so easy to get into when speed and simplicity are top priorities. I wasn’t expecting a side dish or salad to be the first recipe I made from the book, but upon arriving home from my disappointing roasted beet tower experience, I opened up the book and found this recipe for shaved beet salad.

The salad took no more than 10 minutes to put together and totally satiated my beet craving. Raw beets are not for everyone so make sure you slice them thinly. I used a mix of red and golden beets, but feel free to use all red or any combination you prefer. If you are using a mix, make sure you toss them with the dressing separately or the red beets will turn everything else red too.

Photobucket

Shaved Beet Salad
Adapted from Fresh Flavor Fast

1 pound beets, sliced thinly on a mandoline
1 t orange zest
2 T fresh orange juice
2 t white wine vinegar
1 T olive oil
1/2 t sugar
Coarse salt (kosher or Maldon) and pepper

Whisk together the zest, juice, vinegar, oil and sugar and season with salt and pepper. Toss the beets with the dressing. If you are using different colored beets, toss each color separately so that the red beets don’t bleed their color on the lighter beets. Arrange beets on individual plates and serve.

Tuesday, September 29, 2009

Making Cheese Even Better

Photobucket
I’m a sucker for a pretty picture. Especially if that picture is of food and in this particular case if that picture is of oil-dressed tomatoes piled high on top of slices of fried cheese. I have a few cookbooks that I adore that have absolutely no pictures of food, Marcella Hazan’s Essentials of Italian Cooking to name just one, but for the most part, beautiful pictures are what draw me in to a recipe, a book or an ingredient. It’s called food porn and it’s why, in addition to my obscene cookbook collection, I have subscriptions to every major food magazine.

Back to the tomatoes piled high on fried cheese. There isn’t much you can do to cheese to make it better than it already is, but frying it is certainly one way to try. Most cheeses can’t stand up to the heat, but one exception is Halloumi. Mentioned many times before on this blog, Halloumi is a Mediterranean cheese that has a very high melting point – in other words, you can pan fry it and it will keep its shape, but even more importantly something magical happens. The saltiness of the cheese is set off by the warm, melting creaminess and if you’ve left the Halloumi in the pan long enough, at a high enough heat, the crunchy crust that forms on the surface of the cheese finishes everything off with a seriously good contrast of textures. It’s cheese heaven so whenever I see a recipe that calls for it, I take note.

My latest ‘the pictures are just too pretty to pass up’ purchase is The Family Chef by Jewels and Jill Elmore. In a feeble attempt to stunt the growth of my cookbook collection, I stopped myself from buying this book the first time I saw it back in June, but after reading more about the sisters in this month’s Sunset Magazine, I knew I had to go back for a second look. I realized my first instinct was right and quickly purchased the book. It has been my bedside reading for the past week and their Halloumi Cheese with Cucumber Lentil Salad is the first recipe I made from it.

An added bonus with this recipe is that I discovered the boyfriend likes lentils! I didn’t think it was possible that such a healthy powerhouse could be on his list of, ‘please make me more of this right now,’ foods, especially after our phone conversation the day before I made the dish. He called me while I was browsing the aisles of Whole Foods and when told I was getting lentils, he responded with, “Why on earth would you be doing that? Lentils are gross.” Not encouraging, but he rarely knows what’s good for him so I picked them up anyway, made this salad and he couldn’t get enough. He even picked a lentil dish out of another cookbook for me to make the next night. I think I’m on to something here. Maybe you can be too.

Photobucket
Halloumi Cheese with Cucumber Lentil Salad
Adapted from The Family Chef (to make a smaller portion)

1/2 cup beluga lentils cooked according to package directions
1 medium cucumber, peeled in strips, halved lengthwise and sliced into half circles
2 ripe tomatoes (preferably one yellow and one red), cut into chunks
3 T extra-virgin olive oil + more for frying cheese
2 T chopped parsley
2 T chopped mint
2 T lemon juice
Salt and pepper to taste
1 package of Halloumi cheese, cut into 8 slices

Place the first seven ingredients in a bowl, season with salt and pepper and mix together. Heat a non-stick pan over medium-high heat and add some olive oil (about a tablespoon or two). Add the Halloumi slices and cook each side until golden brown, 2 – 3 minutes per side. Place the Halloumi slices on a platter and top with the tomato and cucumber mixture. Serve immediately while the cheese is still warm.

Friday, October 31, 2008

Sausage and Goat Cheese Stuffed Squash Blossoms

I have always admired the beautiful squash blossoms I see in my backyard and at my local farmers' market. But after all this time, it wasn't until last week that I finally bought some and brought them home, determined to stuff and fry them. 

I was planning on serving these for lunch with a simple salad and wanted to do more than just stuff them with goat cheese. I had recently picked up some delicious sweet Italian sausage that I threw into the mix to get something more substantial. Get creative with this recipe. Goat cheese is such a great background for so many flavors!

Sausage and Goat Cheese Stuffed Squash Blossoms

12 squash blossoms
4 oz goat cheese
1 sweet Italian sausage
1/4 t celery salt, divided
1 - 2 cups vegetable oil for frying
1 egg
3/4 cup flour

Remove the sausage from its casing and cook, breaking apart into small pieces as you go. Allow the sausage to cool, mix together with the goat cheese and a pinch of celery salt. Set aside.  
Remove the internal stem and pollen from the blossoms and rinse the exterior to remove any dirt. Whisk egg in a bowl and place flour in a second bowl. Heat about a 1/2" of oil in a cast iron skillet for frying. Stuff each blossom with 1 T of cheese mixture. Dip each blossom in the egg and then dredge in the flour. Shallow fry a few blossoms at a time to keep from overcrowding the pan. Once golden brown, remove to paper towels to drain and sprinkle with a little more celery salt while still hot. Serve on their own as an appetizer or over a salad for a light lunch. Enjoy!

Wednesday, October 8, 2008

Marinated Goat Cheese Salad

It was finally time to pull the marinated goat cheese out of the fridge to find out how weeks of marinating went. The answer? Delicious. To be honest, the original recipe called for the jar to be kept in a "cool place." I have to believe that if I had a cool place in my apartment aside from my fridge, that the flavors would have infused the cheese even more. However, until just recently, there hasn't been an only mildly warm place in my apartment, let alone somewhere cool. I think I will have to try this again once it really gets cold this winter and see if the flavors change.

The reason for marinating the goat cheese in the first place was to make the salad from Anne Willan's The Country Cooking of France. So, without further ado...

Marinated Goat Cheese Salad
Serves 4

1 package arugula blend lettuce
8 slices bread
2 T red wine vinegar
6 T oil from marinating plus more for brushing bread
salt and pepper to taste

Heat the broiler. Cut a round from each slice of bread. Cut each slice of cheese in half horizontally and place one piece of cheese on each slice of bread. The oil still coating the cheese should be more than enough to coat the bread, but if necessary, brush a little more oil on the bread. Mix together the vinegar, salt and pepper and then drizzle in the olive oil while whisking vigorously to emulsify the dressing. Place the cheese bread under the broiler for approximately five minutes until golden. Dress the salad, adding more seasoning if necessary. Divide the lettuce between four serving plates and top with two slices of cheese bread. Enjoy!

Thursday, October 2, 2008

Salmon Nicoise

I love it when restaurants will take a little twist on the traditional nicoise and use salmon instead of tuna. I like tuna, but I love salmon. Unfortunately, when I ordered a salmon nicoise out at lunch recently, it was somewhat of a disappointment so I knew I would have to make my own at home soon to make up for it. This was a great version and the vinaigrette was a new experiment using some grapefruit vinegar. If you don't have grapefruit vinegar on hand, just use whichever kind you prefer. 

Salmon Nicoise
Serves 1

1 salmon filet
1 T olive oil
3 small creamer potatoes
4 caper berries
6 green beans
1 tomato
1/4 cup nicoise olives
3 cups lettuce
2 T olive oil
1 T grapefruit vinegar
salt and pepper

Heat the olive oil in a small pan and cook the salmon for about four minutes on each side and remove to a cutting board. Microwave creamer potatoes for four minutes until soft and green beans for 1 minute until just tender. Slice the tomato into quarters and drain the olives and caper berries. Mix together the olive oil, vinegar, salt and pepper and dress lettuce. Place lettuce in a serving bowl and top with potatoes, salmon, green beans, capers, olives and tomatoes. Enjoy!

Thursday, September 25, 2008

Kale Salad

There is a great restaurant in Los Angeles called Food that serves up a delicious kale salad. I'd never had anything like it and when I found out the dressing was made with cashews, I knew I had to try and recreate it at home. Rather than throw in a lot of additions, I wanted to keep it simply to kale on this batch so I could test out the flavor of the dressing. If you want to throw in some shredded carrot and broccoli, I'm sure it would be delicious. Even the boyfriend enjoyed this and kale is way too heathy an ingredient for him in most cases.

Kale Salad
Serves 4 as a side dish

1 bunch kale
1 cup roasted, salted cashew pieces
2 T lemon juice
1/2 cup water
1 garlic clove
1/4 t salt

Rinse the kale and chop into small, salad-sized pieces. Place the cashews in a food processor along with the lemon juice, garlic, salt and half of the water. Run the processor until a chunky paste starts to form. Add the remaining water to thin out the paste enough to a thick dressing consistency. Add the cashew dressing to the kale and mix thoroughly. Add any additional veggies that you want and enjoy!

Friday, September 5, 2008

Lentil Salad

I got together with some very special women at my friend Lisa's house last week. She hosted us for dinner and along with an amazing, homemade gazpacho, made this lentil salad. After getting her permission to make the salad for Apples and Butter, she graciously shared the recipe with me and I learned that it's a recipe of her mother's. I love those handed down recipes because only the best survive!

I made a few changes to the recipe, certainly not because Lisa's needed any improvement (her's was truly perfect), but it is back-to-school healthy week so I left out the bacon and cut down on the amount of oil just a bit.

Lentil Salad
Serves 4 - 6

1 16 - 17 oz package of prepared lentils
1 cup cooked, diced ham
1/2 cup diced shallots (about 2)
1/2 cup chopped fresh parsley
1/2 cup sliced scallions (about 3-4)
1/2 cup diced bell pepper (1 small)
3 minced cloves garlic
1/3 cup olive oil
1/3 cup balsamic

Combine the shallots (correction from scallions previously listed here), garlic and balsamic in a small bowl and set aside. Mix the lentils with the ham, parsley, scallions, bell pepper and stir. Mix in the balsamic mixture along with the olive oil and stir to coat. I couldn't resist diving in right away and having some, but I found that this salad got even better after all the flavors had a chance to meld. Enjoy!

Wednesday, August 13, 2008

Sushi-House Cucumber Salad

Aside from my somewhat unhealthy addiction to raw fish this salad is my favorite part of going out for sushi. Unlike procuring good-quality raw fish, this salad is really simple to prepare at home. It gets even better when left to mellow in the fridge for a day.

Sushi-House Cucumber Salad

1 Cucumber peeled and cut into spears
2 T seasoned rice wine vinegar
1 - 2 sheets nori (seaweed)
1 T toasted sesame seeds

Slice cucumber spears into paper thin slices using a knife or the slicing blade of a cuisinart. Cut nori into thin strips. Mix nori and cucumber with vinegar and sesame seeds. Seasoned rice vinegar is just sweetened rice vinegar so if you can't find it, add 1 t sugar to rice wine vinegar before mixing in with the other ingredients. Let mellow in the fridge for a day and enjoy!

Thursday, August 7, 2008

Orzo Salad

When we were growing up, my mom would make pasta salads for us as a light dinner. She recently reminded me of the special ingredient in the dressing that I was leaving out. Horseradish. I made it again, using horseradish this time, and it made all the difference in the world. You can use any combination of vegetables you like in this.

Orzo Salad
Serves 4

1 cup orzo
1 cup corn
4 scallions, sliced
2 cups cherry tomatoes, quartered
1/2 cup mayonnaise
2 T horseradish
1 T lemon juice
1/4 t salt

Cook orzo in boiling water for nine minutes. Drain and rinse in cold water to stop cooking. In a small bowl, mix together mayonnaise, horseradish, lemon juice and salt. Add dressing, scallions, corn and tomatoes to orzo and mix well. Chill for an hour before serving.

Wednesday, August 6, 2008

Halloumi Salad

This is my favorite application for Halloumi, a cheese that holds it shape when grilled. Use any vegetables that you like. I've used Oven Dried Tomatoes and artichoke hearts with a simple lemon dressing.

Halloumi Salad
Serves 2

1 8 oz package Halloumi, sliced into four pieces
1 T canola oil
1 cup artichoke hearts, drained if packed in water or oil
2 T olive oil
2 T lemon juice
salt
1 t dried oregano

Whisk oil and lemon juice together until mixture begins to emulsify. Mix a pinch of salt and oregano into dressing and set aside. Heat canola oil in a grill pan over medium heat. Add Halloumi slices to grill pan and grill for about two minutes on each side until starting to brown.  Place two slices of Halloumi on each plate and top with half of the artichoke hearts and tomatoes. Drizzle with dressing and enjoy!

Friday, July 25, 2008

Golden Beet Salad

Did you grow up eating beets from a can? I don't think I did. I'm not sure if that is a result of my mother not serving them to us or my refusing to eat them, but I have no recollection of eating them. And thank goodness. What you get in the can should not even be considered the same food as what you get when you buy a fresh beet and roast it yourself. I'm partial to golden beets and I've used them here in a simple salad with goat cheese. If you're only familiar with the canned variety, go to the store, purchase them fresh and experience what a beet is supposed to taste like.

Roasted Golden Beet Salad
Serves 2

4 golden beets
1 T canola oil
2 heads frisee (or two servings of your favorite lettuce)
1 oz goat cheese
1 T red wine vinegar
2 T olive oil
pinch of salt
pinch of pepper

Preheat oven to 400*

Wrap beets in tin foil with a drizzle of canola oil and roast for 45 minutes. Let cool, peel and cut each beet into six segments. Whisk together vinegar, olive oil, salt and pepper. Crumble goat cheese over lettuce and toss together with dressing and beets. Enjoy!

Saturday, July 12, 2008

Green Miso Coleslaw

Coleslaw is such a summer BBQ staple. I'm often sucked into ordering it as a side at restaurants to satisfy a craving. Unfortunately, I'm also often disappointed with what taste like pre-made dressings. The only way to truly satisfy the coleslaw craving for me is to make it myself. If you need a slightly more dressed-up version to serve at a BBQ, try this one. It's green hues are nice to look at and the touch of miso in the dressing gives it a more interesting flavor.

Green Miso Coleslaw
1 granny smith apple
1 10 oz bag shredded green cabbage
1 1/2 stalks celery

Dressing
1/3 cup Fage
1/3 cup mayonnaise
1 T dijon
1 T honey
1 T sugar
1 T + 1 t white balsamic vinegar
1 T mellow white miso
1/4 t salt

Combine all the ingredients for the dressing, making sure the miso is distributed throughout. Set aside. Core the apple by cutting four sides away from the core. Cut each of these sides into very small apple segments the way you would for a tart and cut each slice into matchsticks as shown above. Cut celery stalk into segments that are a similar length to the apples and cut each segment into matchsticks. Combine cabbage with apple and celery matchsticks. Dress and enjoy!

Saturday, July 5, 2008

Red, White and Blue (and yellow and green) Potato Salad

We needed one more side for our 4th of July picnic yesterday and what could be more appropriate than a potato salad? My local market was selling blue potatoes so I picked up a total of 2 pounds of blue, red and white creamer potatoes and mixed them with some other veggies for a different take on potato salad.

Red, White and Blue (and yellow and green) Potato Salad
2 pounds red, white and blue (purple) new potatoes
1/2 cup corn
1/2 cup petite peas
1/4 crumbled blue cheese
1 small bunch scallions, chopped
8 slices bacon cut in half
3/4 cup mayonnaise
3 T mustard
Juice from half a lemon

Cut potatoes into half inch chunks and place in a pot with enough cold water to cover. Bring to a boil and let boil, uncovered, for 15 - 20 minutes until just fork tender. Drain potatoes and spread out on a baking sheet to cool. While the potatoes are boiling, cook the bacon strips and allow to drain on paper towels. Chop bacon and place in bowl with cooled potatoes, corn, peas, scallions and blue cheese. To make the dressing, combine mayonnaise, mustard and lemon juice in a bowl and mix. If you're not a huge fan of mustard, start with two tablespoons and only add the third if you think the dressing needs it to cut the mayonnaise further. When you're happy with the taste of the dressing, add it to the bowl of potatoes and mix until combined. Salt to taste and let mellow in the fridge until you're ready to serve. Enjoy!

Thursday, July 3, 2008

Basil Pesto

I am not so patiently waiting for the hoards of green tomatoes in my garden to ripen and the basil plants to grow large enough so I can start to pillage them for pesto. As much as I try to wait for the significantly better homegrown stuff this time of year, I absolutely could not stand it any longer and went to the store for a bunch of basil and some heirloom cherry tomatoes. If you haven't made homemade pesto before, give it try. You cannot beat the freshness.

Basil Pesto
3 cups loosely packed basil leaves
2 cloves garlic
1/2 cup pine nuts
1/2 cup grated parmesan
1/2 cup extra virgin olive oil

Place basil and garlic in the bowl of a food processor and pulse until roughly chopped. Add the pine nuts and parmesan and pulse again until combined. With food processor running, drizzle olive oil through feed tube of processor. Run until well combined. For this heirloom tomato salad, I tossed about half the pesto with a mixture of heirloom cherry tomatoes. Finish with a sprinkling of salt and enjoy!