Showing posts with label Beef. Show all posts

Monday, November 22, 2010

Dem Bones

Photobucket

I used to love the knowing looks butchers would flash my way when I would ask for beef bones, chicken carcasses or offal. I once received a marriage proposal after requesting three pounds of oxtail. Rather, I think the butcher told my boyfriend, who was with me at the time, to ask me to marry him right away. ‘Put a ring on that,’ may have been the exact words. You get the point.

That was at least four years ago when I first started making my own stocks and needed to ask butchers for things like chicken carcasses. Those days are pretty much over. It seems it is no longer uncommon for someone to make their own stock or request lesser known cuts of meat. This, in itself, is a good thing. I love that the food revolution has carried quality product and more homemade—fewer processed—ingredients into the kitchen of your average home cook. However, if I am being totally honest, I miss the knowing looks. And the marriage proposals.

One key thing I have learned about stocks at The French Culinary Institute, is that any kitchen without veal stock is an ill-equipped one. On occasion I have the opportunity to bring home from school a quart container of veal stock, or excess demi glace (veal stock that has been reduced by half), but last week I found that all of my reserves had been used up. It is getting cold here in New York and I am going to need a freezer full of stocks to accommodate all of the soup and stew making I have planned for the coming weeks. Unfettered by the lack of butcher attention received in recent years, I set out last week to gather the ingredients for a batch of veal stock.

Though not a difficult task, veal stock is slightly more complicated than the chicken or vegetable stock I make. Since I make a brown veal stock, I have to roast the bones and mirepoix before leaving everything to gently simmer on the stove for hours. Still, considering what a difference using a homemade stock makes in the final flavor of many, many dishes, the effort is minimal in relation to the payoff.

The recipe included below does not need to be followed exactly (I try to use up whatever vegetable trimmings I have stashed in the freezer when making stock), but a good guideline is to aim to include mirepoix (carrots, onion, celery) equivalent to about 20 percent of the weight of bones being used. So, for my seven pounds of veal bones, I included about one and a half pounds of mirepoix.

Once the stock has simmered for roughly eight hours, cool it down quickly by breaking it into smaller containers and chilling them over an ice bath. Once cool, place the containers in the fridge if you are planning on using the stock in a day or two. Otherwise, store them in the freezer for the next soup, stew or braise you make, all of which can benefit from a little homemade stock flavor.

Veal Stock
Makes about 5 quarts

7 pounds veal bones
Vegetable oil as needed
1/2 pound carrots or carrot trimmings cut into 3-in lengths
1/2 pound onions or onion trimmings, peeled and quartered
1/2 pound celery or celery trimmings, cut into 3-in lengths
Greens from one leek, thoroughly rinsed
1/2 cup tomato paste
1/2 cup tomato trimmings or 1 plum tomato, roughly chopped
6 cloves garlic, smashed
Bouquet garni (bay leaf, thyme sprigs, peppercorns, parsley sprigs)

Preheat oven to 450˚
Place a heavy bottomed roasting pan in the oven to preheat. Coat the veal bones in oil and place in the pan. Roast the bones for 30 minutes then turn the bones over and continue roasting for 30 more minutes. Toss the carrots, onions, celery and leek greens with the tomato paste and add them to the roasting pan for the last 15 minutes of cooking (after the bones have been roasting for 45 minutes). Place the roasted bones and mirepoix in a large stockpot. Deglaze the roasting pan with some water to loosen the browned bits, scraping them up if necessary. Add the water and browned bits to the stockpot along with the tomato trimmings. Add cold water to the stockpot until the bones are fully submerged (about 6 quarts of water depending on the pot) and bring to a boil. Reduce the heat to a simmer and skim well. Add the tomatoes, garlic and bouquet garni. Continue to simmer for eight hours. It should be a very low simmer with just a few bubbles breaking the surface every few seconds. Continue to skim the surface while the stock is simmering. Removing the scum that floats to the surface will result in a clear stock - a sure sign of success in a finished stock.

After the stock has simmered for eight hours, strain it and place in smaller containers to cool over an ice bath. I plug up my sink and fill it with an ice and water mixture. I then pour the stock into metal bowls and place the bowls in the ice bath to cool. Pour the cooled stock into quart containers and freeze or place in the refrigerator for later use.
Wednesday, December 9, 2009

Poutine, Freezing and Stewing

Photobucket

It is freezing and I am stewing.

As already established on this blog, I am aware that freezing is a relative term so please, don’t all you Midwesterners jump on me at once. It has dropped into the 40s at night this week and for Los Angeles, by definition, that is freezing. Not to mention that I just returned from Wisconsin where it was, ahem, in the low 40s at night.

As far as the stewing is concerned, it mainly centers on meat, not my emotional state of mind – a much more delicious alternative. I just can’t help myself; I don’t want to turn my oven off in this cold weather. Already there have been soups and stews; braises and bread baking; even pastries on one choice afternoon.

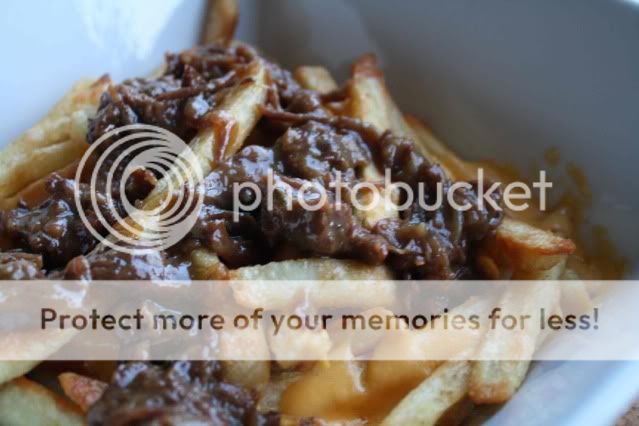
The most celebrated winter dish, new to my kitchen this year, is poutine. It’s only been celebrated by one person so far, but he has done enough on his own to earn it that designation. Poutine sounds pedestrian in theory – fries, covered with melted cheese curds, covered with gravy – but the right gravy can elevate the dish to something else entirely.

I originally created a poutine recipe of my own to avoid the $120 dinners at Animal that were threatening to turn into a weekly occurrence. My boyfriend had it bad for poutine and unlike the Canadian creators of the dish, we seemed hard-pressed to find it on many menus. As we would start planning for our weekend and the inevitable question of where to eat came up, I could see his eyes start to glaze over as he thought about the dish and subsequently pleaded with me to go to Animal, just one more time.

Not that I have a problem eating at Animal every weekend. It is by far my favorite restaurant in L.A. at the moment, but my pocketbook and my arteries started begging for mercy. So, into the kitchen I went determined to save our health and our finances and according to the boyfriend, I succeeded. He even thinks my poutine is better than Animal’s. I’m not certain about that but it is good enough to satisfy his craving and easy enough that I think you’ll enjoy making it at home.

Use this recipe only as a guide. I have varied it each time I’ve made it according to what I already had on hand and it is still delicious, even with modifications. Make sure you use real deal cheese curds - Trader Joes sells them if you have trouble locating them - and feel free to make your own fries, I just like to make the process slightly easier by using the frozen variety. I make my gravy with oxtails because that’s what Animal uses, but if you have a favorite recipe, by all means have at it. And finally, apologies in advance if this is your first introduction to poutine. I take no responsibility for resulting addictions.

Poutine
Serves 2

Gravy:
1 – 1 1/2 pounds oxtail (4 – 6 meaty pieces)
1 quart chicken (or beef) stock, preferably homemade
1 onion, roughly chopped
2 carrots, roughly chopped
2 pieces celery, roughly chopped
1 bay leaf
2-3 sprigs thyme
2 T olive oil
Salt and pepper

To Serve:
French Fries (I use one bag of frozen fries from Trader Joes)
1/2 cup cheese curds

Preheat oven to 375*
Sprinkle the oxtails with salt and pepper. Heat the olive oil in a Dutch oven over medium high heat and brown the oxtails on all sides. Remove to a plate. Add more oil if the pan is dry and sauté the onions, celery and carrots for five minutes, until just starting to soften. Return the oxtails to the pan and add the stock, bay leaf and thyme. If the stock doesn’t almost cover the oxtails, add water until the tops of the oxtails are just peaking out of the stock (but no more than two cups of water). Cover and place in the oven. Cook for three to four hours until the meat is tender and falling off the bone.

When the meat is finished, turn off the oven, remove the oxtails to a plate and set the pan over medium high heat. While the remaining stock is reducing (it should already be significantly reduced after four hours in the oven) pick all of the oxtail meat off the bone. When the stock is looking thick and gravy-like, add the meat to the gravy to warm through.

If you haven’t already, and you should have already, make your French fries. Transfer the French fries to an oven-safe serving dish and sprinkle with cheese curds. Place in your cooling oven for five – 10 minutes until the cheese is melted. Top the fries with gravy and serve while piping hot.

Monday, May 18, 2009

Empanadas

Photobucket
Summer is encroaching on my backyard – and I couldn’t be happier. Each time I step outside to check on the garden it seems the tomato plants have sprung up another six inches and the pole beans have climbed further up their trellis. I have the warm Southern California days to thank for all of this progress and it is because of those warm days that I surprised myself when I cranked the oven up to 400 degrees for the better part of the afternoon. With no air conditioning in my humble abode, this is quite the commitment, but one that was well worth it as I turned out my first batch of empanadas for a friend’s birthday celebration.

Empanadas are an enticing ethnic food that I have shied away from making at home, always assuming that indigenous hands would do a much better job than my white-bread paws could ever hope to achieve. This is also why I have yet to make any Indian dishes at home. I love my Tikka Masala and I’m pretty sure that Taj Indian delivery will always do a better job than I.

The first time I considered making empanadas was after hearing my friend Lauren recount her experience making hundreds of them for a party for her Argentine boyfriend. She, like me, doesn’t have the Latin blood pumping through her veins that I assumed was necessary for a successful empanada. Knowing that her creations were well received encouraged me.

The final push came from the recent New York Times article on empanadas. I sent the article and recipes to Lauren and we began talking about the different types of empanada filling and the kind of dough she uses - after some unsuccessful attempts at making her own, she now relies on Discos, packages of premade frozen discs of empanada dough. Lauren even happened to have a package in her freezer leftover from a recent party. She offered to give it to me and I earnestly accepted. Armed with Discos and the New York Times recipes, it was time to get over my reservations.

I didn’t want to completely cop out with the pre-made dough so I decided to make half the batch with Discos and half the batch with the New York Times recipe. As I mentioned, I was making the empanadas for a friend’s birthday celebration, which turned out to be the perfect opportunity to have a large group compare the Discos with their homemade counterpart. I am actually happy to report that the Discos beat my dough, hands down. I’m happy because it will make future attempts at empanada making even easier. Not that the dough is particularly hard to make, in fact I think we may have gone a little too fat-conscious in Los Angeles - the hardest part of the dough recipe was tracking down lard. I stopped at three stores before finally locating the animal fat at a small neighborhood market. If you’re planning your own empanada party, I recommend saving yourself the trouble and using Discos.

The traditional minced meat filling was the crowd favorite, only marginally beating out my own corn and goat cheese experiment. Both filling recipes are included below. If you want to try your hand at the dough, check out the New York Times recipe.

In addition to the empanadas, I brought a tomato seedling to the party as a gift for my friend. A recent text informed me that her tomato plant, like mine, is, “sprouting like a teenager.” I hope your gardens are having as much luck as we are here in Southern California. And, if you’re going to try your hand at empanadas, I hope you, unlike me, have central air.

Photobucket

Minced Meat Filling
Adapted (doubled) from the New York Times

1 pound lean beef, minced
3 T lard
2 cups chopped onion
Salt and fresh black pepper
1/2 t ground cumin
1/2 t smoked paprika
20-pack of 5-inch Discos
3 hard-boiled eggs, sliced
12 pitted cured black olives, chopped
30 raisins
1 large egg, beaten with 1 T water for an egg wash

Preheat Oven to 400*
If you, like me, weren’t able to find minced meat, cut your beef into chunks and process in a food processor until minced. Melt the lard in a large sauté pan. Add the onion and cook until it starts to soften, then add the beef. Cook until the beef is lightly browned and stir in the seasonings – salt, pepper, cumin and paprika.

Place the filling on half of a Disco, leaving a half-inch border at the edge. Top with a slice of egg, some chopped olive and a few raisins. Brush the border and the other half of the Disco with egg wash and fold over. Crimp the edges with a fork to make sure they are sealed.

Place the filled Discos on a baking sheet, lined with parchment paper, and bake for 10 minutes. Flip the empanadas over and cook for an additional 5 to 10 minutes until golden brown.

Corn and Goat Cheese Empanada Filling

2 T olive oil
3 shallots, chopped
2 cloves garlic, chopped
Corn cut from three ears of corn
1/2 bunch of cilantro, roughly chopped
1/2 cup of goat cheese

Preheat Oven to 400*
Heat the oil in a large sauté pan and add the shallots and garlic. Cook just until fragrant and add the corn. Cook until the corn begins to soften 8 to 10 minutes. Let the mixture cool before transferring to a food processor. Add the cilantro to the food processor and process until the corn is coarsely chopped. Stir in the goat cheese by hand and season with salt and pepper.

Place the filling on half of a Disco, leaving a half-inch border at the edge. Brush the border and the other half of the Disco with egg wash and fold over. Crimp the edges with a fork to make sure they are sealed.

Place the filled Discos on a baking sheet, lined with parchment paper, and bake for 10 minutes. Flip the empanadas over and cook for an additional 5 to 10 minutes until golden brown.

Photobucket
If you are making your own dough, a lid or other round surface makes a good guide.

Friday, January 2, 2009

Beef Wellington

Photobucket
It's hard to believe that the holidays have already passed us by. I tried to hold onto them as long as I could by hosting a dinner party on January 1st to celebrate the new year. Special occasions like this call for once-a-year special dishes and for me, Beef Wellington is definitely a show-stopper. Aside from the exceptionally expensive cut of meat the dish calls for, you can spend an entire afternoon going through all of the steps. Of course, that's often a positive for me. I love the whole process. The step by step of putting together an elaborate dish is my happy place. For a brief afternoon, there is nothing else going on in the world other than what's happening in my kitchen and I love that.

It's been almost three years since I last made a Beef Wellington and I needed a new recipe. I settled on Tyler Florence's "Ultimate" recipe. I have yet to be disappointed by a dish in that series and I did not want to risk this three-pound beef loin on an unknown. He did not disappoint this time around. I will keep this recipe exactly as is the next time I make it. If you're cooking for less than eight people, by all means, save some money and get a smaller beef loin.

Beef Wellington
Serves 8
Adapted from Tyler Florence

1 1/2 pounds button mushrooms
2 shallots, roughly chopped
4 cloves garlic, roughly chopped
leaves from 8 thyme sprigs
2 T butter
2 T olive oil + more for loin
3-pound beef loin
10 - 12 slices prosciutto
2 T dijon mustard
1 pound puff pastry + flour for rolling out
1 egg for an egg wash
salt and pepper for seasoning to taste

Place shallots, garlic, mushrooms and 1/4 of the thyme leaves in a food processor and pulse until finely chopped. Heat butter and olive oil in a pan large enough to hold your beef loin and add the mushroom mixture. Saute until most of the liquid has evaporated (this took me more than 20 minutes). Season with salt and pepper and set aside to cool.

Secure the tenderloin with kitchen twine in a few places, to help it keep its shape. Rub with olive oil, salt and pepper. Remove mushroom mixture from the pan and heat a small amount of olive oil in the same pan. Sear the tenderloin on all sides until starting to brown. Remove from the pan and let cool slightly. 

While the tenderloin is searing, set out a large piece of saran wrap and shingle the prosciutto into a rectangle large enough to wrap around the whole tenderloin. Spread the cooled mushroom mixture over the prosciutto and season lightly with salt and pepper and the remaining thyme leaves (see photo below). Cut the twine off the tenderloin and rub with the dijon mustard. Lay the beef in the middle of the prosciutto rectangle and roll up to cover the beef. Place the whole roll in the fridge for 20 - 30 minutes to help the mixture hold its shape.

Preheat the oven to 425*. Roll out the puff pastry into a rectangle large enough to fully encase the beef. If you're working with smaller sheets of pastry, you may need to overlap them. Remove the beef from the fridge and remove the saran wrap. Place the beef in the puff pastry and roll up, using some of the egg wash to seal the bottom as well as the ends. Place the roll on a baking sheet lined with parchment or a silpat, seam side down. Cut four small slits in the top to help release steam. If you have extra pastry from the ends of the roll, you can cut out decorative pieces to place on top. Brush the puff pastry shell with the egg wash and place the beef in the oven for 40 - 45 minutes until an thermometer registers at least 125*. Remove from the oven and let sit for 10 minutes before slicing so the juices can redistribute. Enjoy!

Photobucket

Monday, December 8, 2008

Beef Short Ribs - Locally


Bringing together all of the local ingredients for this dish has been a great learning experience for me and one that is having a lasting effect. While I've always loved shopping at the farmers' market, I'm now making a point to pass up produce at the market and waiting for my weekend market. It's not convenient, but it's one of the little changes I can make while trying to be a conscience eater.

All this effort has the added benefit of tasting delicious. The short ribs were amazing, I'm certain due to the high quality ingredients and the higher quotient of homemade goods that went into making them. The only thing I would change for the next round is doubling the recipe. They tasted even better the next day and I would have loved to have more on hand.

Beef Short Ribs - Locally
Serves 2

2 pounds J&J Grass-fed, California Short Ribs
3 T Tutta California Olive Oil
1 onion
2 carrots
3 celery stalks
4 cloves garlic
1/2 t salt
3 T Tutta California Cabernet Vinegar
4 thyme sprigs
2 California bay leaves

Preheat oven to 325*
Season short ribs with salt and pepper. Heat olive oil over medium heat in a dutch oven and brown short ribs on all sides. Remove short ribs to a plate. Cut celery, carrots and onion into chunks and add to a food processor with the garlic. Process until well-blended and almost paste-like. Place vegetable mixture in the dutch oven along with the salt and tomato paste and saute until vegetables begin to soften. Stir in two cups of the stock along with the vinegar, thyme and bay leaves. Nestle the short rib pieces in the vegetable mixture, adding more stock until the ribs are completely submerged. Cover and place in the oven for 2 - 3 hours until the meat is falling off the bone. Remove the thyme and bay leaves and discard. Serve the ribs with some of the cooking liquid and polenta. Enjoy!

Wednesday, October 1, 2008

Philly Cheese Steak Number Two

I love the foodie blogroll. It's a great community of food bloggers started by The Leftover Queen. Every month she hosts the Royal Foodie Joust where bloggers come together to create dishes based around three ingredients. This month, the ingredients were fennel, dairy and parsley. I decided to take another go at the boyfriend's favorite sandwich and do a twist on the philly cheese steak. I've sauteed fennel instead of the traditional onion and made a parsley cheese sauce to top everything off. He seemed to think it was a keeper. I think he would still prefer the traditional version, but this is one for the rest of us.

Philly Cheese Steak with Sautéed Fennel and Parsley Cream Sauce

1/4 cup + 2 T Butter

1/4 cup flour

1 pint milk + more for thinning cheese sauce as necessary

1/2 bunch of parsley, chopped

3/4 cup shredded provolone or italian cheese blend

1 t fennel salt

1 fennel bulb

6 oz sliced mushrooms

1 T olive oil

1 lb thinly sliced beef sirloin tips

4 french sandwich rolls

Melt butter in a medium pan and sprinkle flour over. Stir until a roux is formed and cook for 1 - 2 minutes, stirring constantly. Heat milk in the microwave and began adding to the roux in half-cup increments. Make sure each addition is fully incorporated and allow mixture to cook down slightly before adding the next. Once the entire pint of milk is incorporated, remove from heat and stir in 1/2 t of fennel salt, parsley and cheese.

Quarter fennel bulb, core and slice thinly. Melt remaining 2 T of butter in a pan and add fennel. Sauté for 5 minutes and add sliced mushrooms. Cook until fennel is soft and starting to caramelize. While fennel is cooking heat 1 T olive oil in a pan on high and cook sirloin quickly, cooking in 2 rounds if necessary to avoid crowding the pan. Season with remaining 1/2 t of fennel salt.

Toast french rolls and spread cheese sauce over each roll (thinning cheese sauce with more warm milk before serving if necessary). Layer fennel mixture, followed by steak and finally more cheese sauce. Enjoy!

Saturday, August 30, 2008

Smothered Rib Eye

Long weekends spent at my family's home up north mean three things: lots of rest and relaxation away from cell phones, plenty of time spent playing with and walking dogs and evenings spent around the dinner table with high-quality ingredients prepared simply to leave us more time to enjoy one another.

Last night we were treated to a dinner of the most beautiful rib eyes I have ever seen, grilled by my father. No one I know can grill meat better than him. Perhaps it's because I grew up on his food, but no restaurant I have ever been to has matched the flavors or the perfect degree of "doneness" that he brings inside from the grill. Last night he was using a Weber with 100 percent natural mesquite charcoal.

When I feel compelled to take a picture of a piece of raw meat, you know dinner is going to be good. To make these guys "smothered" we sauteed vidalia onions and portobellos until caramelized. Just cut up some fresh produce and throw in tomatoes from the garden for a salad and dinner is served.

Smothered Rib Eyes
Serves 6

3 large, well-marbled rib eye steaks
2 vidalia onions
6 small portobellos (or three regular)
3 T olive oil
3 T balsamic vinegar
soy sauce for marinating
salt to taste

Drizzle the steaks with soy sauce and sprinkle with salt. Leave them to marinate for a few minutes while you heat up the grill. Slice the vidalia onions and portobellos into 1/4" to 1/2" pieces. Heat the olive oil in a large pan over medium heat, add the onions and saute for about five minutes before adding the mushrooms. Cook for an additional five minutes before adding the balsamic vinegar. Allow the mixture to hang out over low heat, stirring occasionally, while you grill the steaks (this process can be made much easier if you're inside taking care of the smothering, while dad is outside grilling and mom is getting the salad ready - I love family weekends). Once the steaks have reached your desired doneness. Bring them inside and let them sit for ten minutes before slicing in half and layering the smother on. Serve with salad and veggies and enjoy!