Showing posts with label Vegetables. Show all posts

Monday, March 18, 2013

Eat Your Greens Salad

 photo GreenSalad_zps872ea011.jpg

The inspiration for this latest salad obsession arrived courtesy of a catering delivery to our office that included this dish in all of its green goodness. Crisp tender vegetables (sugar snap peas, broccoli and edmame), vibrant color and lots of flavor - my only complaint was the heavy dose of vinaigrette. The oily slick on the restaurant version makes you feel like you are undoing all the good done by eating your greens. I absolutely think this salad needs some sort of dressing and a bit of fat, but for me, a drizzle of toasted sesame oil and a sprinkling of salt is sufficient to bring out an earthy, delicious flavor.

Whatever you do, do not skip the blanching step. It makes all the difference to get the vegetables just the slightest bit tender and it certainly doesn’t hurt in preserving the vibrant green color. Blanching traditionally includes a quick dunk in a bowl of ice water to arrest the cooking, but here I opt for stirring in the frozen edamame after the vegetables are drained. They help to quickly cool down the other vegetables, while the residual heat from cooking thaws the edamame. If you prefer an ice bath, by all means use the traditional method, but if you, like me, find yourself without an ice maker and vast quantities of ice on hand, stirring in the edamame works well here.

Eat Your Greens
Makes 2 Quarts

1 pound sugar snap peas
12 oz package broccoli florets
6 oz frozen, shelled edamame
2 – 3 T toasted sesame oil
Salt for cooking and to taste (Kosher – I use Diamond Crystal)

Put a large pot of water on the stove and bring to a boil. While the water is heating, prepare the vegetables.

Remove the stem-end of the sugar snap peas and if desired, the string that runs the length of the pea. Cut the peas on the diagonal into 1/4“ to 1/2“ segments. Roughly chop the broccoli florets.

Once the water comes to a boil, add a generous amount of salt (at least 1 tablespoon). Add the sugar snap peas and broccoli to the water and cook for two minutes. Drain the vegetables in a colander and stir for one to two minutes to speed cooling. Add the frozen edamame and stir until the edamame is thawed – an additional one to two minutes.

Transfer the vegetables to a bowl and stir in two tablespoons of the sesame oil and salt generously. Taste the mixture and if the sesame flavor is mild, add more to taste.

Thursday, August 11, 2011

A New Kind of Polenta

Photobucket

This is yet another one of those culinary ideas that I kick myself for not figuring out on my own. It makes perfect sense. Polenta is made from milled corn, dried and packaged and sent to you to be reconstituted and simmered away on the stove. Why not capture the intense summer flavor of corn by grinding corn, straight off the cob, in a Cuisinart, at home to enjoy the sweet fresh flavor of corn in a whole new way. Somewhere between creamed corn and polenta, this turns out much sweeter than the polenta you're used to.

Serve it as a side dish to a hearty savory stew and the sweetness will perfectly balance the salty savory nature of your main course.

Sweet Corn Polenta
Adapted from Plenty by Yotam Ottolenghi

6 ears of corn
2 1/4 cups water
3 T butter
Salt
Black pepper

Cut the corn from the cob and place in a saucepan with the water. Bring to a simmer and cook for 12 minutes. Drain the corn, reserving the cooking liquid. Transfer the corn to a Cuisinart and process for several minutes to break down the corn as mush as possible. Return the milled corn to the saucepan and add the cooking liquid. Cook over low heat for 10 to 15 minutes, stirring frequently, until thickened. Fold in the butter and season the polenta with salt and pepper to taste.

Thursday, July 28, 2011

Gazpacho Garnish - Kicking It Up a Notch!

 photo GarnishSoup3.jpg Earlier this week I promised you a way to kick up the garnish on this gazpacho. This presentation technique takes a delicious, casual summer soup and turns into something elegant and worthy of company.

It's really quite simple and the only tool you need is a ring mold. If you don't have any and you're interested in working on presentation, I strongly recommend getting a set like this. You will find a hundred and one uses for it.

Here are some suggested ingredients for the vegetable salad that make up the bulk of the garnish, but you should use whichever vegetables you have on hand or whatever looks good at the market that week.

1 small cucumber, cut into a small dice
1 yellow summer squash, cut into a small dice
1 red bell pepper, cut into a small dice
1/4 bunch of cilantro, chopped finely
Salt and pepper
1 avocado

Make the vegetable salad by combining the cucumber, squash, bell pepper and chopped cilantro. Season with salt and pepper.

Cut the avocado in half and peel. Place the avocado cut side down on a cutting board and slice very thinly.

Photobucket

Spray the ring mold lightly with cooking spray so the avocado won't stick to the mold once you're ready to remove it. Place the thin slices of avocado in overlapping layers around the ring mold as pictured above.

Photobucket

Gently spoon the vegetable salad into the avocado ring. If desired sprinkle a bit more cilantro and salt over the top of the salad.

Photobucket

Remove the ring and make sure the salad is holding its shape.

Photobucket

Pour in your finished gazpacho and enjoy!

Tuesday, April 5, 2011

Harbinger of Spring

Photobucket

Growing up, eating artichokes meant simmering them until tender and serving them with a dip of mayonnaise mixed with a bit of soy sauce. Had we been hip to it at the time, we might have called it a soy aioli, but to us it was just the perfect creamy salty accompaniment to those boiled leaves and still, to this day, I can’t eat artichoke leaves without it. Luckily, my artichoke repertoire has expanded ever so slightly beyond boiled leaves.

At FCI we prepare artichokes by ‘turning’ them, or removing all the outer leaves and using a paring knife to remove the green skin until you’re left with the tender heart of the artichoke. Once you have the heart, you can braise, roast, grill or do just about anything you want with it. Currently, in the restaurant at FCI, we serve slivers of braised artichoke heart with a roasted rack of lamb. They are delicious.

One of the perks of working on set at a cooking show is the opportunity to bring home the occasional excess produce. Once the segment is complete, the produce that was used to dress the set is usually still perfectly good, but won’t be visually appealing if saved for another shoot on another day. After the crew has been fed and talent takes what they want, the rest is up for grabs. I am very lucky to be working on these shows as the spring season rolls in and great produce such as asparagus, dandelion greens, spring onions, and of course artichokes, are the topic du jour. I made off with a few artichokes last week and while I was craving my mother’s simmered artichoke with ‘soy aioli’ I decided to broaden my artichoke horizon a bit more and see what I could come up with.

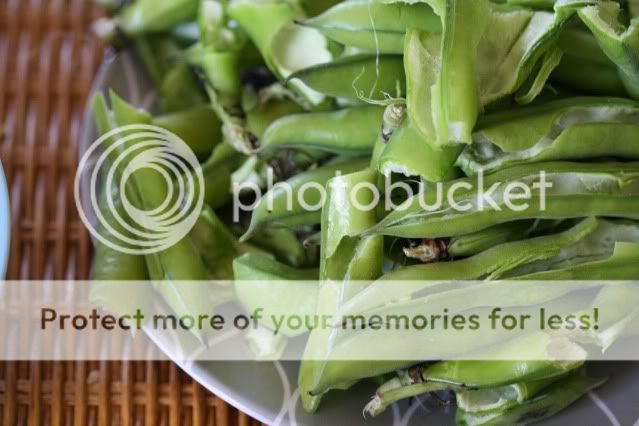
Enter Plenty, the new cookbook from Yotam Ottolenghi. I won’t say much about the book today, because I am smitten with the recipes and have a feeling that you may be hearing a lot about it over the coming weeks. Just know this: If you’re looking for some inspiration in the vegetable department, you are sure to find it in this book. I found mine when a relish of fava beans jumped off the page at me via some gorgeous photography. Favas are my ultimate harbinger of spring and they seemed the perfect accompaniment to the artichokes I had waiting. And a little hint about that other accompaniment I love so much? Hold on to the leaves you remove from the artichoke. Simmered over low heat they go very nicely with a little soy aioli.

I am providing the recipe here as Ottolenghi wrote it, but I was out of panko so I used a mix of walnut flour and whole wheat flour to bread the artichoke hearts. Use whatever, even plain old flour works well too.

Globe Artichokes with Crushed Fava Beans
Adapted from Plenty by Yotam Ottolenghi

1 3/4 cups shelled fava beans
1 small garlic clove, crushed
4 T extra-virgin olive oil plus more for frying
Freshly ground black pepper
1½ t Maldon sea salt
2-3 globe artichokes
3 lemons
1 egg, beaten
3 T panko
3 T fresh mint, chopped
2 T fresh dill, chopped

Bring a pan of water to a boil, add the beans and blanch for three minutes. Drain, refresh and leave in a colander to dry. Remove the outer skins by pressing each bean gently between your thumb and forefinger. Put the shelled beans in the bowl of a food processor. Add the garlic, four tablespoons of oil, some black pepper and half a teaspoon of salt, then pulse until just roughly chopped – don’t overdo it.

Cut off most of the stalk from the artichokes and pull off the tough outer leaves. Once you reach the softer, pale leaves, trim off the top, so you're left with the heart and some very soft leaves around it. Scrape off any remaining tough leaves and the 'hairs' in the center. Rub with a cut lemon to keep the artichokes from turning brown.

Bring a pan of water to a boil, drop in the artichokes and simmer until a knife cuts easily through the flesh, seven to 10 minutes. Drain and dry on paper towels. Put the artichokes in a bowl with the beaten egg, mix, then lift them into a bowl filled with the panko and 1/2 a teaspoon of salt, and coat them well.

Add enough oil to a pan to come 1 1/4 inches up the side. Heat until almost smoking. Fry the artichokes until golden, for about four minutes, turning them as you go. Transfer to a plate lined with paper towels and sprinkle with salt.

Put the fava bean mixture in a bowl and stir in the chopped herbs and the juice of a lemon. Spoon some of this over each serving plate, top with an artichoke heart and spoon more of the beans on top. Finish with a drizzle of olive oil and serve with a lemon wedge, if desired.

Tuesday, December 14, 2010

Comfort in a Bowl

Photobucket

Most days I push myself pretty hard. I work full time and go to school at night. In my spare minutes I compose posts for Apples and Butter, do a bit of freelance writing and work my tush off at making contacts within my industry here in New York. During my best weeks, I even get up early to stop by the gym on my way in to work.

Today is not one of those days and it is certainly not one of those weeks.

I took my level three final last night at The French Culinary Institute. It was the midterm for the entire program at FCI and worth 50 percent of my grade. In other words, a big deal. While it is a relief to have the thing over with, I am feeling a bit worn down from the whole process.

The flip side of pushing myself so hard is that I also have learned how to hit the brakes and indulge myself a bit when it is truly needed. Today I have plans for a lunchtime trip to Strand to treat myself to a new (used) cookbook or two to flip through while I lay in my cozy bed watching movies, and a big bowl of warm, comforting soup for dinner.

There is something so restorative about a bowl of soup.

This is yet another riff (or shall I say variation? Somewhere between this week and last, I began to hate the word riff, which is entirely unfortunate since it seems to be the favored word of bloggers and established writers alike when referring to their own take on something: ‘My riff on Suzanne Goin’s bacon-wrapped dates,” or “we were riffing on different potato-based soups.” Ugh). I digress. This is yet another way to use my vegetable soup formula. Specifically, this is an example of how to use the formula to make a roasted vegetable soup. Butternut squash is the main ingredient, but I also threw in some roasted mushrooms. I find the savory flavor of mushrooms in pureed soup to add a creaminess that is particularly comforting and I may have mentioned this already, but today I am in need of some comfort.

Refer back to the original vegetable soup formula if you would like to make some changes to this basic variation. And by all means do. Your perfect bowl of comfort may not look exactly like mine.

Roasted Butternut Squash and Mushroom Soup

1 lb cubed butternut squash
8 oz domestic mushrooms, sliced or quartered, plus more for garnish if desired
Canola oil
1 small onion, or half of a larger one, diced
A few sprigs of tarragon
A few springs of thyme
1 1/2 – 2 quarts of vegetable stock (6 – 8 cups)
Salt and pepper to taste
Walnut oil (optional)

Preheat oven to 375˚
Toss the mushrooms and butternut squash with a bit of oil and salt pepper. Spread out the vegetables on a roasting pan and bake until the squash is tender, about 30 to 40 minutes. Add a bit of canola oil to a soup pot placed over medium heat. Add the diced onion and sauté until softened. Add the thyme and tarragon and sauté for a minute or two longer. Add the roasted vegetables to the pot and cover with vegetable stock. Simmer for 30 minutes. Remove the thyme and tarragon and transfer the mixture to a blender to puree, in batches if necessary. Return the pureed soup to the pot and season with salt and pepper. If desired, serve with a garnish of roasted mushrooms and a bit of walnut oil.

Tuesday, November 30, 2010

Vegetable Soup Formula

Photobucket

Vegetable soups are quickly becoming my savior as I enter my first, cold New York winter. I used to bring salads to work in Los Angeles year-round and they proved sufficient for a quick meal at my desk. I tried that here in New York during the first few weeks of November and it turned out to be less than satisfying. So much so that when faced with the green leaves staring back at me from the office refrigerator, I quickly turned and walked out the door in search of something warm and a bit more comforting.

The main problem with my new lunchtime ritual is the detrimental effect it has had on the snugness of my wardrobe. Add that to the battle already underway with the culinary school bulge and it is a recipe for disaster. One more trip to Guy & Gallard for lobster bisque and no amount of Saturday morning boot camp in Central Park is going to bring me back.

Enter the humble vegetable soup. This is the perfect comfort food compromise. It is warm, thick and packed with the flavors of fall, but if you keep the ingredients to vegetables, stock and a few key flavorings, it is supremely healthy and nourishing.

This recipe, as with most, is just a guideline. Be sure to experiment with your favorite flavors. Keep this simple formula in mind and you will produce a successful soup every time:

1. Sauté diced onions in a bit of oil. After the onions soften add any garlic, ginger or other such flavorings (not herbs) and sauté a bit more. Season with salt and pepper.
2. For a roasted vegetable soup, dice the vegetables and roast at 375˚ until tender. Alternately, you can add the vegetables to the pot with the onions and sauté a bit to achieve some color. If roasting, add the vegetables to the pot with the softened onions after roasting.
3. Add enough vegetable stock to cover everything, toss in any herbs you want to use and simmer for at least 30 minutes. If you did not roast the vegetables, make sure they are tender before proceeding.
4. Remove the herbs and use an immersion blender or a standard blender to purée the soup.
5. Return the puréed soup to the pan and season to taste with salt and pepper.

There. You just made delicious and healthy vegetable soup. The only thing I must insist on is that you, if at all possible, make your own vegetable stock. It is so simple, yet it adds so much to the final product. Not to mention that it is a great way to use up vegetable scraps. For a refresher on vegetable stock, go here. If you are not quite ready to experiment on your own, here is the recipe for my latest concoction, carrot ginger pear soup.

Carrot Ginger Pear Soup
Makes about 2 quarts

1 small onion, diced
2 T vegetable oil
1 pound carrots
2 ripe pears
2 slices fresh ginger
1 1/2 quarts vegetable stock
Salt and pepper

Heat a medium pot over medium high heat. Add the oil and diced onion and sauté until soft. Add the ginger slices and continue to sauté. While the onions are sautéing, peel and roughly chop the carrots and pears. Add the carrots and pears to the pot and sauté until beginning to soften, five to 10 minutes. Season with salt and pepper. Add enough stock to cover the vegetables and simmer for 30 minutes until the carrots are tender.

To temper the spice of the ginger, remove the slices before pureeing. If you want more zip, leave the ginger in. Purée the mixture using an immersion or standard blender. Return the purée to the pot and season with salt and pepper to taste. If the soup is too thick, add a bit more vegetable stock to thin it out. Serve or cool and divide into containers for storage.

Tuesday, September 21, 2010

Tabbouleh

Photobucket

Tabbouleh is a go-to dish when cleaning out the vegetable bin which I seem to be doing a lot these days. I am still learning to adjust my shopping list to more appropriate levels for someone who is in culinary school. Three nights a week I get fed at school and I bring home leftovers of all the foods I prepare during class. There is a surplus of food in my fridge and sometimes I forget to purchase less when I head out to the store.

Even if you don’t need to clean out the veg bin, tabbouleh is a great dish to have on hand. It keeps well, and even gets better as the flavors meld together over the course of a day or two. I snack on it throughout the day and if you need a quick side for dinner, it is always great to have this sitting in the fridge waiting for you. Love those time savers.

Photobucket

Tabbouleh is traditionally made with bulgar wheat, which is what I used here, but I often use couscous, wild rice, wheat berries or basically any grain (or pasta in the case of couscous) that I have on hand. Traditional vegetables include tomatoes and spring onions with a healthy does (usually an entire bunch) of chopped parsley, but since I use this salad as a dumping ground for leftover vegetables, I do not always stick to the traditional and neither should you. In this rendition I use tomatoes, cucumbers and shallots, but in the past my tabboulehs have also included zucchini, eggplant (cooked), celery, squash and so on. The only real guidelines you should follow are to chop the vegetables small - I usually aim for a similar size to the grain I am using – and to use lots and lots of parsley.

Photobucket

Tabbouleh

1 cup bulgar or other desired grain or pasta
1 cucumber
3 roma tomatoes
1 small shallot
1 bunch parsley
Juice from 1 lemon
Olive oil to taste (start with 3 T and add from there)
Salt and freshly ground pepper to taste

Cook the bulgar or other grain according to package directions. Spread the cooked grains out on a parchment paper lined baking sheet to cool quickly. While the grains are cooking, chop the cucumber, tomatoes and shallot finely. Sprinkle the vegetables with salt and pepper and set aside. Chop the parsley finely, rocking your knife back and forth through the herb to make quick work of the bunch. Once the bulgar has cooled, combine it with the vegetables, parsley and lemon juice. Add 3 tablespoons of olive oil. You want the salad to seem moist, but not oily. If necessary, add more olive oil. Taste and add more salt and pepper to your liking. The salad is ready right away, but gets even better after some time in the refrigerator.

Monday, August 23, 2010

Nori Rolls or How To Use Up All Those Julienned Vegetables

Photobucket

I was pretty sure that when I moved to New York, at least 10 pounds were going to melt off of me with very little effort on my part. I knew I would be walking everywhere instead of driving and I guessed that the heat and humidity would be enough to serve as my own personal sweat lodge.

This may be true for some new inhabitants of New York, but not for me. If, like me, you happen to be attending culinary school, The French Culinary Institute in particular, then the increase of butter and cream in your diet is enough to offset any good that pounding the pavement of New York might have done.

Photobucket

Needless to say, when I am not in school, I am doing my best to keep my meals on the lighter side. These nori rolls have become one of my go-to snacks. I eat them like hand rolls, but I have also been known, in my lazier moments, to thrown some brown rice in a bowl, top it with veggies and use a sheet of nori to scoop everything up with my hands. These are delicious and good for you either way. Also, if you happen to be in culinary school, they have the added benefit of using up all those julienned vegetables you have laying around if you have been practicing your knife skills. If you haven’t been practicing, these rolls will give you a great excuse to start.

Photobucket

Nori Rolls
Makes 4 rolls

2 sheets roasted nori
1 cup cooked brown rice (leftovers work great here)
1 T Japanese fish sauce (preferably Ayu for its great, mild taste)
1/2 carrot, julienned
3 green onions, julienned
1/4 avocado, sliced thinly

Toss the brown rice with the fish sauce and set aside. If you just cooked the rice, let it cool before assembling the rolls. Cut one sheet of nori in half lengthwise to make two strips. At one end of each strip of nori, pile 1/4 cup of rice, leaving the bottom corner of the nori sheet exposed so you can use it to start rolling. Place a quarter of the julienned carrots and green onions on the rice on each sheet along with one or two slices of avocado. Fold the bottom corner of the nori sheet over your pile of rice and vegetables and continue rolling the sheet into itself until you form a hand roll. Use a bit of water to moisten the end of the nori sheet to get it to stick to the roll. A bit of brown rice may fall out as you are rolling. Just tuck it back in to the roll when you are finished. I eat these plain, but you may also serve them with soy sauce or extra fish sauce for dipping.

Tuesday, March 30, 2010

Fava Bean Assembly Line

Photobucket

This weekend I decided that one of the things I am looking forward to about having children is setting up my own fava bean shelling assembly line. I am not pregnant, nor do I have plans to become pregnant anytime in the near future, but after working my way through two pounds of fava beans on Saturday, to be left with only a scant half cup of shelled beans, I am in need of that assembly line.

Photobucket

There are pictures of me as a child, saddled up to the kitchen counter, dutifully snapping the ends off of green beans as my mother prepares the other and slightly more challenging components of a family meal. She was all about child labor in the kitchen and I plan on taking the same route – especially when it comes to favas. The shelling, followed by blanching, followed by peeling is a lot of work for the small amount of food you’re left with. It is worth it, but you really have to set aside a chunk of time if you’re tackling the task on your own.

Photobucket

If there are any idle hands in your household, put a bowl of fava beans in front of them and demand help. This salad from Jamie Oliver really is worth all of the effort. The favas are paired with a fresh pea dressing and smoky pancetta. This is the first time I’ve made a salad dressing out of pureed vegetables and I’m a bit bothered that Jamie Oliver beat me to the punch. It’s a particularly great idea in this case; the pureed raw peas taste quintessentially fresh and the bright green color really pops.

The fava bean prep is the most difficult part of this recipe. If you have helpers, get extra fava beans. You’ll be grateful if you have leftovers.

Photobucket

Fava Bean and Pancetta Salad
Adapted from Jamie Oliver

1 garlic clove, peeled and left whole
10 ½ ounces of shelled fava beans (from about three pounds of whole favas)
8 pieces of pancetta (about a quarter pound)
1 handful of almonds
5 ½ ounces of shelled fresh peas (from about one and a half pounds)
2 ½ ounces of Pecorino cheese, grated plus more for scattering over the plates
15 mint leaves (a handful), plus more for scattering over the plates
6 – 8 T extra virgin olive oil
Juice of 1 – 2 lemons
Salt and pepper

Preheat the oven to 475*
Bring a medium saucepan of water to a boil and do not add any salt, which would toughen the favas while cooking. Add the garlic and cook for three minutes. Add the shelled fava beans and cook for an additional three to five minutes until the favas can be easily squeezed from their skins. Drain, set the garlic aside and remove the skins from the fava beans and discard.

Place the pancetta and the almonds on a baking sheet and bake just until the pancetta is crisp, about 10 minutes. If the almonds start to get too dark, remove them and continue cooking the pancetta.

To make the dressing, place the peas and reserved garlic clove in a food processor and process until smooth. Add the cheese and mint leaves and process until combined. Add 6 T of olive oil and 4 T of lemon juice and blend. This dressing should be thick, but if it seems too pasty, add more olive oil and lemon juice until your desired consistency is reached (I added about 1 T more of each). Season with salt and pepper to taste.

Divide the fava beans among four plates. Drizzle the dressing over the fava beans - you may not need to use all of it. Scatter the pancetta and the almonds evenly over the four plates and finish with a sprinkling of mint leaves and pecorino if desired.

Monday, March 22, 2010

Roasted Beet Risotto

Photobucket

The first day of spring has come and gone and I am brimming with anticipation for the artichokes, fava beans and pea shoots that will soon appear at farmers’ markets all over Los Angeles. In an effort to cook seasonally, I have stockpiled recipes for fava bean purees and shaved artichoke salads, and held off on making a rhubarb tart until I see the harbinger of spring show up at my favorite Saturday market.

Photobucket

Beets are a year-round food here in Southern California, but the vibrant pink color imparted by roasted red beets announces spring almost as much as the honey baked ham I order every year for Easter. So, in anticipation of all the wonderful spring food headed to market, a number of beet dishes have been prepared in my kitchen.

This weekend I added a puree of roasted beets to risotto, turning the otherwise neutral colored dish into something bursting with color. The bright pink dish may look almost artificial to some, but served next to a green salad and a rack of lamb, it looks just like spring to me.

Photobucket

Roasted Beet Risotto
Serves 6 – 8 as a side dish

3 – 4 medium red beets
2 T extra virgin olive oil
2 T unsalted butter
1 small onion, minced
2 cups carnaroli or arborio rice
4 – 6 cups chicken stock or a combination of stock and water
Salt and pepper
Sour cream or crème fraiche to serve

Preheat Oven to 400*
Trim the beets of greens and scrub to remove any dirt. Wrap the beets in foil and bake until tender, 45 minutes to an hour. When the beets are cool enough to handle, remove the skin by peeling or gently rubbing with a paper towel. Puree the beets in a food processor and set aside while you prepare the risotto.

Bring the chicken stock or chicken stock and water to a boil and then keep warm over low heat. Heat the olive oil and butter in a large saucepan over medium heat. Add the onion and sauté until softened, about five minutes. Add the rice and stir until lightly toasted and turning opaque. Add about a cup of the heated liquid to the rice and stir until fully incorporated. Continue adding liquid, one cup at a time, until the rice is still lightly al dente – you may not need all the liquid. Stir in the beet puree and season with salt and pepper. If desired, add a spoonful of sour cream or crème fraiche to each serving.

Thursday, March 11, 2010

Individual Potato and Onion Tartes Tatin

Photobucket

If I could take one indulgent, calorie and fat-laden ingredient and make it good for you without changing the makeup or taste of the product at all, it would be puff pastry. Unless of course I could choose the entire category of cheese, but if I had to choose just one cheese, I would stick with puff pastry.

Its rich buttery flavor and flaky layers are totally addictive and such a good complement to so many sweet and savory applications. I love using it as an easy tart crust, rolling it into palmiers or using it for a simple dessert. Not only is it delicious, but all the hard work is already done or you. You just cut the pastry to size and use as desired.

Photobucket

That ease of use is what makes these individual tartes tatins so brilliant. It’s an exercise in slicing more than cooking. Onion and potato slices are placed in individual pie pans and topped off with puff pastry. You can assemble them in about 15 minutes and after 30 minutes in the oven they emerge with the onions meltingly tender and sweet, and the crust perfectly puffed and golden. The hardest part, at least for me, is trying not to cut yourself on the mandoline as you slice the potatoes. I always cut myself. I probably need to give in and order a set of these to save my hands from total annihilation.

Photobucket

While I love any reason to purchase a new kitchen product, I actually could not find any 5-inch pie pans. Not even my trusted Surfas had them in stock. They are available online, but if you do not want to purchase small pie pans, I found that disposable 5-inch tins worked well (and only $3.99 for 15 of them).

Photobucket

Individual Potato and Onion Tartes Tatin
Adapted from Martha Stewart

4 T butter, cold and cut into small pieces, plus more for the pans
1 package puff pastry (17 ¼ oz)
4 medium yellow onions, peeled and cut into ¼-inch slices
5 small new potatoes
Salt and pepper
¼ cup balsamic vinegar
Pinch of sugar

Preheat Oven to 425*
Generously butter six 5-inch pie pans (or 5-inch disposable tin pans). Cut six 4 ½-inch rounds from the puff pastry and place in the refrigerator to chill while you finish the tarts.

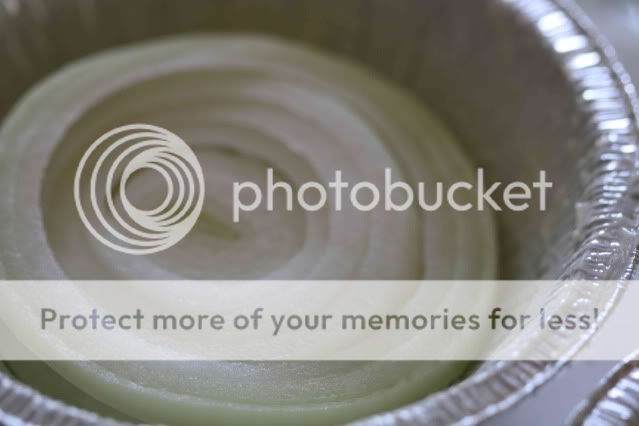
Place two to three slices of onion on the bottom of each pie pan. Use a mandoline to cut the potatoes into ¼-inch (or thinner) slices. Lay the potato slices in a circle covering the onions, overlapping the slices as pictured above. Generously sprinkle the potatoes with salt and pepper. Place the puff pastry rounds over the potatoes and bake until golden (20 minutes in Martha’s oven, closer to 30 in mine).

Invert the tarts onto a serving platter or individual plates and allow to cool slightly while you prepare the glaze. Heat the balsamic vinegar and sugar in a small saucepan. Simmer until slightly reduced and syrupy, about four minutes. Whisk in the cold butter, one piece at a time. Season with salt and pepper. Using a pastry brush, brush the glaze over the onions topping each tart and serve warm.

Thursday, March 4, 2010

Shaved Beet Salad

Photobucket

Occasionally I look at a menu and find a dish that sets off a craving. It happened to me this past weekend when I spotted a roasted beet tower on the appetizer menu of a restaurant where I was enjoying a sunny Sunday afternoon on the patio. I envisioned layers upon layers of red, golden and bulls blood (pink) beets. What showed up was three very thin beet slices, each separated by a solid inch of an avocado and tomato mixture. Don’t get me wrong, I love avocados, but when I was expecting roasted beets, a plate of guacamole was pretty disappointing.

Lucky for me, the folks over at Clarkson Potter recently sent me a copy of the new Everyday Food cookbook – “Fresh Flavor Fast.” I subscribe to the Everyday Food magazine and buy their books because they have simple, get-down-to-business recipes. I may love spending hours on a dish on a quiet Saturday afternoon, but Monday through Friday, I need realistic recipes that take into account the maybe 30 minutes I have to prepare a meal.

Fresh Flavor Fast is everything I love about Everyday Food. It’s packed with new ideas to get you out of the cooking ruts that are so easy to get into when speed and simplicity are top priorities. I wasn’t expecting a side dish or salad to be the first recipe I made from the book, but upon arriving home from my disappointing roasted beet tower experience, I opened up the book and found this recipe for shaved beet salad.

The salad took no more than 10 minutes to put together and totally satiated my beet craving. Raw beets are not for everyone so make sure you slice them thinly. I used a mix of red and golden beets, but feel free to use all red or any combination you prefer. If you are using a mix, make sure you toss them with the dressing separately or the red beets will turn everything else red too.

Photobucket

Shaved Beet Salad
Adapted from Fresh Flavor Fast

1 pound beets, sliced thinly on a mandoline
1 t orange zest
2 T fresh orange juice
2 t white wine vinegar
1 T olive oil
1/2 t sugar
Coarse salt (kosher or Maldon) and pepper

Whisk together the zest, juice, vinegar, oil and sugar and season with salt and pepper. Toss the beets with the dressing. If you are using different colored beets, toss each color separately so that the red beets don’t bleed their color on the lighter beets. Arrange beets on individual plates and serve.

Friday, February 19, 2010

Grilled Zucchini Rolls for a Rainstorm

Photobucket

As we head into a weekend with nothing but rain on the docket, it’s easy for my mind to wander to soups, stews and braises. Something that will keep the oven on all afternoon and produce a dish that is warm, comforting and filling. It is easy for my mind to wander there, but I’m not letting it. I’m sticking with fresh, bright flavors in hopes of using my taste buds to pull myself out of this rainy weekend.

These little appetizers of grilled zucchini wrapped around fluffy fresh goat cheese, basil and citrus should be enough to remind me of warm evenings spent outdoors post-time change (even if the grill marks on the zucchini came from my grill pan and not the outdoor BBQ). The recipe comes from Ellie Krieger, but I’ve taken quite a few liberties with it including doubling the amount of goat cheese. After all, I wouldn’t want things too healthy - it is raining outside. If you want to read the original, and slightly more healthy version of the recipe, just click on her name below.

If all this rain continues, that duck confit I’ve been threatening to make will definitely come to fruition, but for now I’m counting on these light fresh flavors to satisfy me. Actually, even if the rain doesn’t continue, the duck is definitely coming to fruition. Perhaps after I let my mind start to wander again.

Photobucket

Grilled Zucchini Rolls
Adapted from Ellie Krieger

3 zucchini
3 oz goat cheese
1 T freshly minced parsley leaves
1/2 t lemon juice
1/3 cup basil leaves
Salt and pepper
Cooking spray

Thinly slice the zucchini on a mandolin and discard the outermost slices. Season with salt and pepper. Place a grill pan over medium heat and spray with cooking spray. Cook the zucchini until tender and grill marks appear (about four minutes per side).

In a small bowl, combine the goat cheese, parsley and lemon juice, and season with salt.

Put a small spoonful of the cheese mixture on each zucchini slice and top with a basil leaf. Roll up and place seam side down on a platter. Repeat with remaining zucchini slices.

Wednesday, February 10, 2010

When The Cream Is Worth It

Photobucket

Sometimes the cream is worth it. Actually, in my book the cream is often worth it. However, as the January leanings towards a healthier diet continue into February, sometimes I find myself doing silly things like replacing all the cream in a recipe with low-fat buttermilk.

Perhaps you have found yourself doing the same thing. In theory I think it’s a good idea. After all, low-fat buttermilk has a thick texture that is similar to cream. Unfortunately, in practice, all that missing fat is noticeably missing.

Photobucket

I realized this recently while making a zucchini and goat cheese tart. All the shredded zucchini that the recipe called for seemed too healthy to bury under a mountain of cream and frankly, I did not feel like consuming most of my daily calories in one sitting. I replaced all of the cream with low-fat buttermilk and hoped for the best.

Photobucket

Even with the buttermilk, the tart ended up just fine. In fact, a friend who doesn’t eat a lot of rich food thought it was delicious, but for me, there was something missing (mainly all that fat).

I’m including the recipe as it was originally published in the current issue of Donna Hay. The next time I make this I will likely replace some of the cream with buttermilk, probably a third at most and see if I can be satisfied with that compromise.

Photobucket

Zucchini and Goat’s Curd Tart
Donna Hay Magazine Issue 47
Serves 4 - 6

2/3 cups butter, melted
8 sheets phyllo dough
5 zucchini grated
9 eggs
1 1/2 cups single cream
Salt
Pepper
7 oz goat’s curd or goat cheese

Preheat oven to 325*
Butter the base of a 12” x 15” pan (I ended up using a 9” x 13” brownie pan and it worked perfectly). Layer the sheets of phyllo, brushing butter between each sheet. Place the grated zucchini in the pan on top of the phyllo. Lightly beat the eggs and cream together, season with salt and pepper and pour over the zucchini. Top with spoonfuls of goat cheese and bake for 45 – 50 minutes until set. Let cool slightly before slicing.

Tuesday, November 3, 2009

The First Soup of Fall

Photobucket
The first soup of fall is a highly anticipated event at my house - at least by me. I’m not certain that anyone else even notices that rich, warm soups have been missing from the menu for months.

For Southern California residents like myself, it takes a certain finesse to know when the time is right for that first soup. Though the first official day of fall was September 22, the ninety degree weather we were experiencing at the time certainly was not conducive to soup. Here are a few signs I look for to help me figure out if it’s time: the last tomato has been pulled from the vines in the backyard; rather than gazpacho, I start to crave something warm and substantial; and the idea of turning the oven on for a few hours sounds comforting rather than torturous.

That time arrived on a recent Sunday when temperatures finally dipped below seventy and a low-lying Pacific fog that rolled in off the coast made me want to stay inside and hunker down with something nourishing. I was holding on to a recipe for Maple Carrot Soup from Delicious Magazine for just that kind of day. This soup is delicious, hearty and nourishing – all of the things one might want in a great fall soup. Just be sure to have it as an appetizer as it is surprisingly filling in large portions.

Of course, since I made this soup, temperatures in Los Angeles have returned to the eighties and I broke a sweat yesterday just walking to lunch. I hear that more cool weather is just around the corner and for once, I couldn’t be happier - perhaps the result of a recent trip to New York that forced me to bundle up in jackets and scarves as temperatures dropped into the…wait for it… fifties…gasp(!)… Surprisingly, this California girl loved it and is now ready for fall with scarves and rain boots in hand and on foot.

Photobucket

Maple Carrot Soup
Adapted from Delicious Magazine
Serves 6 - 8

2 pounds carrots, cleaned
2 onions, diced
1-inch piece ginger, peeled and grated
4 cloves garlic, minced
1/3 cup maple syrup
2 T olive oil + more if needed
4 cups chicken stock
Salt and pepper to taste
Crème fraiche to serve

Preheat oven to 350*
Slice the carrots about 1/4-inch think. A mandolin will make quick work of this. Line a baking sheet with a Silpat or parchment paper. Toss the carrots and onions with the ginger, garlic, maple syrup and olive oil and place on the baking sheet. Roast for 30-40 minutes, stirring and turning once or twice during cooking. If the carrots look like they are drying out, add more olive oil a tablespoon at a time. When the carrots and onions begin to soften, transfer them to a large pot with all of the juices from the baking sheet and add the chicken stock. Season with salt and pepper. Cover and bring to a boil and then simmer for about 20 minutes until the carrots are completely soft. Use an immersion blender to puree the soup in the pot, adding more water or stock as necessary to thin it out. Serve appetizer portions with a dollop of crème fraiche, maple syrup and snipped chives.

Tuesday, September 29, 2009

Making Cheese Even Better

Photobucket
I’m a sucker for a pretty picture. Especially if that picture is of food and in this particular case if that picture is of oil-dressed tomatoes piled high on top of slices of fried cheese. I have a few cookbooks that I adore that have absolutely no pictures of food, Marcella Hazan’s Essentials of Italian Cooking to name just one, but for the most part, beautiful pictures are what draw me in to a recipe, a book or an ingredient. It’s called food porn and it’s why, in addition to my obscene cookbook collection, I have subscriptions to every major food magazine.

Back to the tomatoes piled high on fried cheese. There isn’t much you can do to cheese to make it better than it already is, but frying it is certainly one way to try. Most cheeses can’t stand up to the heat, but one exception is Halloumi. Mentioned many times before on this blog, Halloumi is a Mediterranean cheese that has a very high melting point – in other words, you can pan fry it and it will keep its shape, but even more importantly something magical happens. The saltiness of the cheese is set off by the warm, melting creaminess and if you’ve left the Halloumi in the pan long enough, at a high enough heat, the crunchy crust that forms on the surface of the cheese finishes everything off with a seriously good contrast of textures. It’s cheese heaven so whenever I see a recipe that calls for it, I take note.

My latest ‘the pictures are just too pretty to pass up’ purchase is The Family Chef by Jewels and Jill Elmore. In a feeble attempt to stunt the growth of my cookbook collection, I stopped myself from buying this book the first time I saw it back in June, but after reading more about the sisters in this month’s Sunset Magazine, I knew I had to go back for a second look. I realized my first instinct was right and quickly purchased the book. It has been my bedside reading for the past week and their Halloumi Cheese with Cucumber Lentil Salad is the first recipe I made from it.

An added bonus with this recipe is that I discovered the boyfriend likes lentils! I didn’t think it was possible that such a healthy powerhouse could be on his list of, ‘please make me more of this right now,’ foods, especially after our phone conversation the day before I made the dish. He called me while I was browsing the aisles of Whole Foods and when told I was getting lentils, he responded with, “Why on earth would you be doing that? Lentils are gross.” Not encouraging, but he rarely knows what’s good for him so I picked them up anyway, made this salad and he couldn’t get enough. He even picked a lentil dish out of another cookbook for me to make the next night. I think I’m on to something here. Maybe you can be too.

Photobucket
Halloumi Cheese with Cucumber Lentil Salad
Adapted from The Family Chef (to make a smaller portion)

1/2 cup beluga lentils cooked according to package directions
1 medium cucumber, peeled in strips, halved lengthwise and sliced into half circles
2 ripe tomatoes (preferably one yellow and one red), cut into chunks
3 T extra-virgin olive oil + more for frying cheese
2 T chopped parsley
2 T chopped mint
2 T lemon juice
Salt and pepper to taste
1 package of Halloumi cheese, cut into 8 slices

Place the first seven ingredients in a bowl, season with salt and pepper and mix together. Heat a non-stick pan over medium-high heat and add some olive oil (about a tablespoon or two). Add the Halloumi slices and cook each side until golden brown, 2 – 3 minutes per side. Place the Halloumi slices on a platter and top with the tomato and cucumber mixture. Serve immediately while the cheese is still warm.

Friday, July 17, 2009

Pickled Radishes

Photobucket

Every year I have quite the supply of radishes at the beginning of summer. It’s the first thing that will sprout in the garden and I tend to get a little overzealous tucking radish seeds into every spare nook and cranny. I like radishes in my salads, but after a while, I really have to find something to do with the huge supply, especially when they’re getting large and overgrown in the garden because I can’t use them up fast enough.

When in doubt, pickle. That seems to be my mantra in the garden this year. Pickle or can everything in sight, so it can be enjoyed later in the year, when the best days of my garden are behind me for the season. My tomatoes are just starting to come in, but I’m already looking forward to making tomato jam and paste to put away for fall when I’m lamenting the all-too-short tomato season.

Photobucket

With the radishes I decided that rather than canning, I would whip up a quick brine and keep a jar of pickled radishes tucked in the fridge for a week (that’s about as long they will last without canning or preservatives) for intermittent snacking. We ended up devouring most of these during a BBQ with friends. They were great on burgers as well as on their own on the side.

If you have a favorite brine recipe, by all means use it and please share it with us! In a pinch you can even use a pre-packaged jar of brining spices. Though I prefer to make my own concoction of mainly mustard and coriander seeds, I was out of both and not wanting to run to the store, I settled for a pre-made blend I had at home. I recommend taking the time to go through and pick out come of the cloves and anything else you’d rather not include. The cloves would have overwhelmed the flavor of this batch of pickles.

Photobucket

Pickled Radishes
Makes about 4 cups (I had a lot of radishes to use up, feel free to reduce this recipe)

5 bunches store bought radishes or a good pile from your backyard*
1/2 cup red wine vinegar
1/2 cup white balsamic vinegar
1/2 cup granulated sugar
1 1/2 cups water
2 T kosher salt
1/4 cup brining spices, picked over to remove cloves
2 dried bay leafs
Jar large enough to hold the radishes

*The amount of radishes is intentionally not precise – at the end of the process, you will simply pour over enough brining liquid to cover what you have.

Rinse the radishes and slice thinly using a mandoline and set aside. Combine the next seven ingredients in a saucepan and bring barely to a simmer over medium heat, stirring to dissolve the sugar and salt. Remove the mixture from the heat and allow to cool slightly (for about 10 minutes). Place the radishes in a jar and pour in enough brining liquid to cover. Discard remaining liquid. Place the jar of radishes in the refrigerator and let sit for a day (if you can wait that long). These pickles will last about a week in the refrigerator.

Photobucket

Monday, May 18, 2009

Empanadas

Photobucket
Summer is encroaching on my backyard – and I couldn’t be happier. Each time I step outside to check on the garden it seems the tomato plants have sprung up another six inches and the pole beans have climbed further up their trellis. I have the warm Southern California days to thank for all of this progress and it is because of those warm days that I surprised myself when I cranked the oven up to 400 degrees for the better part of the afternoon. With no air conditioning in my humble abode, this is quite the commitment, but one that was well worth it as I turned out my first batch of empanadas for a friend’s birthday celebration.

Empanadas are an enticing ethnic food that I have shied away from making at home, always assuming that indigenous hands would do a much better job than my white-bread paws could ever hope to achieve. This is also why I have yet to make any Indian dishes at home. I love my Tikka Masala and I’m pretty sure that Taj Indian delivery will always do a better job than I.

The first time I considered making empanadas was after hearing my friend Lauren recount her experience making hundreds of them for a party for her Argentine boyfriend. She, like me, doesn’t have the Latin blood pumping through her veins that I assumed was necessary for a successful empanada. Knowing that her creations were well received encouraged me.

The final push came from the recent New York Times article on empanadas. I sent the article and recipes to Lauren and we began talking about the different types of empanada filling and the kind of dough she uses - after some unsuccessful attempts at making her own, she now relies on Discos, packages of premade frozen discs of empanada dough. Lauren even happened to have a package in her freezer leftover from a recent party. She offered to give it to me and I earnestly accepted. Armed with Discos and the New York Times recipes, it was time to get over my reservations.

I didn’t want to completely cop out with the pre-made dough so I decided to make half the batch with Discos and half the batch with the New York Times recipe. As I mentioned, I was making the empanadas for a friend’s birthday celebration, which turned out to be the perfect opportunity to have a large group compare the Discos with their homemade counterpart. I am actually happy to report that the Discos beat my dough, hands down. I’m happy because it will make future attempts at empanada making even easier. Not that the dough is particularly hard to make, in fact I think we may have gone a little too fat-conscious in Los Angeles - the hardest part of the dough recipe was tracking down lard. I stopped at three stores before finally locating the animal fat at a small neighborhood market. If you’re planning your own empanada party, I recommend saving yourself the trouble and using Discos.

The traditional minced meat filling was the crowd favorite, only marginally beating out my own corn and goat cheese experiment. Both filling recipes are included below. If you want to try your hand at the dough, check out the New York Times recipe.

In addition to the empanadas, I brought a tomato seedling to the party as a gift for my friend. A recent text informed me that her tomato plant, like mine, is, “sprouting like a teenager.” I hope your gardens are having as much luck as we are here in Southern California. And, if you’re going to try your hand at empanadas, I hope you, unlike me, have central air.

Photobucket

Minced Meat Filling
Adapted (doubled) from the New York Times

1 pound lean beef, minced
3 T lard
2 cups chopped onion
Salt and fresh black pepper
1/2 t ground cumin
1/2 t smoked paprika
20-pack of 5-inch Discos
3 hard-boiled eggs, sliced
12 pitted cured black olives, chopped
30 raisins
1 large egg, beaten with 1 T water for an egg wash

Preheat Oven to 400*
If you, like me, weren’t able to find minced meat, cut your beef into chunks and process in a food processor until minced. Melt the lard in a large sauté pan. Add the onion and cook until it starts to soften, then add the beef. Cook until the beef is lightly browned and stir in the seasonings – salt, pepper, cumin and paprika.

Place the filling on half of a Disco, leaving a half-inch border at the edge. Top with a slice of egg, some chopped olive and a few raisins. Brush the border and the other half of the Disco with egg wash and fold over. Crimp the edges with a fork to make sure they are sealed.

Place the filled Discos on a baking sheet, lined with parchment paper, and bake for 10 minutes. Flip the empanadas over and cook for an additional 5 to 10 minutes until golden brown.

Corn and Goat Cheese Empanada Filling

2 T olive oil
3 shallots, chopped
2 cloves garlic, chopped
Corn cut from three ears of corn
1/2 bunch of cilantro, roughly chopped
1/2 cup of goat cheese

Preheat Oven to 400*
Heat the oil in a large sauté pan and add the shallots and garlic. Cook just until fragrant and add the corn. Cook until the corn begins to soften 8 to 10 minutes. Let the mixture cool before transferring to a food processor. Add the cilantro to the food processor and process until the corn is coarsely chopped. Stir in the goat cheese by hand and season with salt and pepper.

Place the filling on half of a Disco, leaving a half-inch border at the edge. Brush the border and the other half of the Disco with egg wash and fold over. Crimp the edges with a fork to make sure they are sealed.

Place the filled Discos on a baking sheet, lined with parchment paper, and bake for 10 minutes. Flip the empanadas over and cook for an additional 5 to 10 minutes until golden brown.

Photobucket
If you are making your own dough, a lid or other round surface makes a good guide.

Friday, April 10, 2009

Minted Fettuccine with Petite Pea Dressing

Photobucket

One thing I have come to expect in cooking is that not all of my experiments will turn out favorably. If you’ve been cooking for a little while and are comfortable trying different things and not using recipes, then you also know this to be true. That is why, when a dish turns out right and tastes delicious on the first try, I am always so pleasantly surprised.

I’d been craving goat cheese, peas and mint in a pasta filling for some time and was just waiting for the mint in the backyard that seeds itself each year to spring back into action (pun intended). I harvested the first good sprigs last week and was finally ready to get to work. By then, I wasn’t feeling the filled pasta anymore so I processed some of the mint with the flour for the pasta dough to make minted fettuccine. Instead of a pasta filling I used the peas, goat cheese and mint along with minced shallot, fennel pollen and egg to make a quick dressing that would cook from the heat of the drained pasta when the dish was tossed together. For good measure I sautéed some pancetta and mushrooms to throw in at the end for a little substance.

There was enough of this dish to easily feed two, but it only fed one (me) and was eaten very quickly (read inhaled). It was quickly added to my list of spring staples and it didn’t come from a recipe so don’t think you have to stick to this one. Scallions or spring onions would be delicious in place of the shallot and you could just as easily sub in ricotta for goat cheese and so on.

Are you planning a big Easter meal this weekend? Or perhaps you’ve just finished all of the cooking for your Seder? I am letting myself off the hook this year. The honey baked ham is already ordered and with the addition of some oven baked asparagus and rolls, Easter dinner is served. If you do want to do some cooking this weekend, this pasta is a great way to acknowledge the flavors of spring without putting forth too much effort. Yes I make the pasta from scratch, but if you have a Cuisinart and a pasta machine (even easier with the KitchenAid pasta attachment) then that really isn’t a difficult task.

Photobucket


Minted Fettuccine with Petite Pea Dressing
Serves 2 (in theory)

Pasta
Leaves from 2 sprigs of mint
1 1/2 cups all purpose flour
1 1/2 t salt
1 1/2 t olive oil
2 eggs

Place the flour and salt in a food processor with the mint leaves and blend until the mint is minced and well incorporated. Add the olive oil and eggs and process until the dough pulls away from the sides of the bowl and forms a ball. Flatten dough into a disc about 4 inches across, wrap with plastic wrap and let sit for at least 30 minutes. Process according to your pasta maker directions, using the fettuccine attachment to cut the pasta.

Dressing
8 oz (half bag) of frozen petite peas
4 oz goat cheese
1 small shallot
1 – 2 t fennel pollen
Leaves from 1 sprig of mint
Salt and pepper to taste
1 egg

Place all the ingredients aside from the egg in a food processor or blender and process until smooth. Taste and adjust seasoning, then add the egg and process until incorporated.

Finishing the dish
1 t olive oil
1/3 cup cubed pancetta
1 cup sliced mushrooms

Bring a large, salted pot of water to a boil. While the water is heating, place the oil in a pan over medium heat. Add the pancetta and cook for 2 – 3 minutes before adding the mushrooms. Continue cooking until the mushrooms are soft and set aside.

Cook the pasta and begin to check for doneness after just 2 minutes. Fresh pasta cooks much faster than dried. When fully cooked, drain and return to the pot along with the dressing and the mushroom mixture. Toss well until the sauce is warmed through and serve.

Friday, March 27, 2009

Pissaladiere

Photobucket

I read recipes frequently enough that by now, I usually know immediately if I want to make the dish. Often I’m drawn in by a picture and I know visually, the dish will be stunning. Then there are the times where the ingredients sound so perfect together that I just can’t wait to dive in, often being able to taste the flavors just from my imagination. When I get both of these reactions to the same recipe, I’m on my way to the market as soon as possible for supplies. Recently, I read a recipe for pissaladiere and almost immediately found myself at the Whole Foods olive bar.

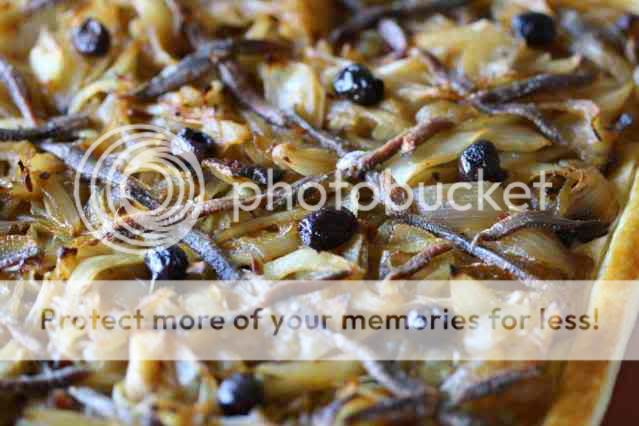
The technical definition of pissaladiere describes a pizza without cheese or tomato sauce, made up of sautéed onions, olives and anchovies. This dish dates back to the time of the Romans and while it may have originated as a pizza-like creation, it has since evolved into more of a tart. Of course, the star ingredients, olives, anchovies and sautéed onions, still come into play. The recipe I found used puff pastry as a base – one of my favorite starts to a tart, both for it’s simplicity of preparation and indulgent flavor. I knew the crisscross pattern of anchovies would make a beautiful photo and the sweet flavor of the caramelized onions would match beautifully with the salty, savory bite of the anchovies and olives.

That salty sweet combination is habit forming in my house and true to form, the majority of the pissaladiere was inhaled within minutes of being cool enough to eat. I was concerned with overwhelming the boyfriend’s palate with too much anchovy so I used fewer filets than called for and cut them in half lengthwise. I had enough anchovies for the pattern on the tart, but was able to reduce the strength of their pungent flavor. It seemed perfectly balanced to me (an anchovy fan) and I would recommend taking this route to all but the most dedicated devotees. And by the way, if you don’t count yourself as a fan, try this recipe anyway with the smaller amount of anchovies. I think you’ll find you like the salty contrast.

Pissaladiere
Serves four as a lunch dish or eight as an appetizer

1 sheet puff pastry, thawed
1/3 cup olive oil
2 1/4 pounds of onions (about four medium)
2 T sun dried tomato paste or sun dried tomato bruschetta
1 – 2 T red wine vinegar
1/2 t salt
2 t sugar
1 egg yolk whisked with 1 t water
2/3 cup olive tapenade
2 t fresh thyme leaves + additional sprigs for garnishing
3.5 oz jar of good quality anchovies (about 12 – 15 filets)
15 – 20 pitted nicoise olives

Peel onions, cut in half and slice thinly. Warm oil in a large, heavy sauté pan over medium low heat. Add onions, sun dried tomato paste, 1 T of vinegar, salt and sugar to the pan. Sauté until onions are tender and begin to caramelize, about an hour to an hour and 15 minutes. Only stir the onions every 10 minutes or so, just to keep them from sticking to the bottom of the pan. When finished cooking, taste the onions and add the additional 1 T vinegar, if desired. I did not desire.

About 20 minutes before the onions are finished, preheat the oven to 400*. Place the thawed puff pastry on a baking sheet covered in parchment paper or a silpat. Score a 3/4 inch border around the pastry and chill for 10 minutes. Spread the tapenade over the puff pastry, inside the scored border. If your tapenade is chunky like mine was, the pastry won’t be fully covered. Just make sure it’s relatively evenly distributed and sprinkle with thyme leaves. When the onions are sufficiently caramelized spread them evenly over the tapenade.

Drain anchovies and slice them in half lengthwise. Lay them over the onions in a crisscross pattern as shown in the picture above. Place one olive in the center of each diamond area created by the anchovies. Brush egg wash lightly over the border area. Bake the pissaladiere for 10 minutes, then reduce the heat to 350* and cook for an additional 10 – 15 minutes until the border is golden and flaky and the crust is cooked through. Scatter thyme sprigs over the tart if desired and let cool slightly before slicing.

Photobucket