Showing posts with label Breakfast. Show all posts

Tuesday, September 28, 2010

A Healthy Breakfast to Combat Culinary School's Pastry Section

Photobucket
Last night was day two of our two-week section on pastry. The French Culinary Institute believes that culinary students should have at least a background in pastry, and I couldn’t agree more. Take Top Chef as a prime example. Every season at least one, if not two, competitors get sent home for the ill-advised action of taking on a dessert course. We culinary students need to earn our chops in the fine art of dessert-making.

I have an insatiable sweet tooth and while it usually craves chocolate, I am happy to oblige it with a couple of weeks of pastry crèmes, tarts, ice creams, mousses, soufflés, puff pastry and crepes. Unfortunately, I can feel my pants tightening just from writing that list. That, in conjunction with the aftereffects of a serious sugar high in class last night, left me craving something good for my body this morning (when I say serious sugar high I mean serious. By the end of class, no one could stop laughing long enough to listen to the instructor, and after I got home at 11:30 pm, it still took me two hours to be able to go to sleep).

Luckily, in addition to the many food magazines I read, I also have subscriptions to a number of health and fitness publications. Someone who loves to eat as much as I do needs all the help she can get making sure she does not need to buy a new wardrobe every few months. These blueberry pancakes are from Health Magazine’s September issue and a part of their new CarbLovers Diet. I am not someone who has ever in her life been able to stick to a diet (please see previous comment about loving to eat and did I mention I am in culinary school?). However, I do love to take some of the best, healthy recipes from publications like Health, Cooking Light, Family Circle and others, and incorporate them into my cooking routine to bring balance back to my meals. These blueberry pancakes are delicious and easy to make, a combination that should earn them a repeat appearance in your cooking repertoire. At least, if like me, you need a healthy addition to your diet every now and then.

Photobucket

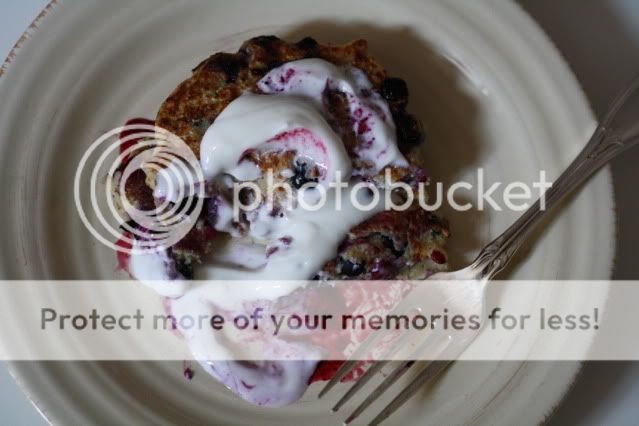
Blueberry Oat Pancakes with Agave-Sweetened Yogurt
Adapted from Health Magazine
Serves 2

1 cup rolled oats
1/2 cup low-fat cottage cheese
2 large eggs
1 t vanilla bean paste (or vanilla extract)
1 cup blueberries
Cooking spray
3/4 cup 0% Fage (or other low or non-fat Greek yogurt)
1 T agave (or maple syrup as the original recipe calls for)

Combine first four ingredients (through vanilla) in a blender and process just until smooth (if you take it too far as I did with my first batch the pancakes will turn out gummy). Place the batter in a medium bowl and stir in the blueberries. Heat a nonstick skillet over medium heat and coat with cooking spray. Spoon a few tablespoons of batter per pancake into the pan. Cook until golden, about three minutes per side. Combine the yogurt and the agave or maple syrup and serve with the pancakes.

Thursday, July 15, 2010

Pantry Cooking and Boxes

Photobucket

Welcome to my breakfast. This is what I have come to call pantry eating. I have not been to the grocery store in a week and a half. I refuse to buy new groceries in an attempt to use up the many boxes of various grains that crowd my pantry and the stocks, proteins and numerous containers that are taking up my freezer. I am hoping to use, not throw away, the contents of my kitchen before I clear out.

The picture is of the grits and eggs and that are quickly becoming a staple for breakfast. I wish I had something more elegant to show you or even a recipe to share, but it is just not in the cards this week. My kitchen is in boxes halfway to New York and I have done next to no cooking.

Photobucket

Instead, my week has been filled with finding places to store boxes, trips to Goodwill and realizations that I really did not ever need so much stuff anyway. I think any move is a good time to go through your belongings and trim the fat, but a move to a small New York apartment will really show you how little you need to exist comfortably.

Today is day four of official unemployment and as I awake to find that I have already found a home for every box and that most of my furniture is spoken for, I realize it is time to slow down and start to say my goodbyes to those I care about in Los Angeles. I am much better at the busy ‘doing’ rather than the slow and sometimes painful feelings associated with goodbye. Unfortunately, with no more boxes to move and only four days left in Los Angeles, I cannot avoid the goodbyes any longer.

Wednesday, February 10, 2010

When The Cream Is Worth It

Photobucket

Sometimes the cream is worth it. Actually, in my book the cream is often worth it. However, as the January leanings towards a healthier diet continue into February, sometimes I find myself doing silly things like replacing all the cream in a recipe with low-fat buttermilk.

Perhaps you have found yourself doing the same thing. In theory I think it’s a good idea. After all, low-fat buttermilk has a thick texture that is similar to cream. Unfortunately, in practice, all that missing fat is noticeably missing.

Photobucket

I realized this recently while making a zucchini and goat cheese tart. All the shredded zucchini that the recipe called for seemed too healthy to bury under a mountain of cream and frankly, I did not feel like consuming most of my daily calories in one sitting. I replaced all of the cream with low-fat buttermilk and hoped for the best.

Photobucket

Even with the buttermilk, the tart ended up just fine. In fact, a friend who doesn’t eat a lot of rich food thought it was delicious, but for me, there was something missing (mainly all that fat).

I’m including the recipe as it was originally published in the current issue of Donna Hay. The next time I make this I will likely replace some of the cream with buttermilk, probably a third at most and see if I can be satisfied with that compromise.

Photobucket

Zucchini and Goat’s Curd Tart
Donna Hay Magazine Issue 47
Serves 4 - 6

2/3 cups butter, melted
8 sheets phyllo dough
5 zucchini grated
9 eggs
1 1/2 cups single cream
Salt
Pepper
7 oz goat’s curd or goat cheese

Preheat oven to 325*
Butter the base of a 12” x 15” pan (I ended up using a 9” x 13” brownie pan and it worked perfectly). Layer the sheets of phyllo, brushing butter between each sheet. Place the grated zucchini in the pan on top of the phyllo. Lightly beat the eggs and cream together, season with salt and pepper and pour over the zucchini. Top with spoonfuls of goat cheese and bake for 45 – 50 minutes until set. Let cool slightly before slicing.

Monday, January 25, 2010

Carrot Cake for Breakfast

Photobucket

My subscription to Cooking Light runs out in January each year, right around the time that I’m really craving the lighter recipes that can be found on its pages. Not that I don’t enjoy the publication year-round, but I tend to do more cooking from the magazine in January and February as new year’s resolutions take hold of me. So, each January I renew my subscription with the hope that my penchant for lighter fare will last the whole year through.

Photobucket

When it comes to healthier eating, weekend breakfasts always cause a bit of a problem. I love sleeping in and getting up to prepare a big, decadent breakfast and it can be really hard to find something that feels big and decadent, but not totally unhealthy. Lucky for me, this month’s Cooking Light has a great recipe for an indulgent weekend breakfast that doesn’t make you feel like you are undoing all the good you did during the week.

Photobucket

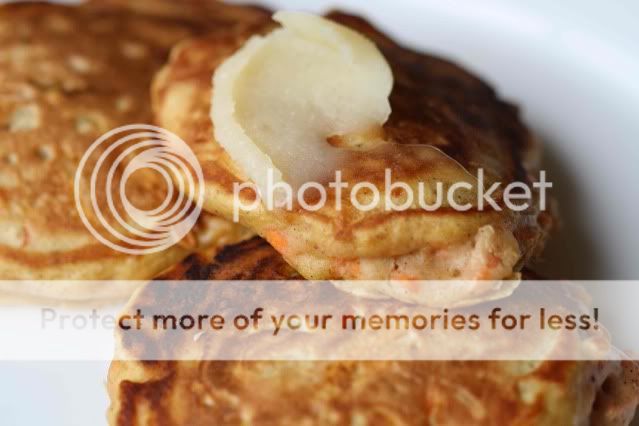
Carrot cake pancakes sounded like something that could be too sickly sweet for my kind of morning fare, but these are nothing of the sort. Bulked up with two cups of shredded carrots, they call for all the spices found in carrot cake, but not all of the sugar. And that delicious cream cheese frosting you’re accustomed to? A honey butter stand-in works perfectly.

Carrot Cake Pancakes
Adapted from Cooking Light
Makes 12 pancakes; serves 4 - 6

1 1/4 cups flour
1/4 cup chopped walnuts, toasted
2 t baking powder
1 t ground cinnamon
1/4 t salt
1/8 t freshly ground nutmeg
Pinch of ground cloves
Pinch of ground ginger
1/4 cup brown sugar
3/4 cup low-fat buttermilk
1 T canola oil
1 1/2 t vanilla extract
2 eggs, lightly beaten
2 cups finely grated carrot (from about a 1/2 pound)
Cooking spray
3 T butter, softened
2 T honey

Combine the flour with the next seven ingredients (through ground ginger) and mix lightly to combine. In a separate bowl, combine the sugar with the next four ingredients (through eggs) and mix thoroughly. Add the sugar mixture to the flour and stir just to combine. Use a spatula to fold the shredded carrots into the batter.

Heat a non-stick pan over medium heat and spray with cooking spray. Use a 1/4 cup measuring cup to portion out three to four mounds of batter (depending on the size of your pan). Cook for two minutes, flip over and cook for one minute more until the pancakes are golden brown and cooked through. Repeat with remaining batter.

While the pancakes are cooking, combine the honey and the butter and place in the refrigerator until you’re ready to serve. Serve three pancakes per person and top with about a tablespoon of honey butter.

Tuesday, November 10, 2009

Aebleskivers and Unitaskers

Photobucket
My kitchen is very familiar with unitaskers - Alton Brown’s name for kitchen appliances that serve only one function. In Alton’s world they are reviled, but in mine they are an all-too-common occurrence. That is why, when I come across a unitasker that catches my eye, I walk away as quickly as I can. I simply don’t have room in my apartment kitchen, nor in my kitchen budget, for every kitchen tool known to man, no matter how much I would actually like to own them all.

This policy of limiting unitaskers is why I first walked away from the aebleskiver pan, and then again and again, until finally after at least a year of lusting after it, I gave in. It’s small, it won’t take up too much room, I love weekend breakfasts made at home, it was purchased with a gift card – these are the justifications that convinced me I could make room for just one more pan.

After three weekends in a row of Saturday-morning aebleskivers, I can fully endorse the purchase of one more unitasker. Go for it. This round, filled pancakes make such a delicious breakfast and they appear much more impressive to your guests than their easy preparation would lead you to expect.

I experimented with three different fillings over the course of those three weekends including an involved apple tarte tatin recipe courtesy of Williams-Sonoma and a delicious apple butter purchased at an orchard back East. I am thrilled that the favorite filling to date is nothing more than Bonne Maman raspberry preserves. No work needed for the filling means these Danish treats are even easier to prepare.

So go forth and purchase a unitasker. Even if you don’t have Alton’s blessing, you certainly have mine.

Photobucket

Aebleskivers

2 eggs separated
2 T vegetable oil
1 t sugar
1 cup flour
1/2 t baking powder
1 cup milk
1/4 t salt

In a medium bowl beat the egg yolks and sugar until light in color. Combine the remaining dry ingredients and add to the egg mixture. Mix in the milk and oil, alternating between the two. In a separate bowl, beat the egg whites until stiff and fold them into the batter.

Place the aebleskiver pan over medium heat and grease the indentations with butter. Place one tablespoon of batter in each indentation, top with a teaspoon of filling (your choice) and finish with another tablespoon of batter. Let cook for 3 – 4 minutes until the bottoms are beginning to turn a nice golden brown (the only way to tell is to try flipping one). Use two skewers or chopsticks to flip the aebleskivers by pushing down on one side with one skewer while simultaneously pulling up on the other side with the other skewer. If this makes no sense, watch this video. Let the aebleskivers cook for 2 – 3 minutes more after flipping. Serve immediately with a dusting of powdered sugar and some maple syrup.

Photobucket

Tuesday, February 17, 2009

Perfect Pancakes

Photobucket

For all the food I take extra care and time to make from scratch, I find it hard to believe that until very recently, I was a lazy pancake person. The occasional German pancake made from scratch and many a Bisquick special (with blueberries thrown in for a homemade feel) are what come out of my kitchen when pancakes are on the menu.

This all changed last weekend. I was flipping through Marcus Wareing’s How to Make The Perfect… cookbook and stumbled upon a recipe for pancakes. Not just any pancakes; these are, “this guy is taking the time to whip egg whites to soft peaks and fold them into his batter” pancakes. I was immediately shamed. I looked in the fridge and was relieved to find that I had enough eggs to rectify what was clearly years and years of pancake laziness.

I can officially say that I am pancake reformed. These were the lightest and most delicious pancakes I have ever had. When I say light I don’t mean not rich, I mean that the air that’s incorporated during the whipping of the egg whites imparts a delicate lightness to these beauties. As a result, they fall slightly when you remove them from the pan, but the flavor is still amazing. If you are a lazy pancake person like I was, you have try these, even just once.

Photobucket

Perfect Pancakes
Adapted from How to Make the Perfect…
(recipe cut in half to serve two)

1/2 + 1/3 all purpose flour
1 1/4 t baking powder
1/4 t salt
1/4 t cinnamon
2 T sugar
2 eggs, separated
1 cup milk
3 T butter, melted + more for cooking the pancakes
1 egg white

Sift first four ingredients together into a bowl and stir in the sugar. In a separate bowl, whisk the egg yolks and stir in the milk, followed by the melted butter. Make a well in the dry ingredients and stir in the egg mixture to make a smooth batter. Whisk the three egg whites to soft peaks and fold them into the batter. Heat some butter in a nonstick pan and cook the pancakes over medium heat. Enjoy immediately as the pancakes will fall slightly as they come out of the pan.

Photobucket

And the perfect pancake mix-in:


Photobucket

Sunday, December 14, 2008

Salt Cured Salmon

Photobucket

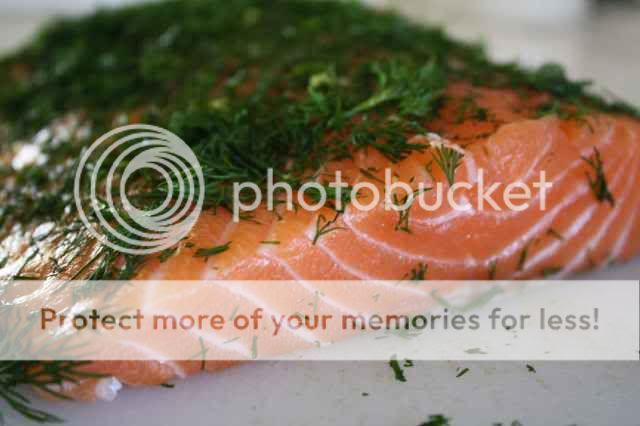
Beautiful pictures are my first attraction to a dish. It's why I subscribe to more food magazines than I know what to do with and why I continue to buy cookbooks when I have 30 at home that haven't had more than one or two recipes made out of them. I'm a sucker for food photography. It's why, when I was reading the latest issue of Donna Hay, I immediately knew I had to make their salt cured salmon. The beautiful pink flesh contrasted with the green of the dill made an amazing picture and since salmon is my favorite fish, this was a sure bet.

Photobucket

The recipe is very simple and I think the biggest secret was splurging on a beautiful piece of fresh salmon from my local fish monger. Not cheap, but worth it for this dish. I got home from the fish monger and within just ten minutes, had the fish curing in the fridge for brunch the next day. Then it was time to head off to Surfas, a restaurant supply store in Culver City. Heaven on earth for someone like me. I'm there pretty much every other week and am always spending more money than planned.

When I got to Surfas, I was pleasantly surprised to see that they had installed a cheese and charcuterie counter. When I realized that the person working the counter was a friend of mine, surprise turned to elation, followed quickly by a sense of loss for the recent progress on my workout routine and healthy eating. I knew having David as the gatekeeper to this wonderful world of cheese would be a blessing and a curse in my life. Mostly blessing, but there would be consequences, and mostly in the area of my clothes not fitting properly.

I spent the next fifteen minutes tasting different cheeses and talking about everything that David had available. I left with a great selection (after heading in with no intention to buy or having any specific need for cheese) and amongst that selection was a beautiful chunk of aged gouda called Beemster Classic. It's delicious and smooth with little crystals that crunch in the back of your mouth as you chew. We all agreed that if ever there was a breakfast cheese, this was it. I was excited knowing that I had the perfect dish, curing at home, that desperately needed a delicious cheese to go with it.

Photobucket

To cure the salmon use this simple recipe that I'm borrowing from Donna Hay. I cut the recipe since I'm only cooking for two, but this can easily be doubled to serve more. Smoked salmon is a tradition at my house on Christmas morning, but this year I think we'll be curing ours at home.

Salt Cured Salmon

1 1/2 pounds fresh side of salmon, skin removed
1/2 bunch of dill, chopped
1/2 cup rock salt
2 t white peppercorns
1 T sugar
2 t water

Coat salmon in chopped dill. Stir together salt, peppercorns, sugar and water. Place half the salt mixture on a piece of plastic wrap, place the salmon on top of the salt and coat the top and sides of the salmon with the remaining salt mixture. Wrap tightly in the plastic wrap and place in a rimmed baking dish (the salmon will give off a good amount of liquid). Place another dish on top of the salmon and weigh down with a few cans of food. Refrigerate for 24 hours. Remove from the plastic wrap and wipe off the salt. Slice thinly and serve with the following recipe or as desired.

Photobucket

Salt Cured Salmon and Beemster Classic on Toast
Serves 2

2 large slices good sourdough, or in this case, Gilroy Garlic Bread
6 - 8 shavings of Beemster
2 eggs
1 tsp vinegar
6 slices of salt cured salmon
Butter for the bread

Heat a small pot of water to poach the eggs. When the water is almost simmering, add the vinegar and swirl the water in a circular motion. Add one egg and cook for 3 - 4 minutes. Remove with a slotted spoon to drain on paper towels and repeat with the second egg. Toast and butter the bread. Layer the Beemster, salt cured salmon and finally the poached egg on the toast and enjoy! 

Monday, November 10, 2008

French Toast - Leftover Vanilla Cakes

The vanilla cakes from last week were delicious, but we had two leftover and I hate having to throw food away. The perfect solution came to me when I woke up this morning and needed to figure out breakfast. It turns out that mini-cakes turned into french toast equals deliciousness. I was worried that the cakes would be too sweet or have too much vanilla in them, but I didn't add much vanilla to the egg soak and they turned out great.

Vanilla Cake French Toast
Serves 2

2 individual vanilla cakes
2 eggs
3/4 cup buttermilk
1/4 t vanilla
1/4 t salt
butter for cooking

Slice cakes into 1/2 " slices. Combine eggs, buttermilk, vanilla and salt in a small container and add vanilla cake slices to container to soak for 20 or more minutes. Heat butter in a non-stick skillet and fry french toast for 3 - 4 minutes per side. Top with fruit and maple syrup.


Wednesday, October 15, 2008

Cream Scones

I was perusing some of my favorite blogs the other day and came across a wonderful scone recipe at La Bella Cook. I immediately started craving them and after putting water on for a pot of tea, I started making them.

The recipe comes from Dorie Greenspan and I, along with Bridgett at La Bella Cook, left out the currants. I like to add flavor to my scones with what I serve alongside them. Today it was a blueberry spread, butter and sage honey. Had I had any clotted cream on hand, it definitely would have made the mix. The final piece to this delicious breakfast was a large pot of PG Tips. Enjoy!

Cream Scones
Adapted from Dorie Greenspan

1 egg
2/3 cup heavy cream
2 cups flour
2 T sugar plus more for dusting
1 T baking powder
1/4 t salt
5 T butter, cubed and chilled

Preheat oven to 400*
Mix egg and cream together and set aside. Place flour, sugar, baking powder, salt and butter in a food processor and pulse until crumbs form. Turn out into a bowl and pour the wet ingredients over. Gently fold together with a spatula until just combined (do not over mix). Turn dough out onto a board dusted with flour and form into a circle. Cut the circle into 6 - 8 wedges and transfer to a baking sheet lined with a silpat or sprayed with cooking spray. Bake for 22 minutes and cool slightly before serving and enjoy!

Monday, October 13, 2008

Coffee Cake Muffins

As much as I love weekends, it's a really good thing for my waistline that I don't have time to bake like this every morning. There's something about waking up early and having time to peruse the recipes I've set aside, check the shelves to see what's around and set about making something delicious for breakfast. I just love it. And given the time, I would probably do it every morning.

I found these little numbers through America's Test Kitchen. I've never made one of their recipes before, but after trying these, I plan to make many more. They were absolutely delicious. I changed up the recipe slightly by using light sour cream and subbing out walnuts for pecans (since that's what I had on hand). Use whichever nuts you prefer.

Coffee Cake Muffins
Adapted from America's Test Kitchen
Makes 12 Muffins

Topping
1/2 cup sugar
1/3 cup brown sugar
1/3 cup flour
1 T cinnamon
4 T butter, cubed
1/2 cup walnut pieces

Muffins
2 eggs
1 cup light sour cream
1 T vanilla bean paste
1 3/4 cup flour
1/2 cup sugar
1 T baking powder
1/4 t salt
5 T butter

Preheat oven to 375
For the topping:
Place the brown sugar, flour, cinnamon, butter and 1/4 cup of the sugar in a food processor and pulse until crumbs form. Scoop out 3/4 cup of mixture and set aside (this will be your cinnamon filling). Add remaining 1/4 cup of sugar and the walnut pieces and pulse until nuts are coarsely chopped. Set aside for your topping.

For the muffins:
Mix the eggs, vanilla and sour cream together. Place the flour, sugar, baking powder, salt and butter in a food processor and pulse until crumbs form. Use a spatula to gently fold the dry and wet ingredients together. Do not over mix. Spray a muffin tin with cooking spray and line with muffin liners. Place 1 T of batter in each muffin cup and press to cover the bottom. Next add 1 T of cinnamon filling, pressing into the batter, and then cover with more batter until all the batter is used up. Sprinkle 2 T of topping over each of the muffins and press gently into the batter. Bake for 22 - 24 minutes and let cool for 10 minutes before serving. Enjoy!

Sunday, October 5, 2008

Proper English Fry Up

Breakfast can be a bit of a battle at my house. Are we having a quiche with sauteed leeks and a thick, rich custard? Or are we having bacon and fried eggs? While I'm usually pushing for the former or something similarly sophisticated, I don't entirely hate it when the boyfriend wins out. One of his favorite things to make on those mornings is a proper English fry up. Think bangers, fried eggs, baked beans, grilled mushrooms and tomatoes. Since I knew we would be having an English fry up this Sunday, I decided to bring in a little bit of sophistication by making some stuffed portobellos to go along with everything that the boyfriend was pulling together for the fry up. I'm giving you the mushroom recipe here, but to pull together the rest of the breakfast, here is what you will need: baked beans (preferably Heinz), toast (must be white), english bangers (sausage), bacon (if the sausage isn't enough meat for you and yours) and fried eggs (1 -2 per person). Often we also grill tomato halves as well if you'd like to throw those in the mix.

Stuffed Portobellos
Serves 4

4 stuffing portobellos (these guys are definitely smaller than regular portobellos)
2 slices thick cut bacon
1/2 cup baked beans
1 - 2 T olive oil
salt

Preheat oven to 425*
Remove the stems from the portobellos and use a melon baller to scoop out some of the flesh. Chop the removed stems and flesh and place in a medium bowl. Slice the bacon strips in half lengthwise and chop into small pieces. Cook until golden brown. Add the bacon and 1 T bacon grease to the chopped mushrooms along with the baked beans. Mix together, adding salt to taste, and divide mixture between the four mushrooms. Pour the olive oil in the bottom of a baking dish and add stuffed mushrooms. Make sure the bottom of the mushrooms are coated thoroughly in oil and cook for 20 - 25 minutes until tender. Serve alongside your English fry up and enjoy!

Monday, September 15, 2008

Buttermilk Waffles

When I wake up in the morning, the first question that needs to be answered is sweet or savory? Once I cross that one off my list, I can get on with breakfast and then, the rest of my day. Today was most definitely a sweet day. Luckily I had just the recipe in mind.

When my recent issue of Everyday Food arrived, I began flipping through the pages and was immediately drawn to the buttermilk waffles and their ideas for toppings. I had never used walnuts on my waffles before and was excited to try it. This morning presented the perfect opportunity to try out the recipe. Here it is for you, in all its deliciousness. Sometimes the simplest and most classic of breakfasts are the best, don't you think?

Buttermilk Waffles
Adapted from Everyday Food September 2008

2 cups flour
2 T sugar
2 t baking powder
1 t baking soda
1/2 t salt
2 cups buttermilk
1 stick butter, melted
2 large eggs
canola spray

Heat waffle iron. Combine dry ingredients in a medium bowl and set aside. Whisk buttermilk, eggs and butter together until combined. Fold the dry ingredients into the wet using a spatula until just combined, being sure not to over-mix. The batter will be lumpy. When the waffle iron is hot, spray lightly with canola oil and add the batter (each waffle iron takes a different amount of batter). Cook until golden, top with the walnut syrup and enjoy!

Walnut Topping

3/4 cups maple syrup
1/2 cup walnuts

Stir the ingredients in a small saucepan over low heat until warmed through.

Tuesday, August 19, 2008

Good Mornings - Mixed Blueberry Coffee Cake

Do you ever wake up in the mood for something sweet and satisfying, but not wanting to make the effort to get over to your local bakery? Well this is the result of one of those mornings. I had not planned anything specific and decided to open up my recent magazine arrivals for inspiration. I found my answer in a blueberry coffee cake recipe. After a glance around the kitchen and deciding that swapping out some St. Andre triple cream french cheese for the cream cheese would be an experiment worth undertaking, I decided I had enough to make something similar using the recipe as my guideline.

Mixed Berry Coffee Cake
Serves 6 - 8
Adapted from Sunset Magazine "Secrets From Our Test Kitchen" Supplement

1 cup mixed frozen berries
1 cup + 1 T sugar
2 cups + 2 T flour
1/2 cup butter
1/2 t baking powder
1/2 t baking soda
1/4 t salt
1 t lemon zest
1/2 cup yogurt
1/4 cup sour cream
1 t vanilla
2 eggs
6 oz St. Andre triple cream (or cream cheese)
1 t lemon juice

Preheat oven to 350*
Place the berries and 1 T sugar in a medium saucepan and set over medium heat. When warmed through, add 2 T flour and let reduce down. Once thickened slightly, remove the mixture from heat and allow to cool.

Add the remaining 2 cups flour and 3/4 cup of sugar to a food processor and pulse to mix. Cut the butter into thin slices and add to the processor. Pulse until just incorporated. Reserving a 1/2 cup, pour remaining mixture into a medium bowl and add baking soda, baking powder, salt and lemon zest. In another bowl, whisk together the yogurt, sour cream, vanilla and 1 egg. Use a spatula to mix the wet ingredients into the dry without over mixing. Pour batter into a 9-inch cake pan.

Add the cheese, lemon juice, 1/4 cup of sugar and remaining egg to the food processor. Run the processor until the mixture is completely smooth. Spread this over the batter, leaving a border. Take the cooled berry mixture and spread over the same area of batter. Sprinkle the reserved 1/2 cup of the flour mixture over the entire cake and bake for 40 minutes until puffy and golden on the edges. Let cool before serving and enjoy!

Sunday, August 17, 2008

Sausage and Leek Quiche

One of the best parts about weekends and something I look forward to all week, is waking up with plenty of time to make a big breakfast and then taking even more time to enjoy it sitting down in the dining room. It's so much better than the apple I usually grab on the way into work during the week. This brunch consisted of a sausage and leek quiche, sausage on the side for the boyfriend, fruit for me, one french press for him and a pot of tea for me and a liter of fresh-squeezed orange juice for the both of us. What a way to start a morning. Now that I've bribed him with homemade breakfast, we can get on with repainting my bedroom - this weekend's home improvement project.

Sausage and Leek Quiche
Serves 4

1/2 recipe tart dough (the leftover half from here)
8 oz sage sausage
1 leek
1 T canola oil
3 eggs
1 cup heavy cream
1/2 cup grated fontina
1/4 cup grated parmesan

Preheat Oven to 375*
Prepare the quiche shell according to directions found here, but after removing pie weights, only continue to bake the crust for five more minutes. Remove the green part of the leek and reserve for another purpose (stock or the compost pile). Cut the remaining white part in half lengthwise and then into small slices. Dunk the sliced leeks in a bowl of water to remove any dirt and sand. Saute the leeks in canola oil for ten minutes until soft and translucent, remove to paper towel. Add sausage to the same pan and saute, breaking up into small pieces until cooked through. Whisk the eggs together with the cream and add the sausage, leeks and fontina cheese. Pour mixture into quiche crust, sprinkle the parmesan over the top and bake for 30 - 40 minutes or until golden around the edges and the middle is no longer liquid. Enjoy!

Sunday, August 3, 2008

German Pancake

This is a great quick breakfast that I like to make when I'm out of bacon and sausage or any of the other boyfriend breakfast staples. This seems to keep him happy in the absence of cured meat.

German Pancake
Adapted from The Joy of Cooking
Serves 4 or 1 - 2 boyfriends

1/2 cup flour
1/2 cup milk
1/4 cup sugar
1 egg
pinch of salt
4 T butter

Whisk milk and egg together and mix with flour, sugar and salt (do not over mix). Melt butter in a large (10 - 12") cast iron pan over medium heat. Add batter to pan and let cook one minute on the stove top before placing in the oven. Cook in the oven 15 - 20 minutes. When finished cooking, dust with powdered sugar and serve immediately in the pan as the pancake will deflate very quickly. Enjoy!

Monday, July 14, 2008

Buttermilk Biscuit Breakfast Cake

There's nothing like having the time for a good, sit down breakfast. If I know I'm actually going to have some time to relax and savor my coffee, I like to try and put some effort into whatever I make. When I got up, there were four plums sitting on my counter just asking to be used. I wanted to make some kind of fruit or coffee cake with them, but also had a little bit of a craving for buttermilk biscuits. I settled on making a cake-like batter based on the biscuits so I could satisfy both urges. Set this out with some carrot juice and coffee and breakfast is served.


Buttermilk Biscuit Cake

4 plums
1 1/2 cups flour
1/2 cup + 2 T sugar
2 t baking powder
1/2 t baking soda
1/4 t salt
1 stick butter divided
3/4 cup buttermilk


Preheat oven to 400*

Slice plums into 1/8 inch think rings. Use 2 T of butter to grease a 9 inch square dish and sprinkle 1 T sugar over butter. Arrange plum slices in the bottom of the dish as shown and sprinkle additional 1 T sugar over plums. In a medium bowl sift together flour, sugar, baking powder, baking soda and salt. Cut remaining butter into thin slices and add to dry ingredients. Use a pastry cutter to blend butter into dry ingredients until only small crumbs remain. Add buttermilk and mix lightly until just combined. Drop batter over fruit to cover and place in oven for 22 - 24 minutes. When the cake is golden, remove from the oven and let cool slightly before unmolding onto a serving plate. Slice and enjoy!