Friday, July 31, 2009

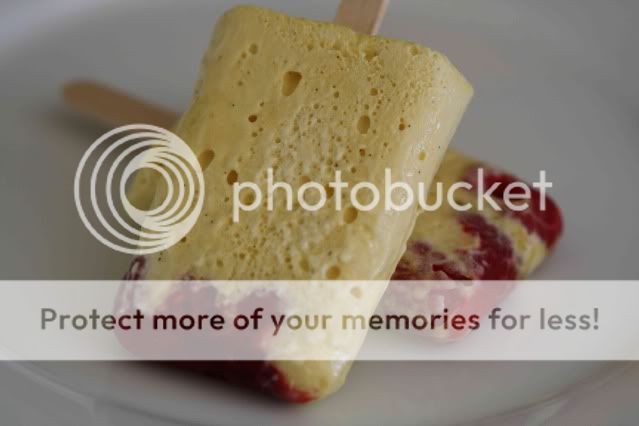
Semifreddo Popsicles

Photobucket

I always get a bit nostalgic for the summers of my childhood around this time of year. The advertisements for back-to-school shopping are starting and I can walk into any bookstore to find some of my favorite food magazines already touting the best stews for fall. When I was growing up, summer seemed to last forever. Those were the days before we scheduled every spare minute of a child’s life with sports and activities and year-round school had yet to catch on. If you weren’t enrolled in summer school, which I rarely was, you had a solid three months, from June through the end of August or even Labor Day, to enjoy the summer, and enjoy it we did.

As with most things in life, my memories of summer center on food. The American flag cake my mother made using blueberries and raspberries for the Fourth of July one year, eating almost every family dinner out on our back patio with citronella candles burning to ward off the bees and oddly enough, because I don’t think we used them that much, the Tupperware popsicle molds that we experimented with one year.

The only clear memory I have of trying out the molds is the ultra-gourmet diet coke popsicle I created. While I did like to play with food when I was young, my experiments, much like this one, rarely produced something you would actually want to eat.

I’ve seen many recipes for truly gourmet popsicles that far outpace my diet coke concoction. From puréed fruit mixed with prosecco to coconut milk with lime juice and most recently, a semifreddo recipe frozen in popsicle molds for individual servings. That is the recipe that pushed me over the edge and sent me out on a search for my own set of molds. It was surprisingly hard to find the old-fashioned popsicle sticks. Since most molds come with their own plastic stick, grocery stores, at least the ones by me, don’t seem to carry them anymore. I ended up in an Office Depot in the craft section to hunt them down. Tools in hand, I rushed home to try my hand at a semifreddo (first one I’d ever made) and making my own popsicles (first foray into the non-diet coke flavored arena).

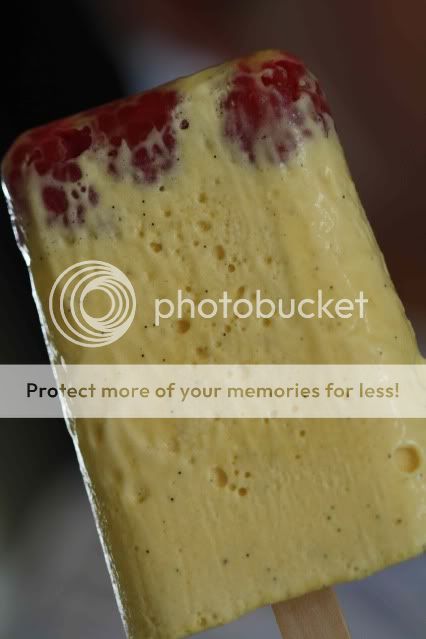
These came out delicious and rich and sweet, but not overly so. When I make them again, I won’t use my dark-yolk eggs. That deep yolk color made the popsicles more yellow than the beautiful off-white I was going for. Other than that, these are perfect as is. The original recipe called for frozen raspberries, but I went with fresh. Use whatever you have on hand.
Photobucket

Raspberry Semifreddo Popsicles
Adapted from Donna Hay

2 eggs
1 egg yolk
1 T vanilla bean paste
1/2 cup sugar
1 cup cream
2 cups raspberries

Place the eggs, egg yolk, vanilla and sugar in a heatproof bowl and place over a bowl of simmering water (you can use a double boiler, but a bowl works better with the electric mixer). Use a handheld mixer to beat the mixture for 6 - 8 minutes until thick. Set aside.

Beat the cream to stiff peaks using a stand mixer or clean off the handheld mixer and use it. Gently fold into the egg mixture. Divide the raspberries between 12 popsicle molds. Pour enough semifreddo to come about one inch up the popsicle mold. Tap the molds against the counter to get the semifreddo to settle into the base of the mold, around the raspberries, then finish filling the molds with semifreddo. Cover the molds with aluminum foil and insert popsicle sticks through the foil - this will help the sticks stay upright while freezing. Freeze until solid, about six hours.

Thursday, July 23, 2009

Parsley Lemonade

Photobucket

I can’t think of anything more refreshing than a glass of homemade lemonade on a hot summer day. At least, I didn’t think I could. Then my boyfriend’s mother told me about the parsley lemonade she enjoyed on a recent lunch date. What better way to make lemonade even more delightful than to add in a bunch or two of fresh herbs? And why didn’t I think of that? There was no doubt that parsley lemonade would be served at my next BBQ and truth be told, it’s been served at every one since as well.

Rather than worry about everyone at the BBQ walking around with flecks of green, chopped parsley stuck in their teeth, I steeped the parsley in a simple syrup to infuse the flavor without leaving any parsley in the final drink. This kills two birds with one stone – you have your flavoring and sweetener in one mix.

If you feel like stocking up on some new glassware, good old-fashioned mason jars make a great vessel for this drink. Sur la Table sells a great set with handles that are sturdy enough to have survived a number of our backyard BBQs.

Photobucket

Parsley Lemonade

1 bunch parsley
2 cups sugar
2 cups water
3 pound bag of lemons*
Water or sparkling water to taste

Remove large stems from the parsley and roughly chop. Place water and sugar in a saucepan over medium heat until sugar is dissolved, stirring occasionally. Once the sugar is dissolved, add the chopped parsley to the pan and let heat for one – two minutes more. Remove from heat, cover and set aside until cool and the parsley flavor is infused, about an hour. In the meantime, juice the lemons.

When the simple syrup is cool, combine it with your lemon juice. You now have your concentrate. You can either mix the concentrate with water to taste and let your guests serve themselves, or keep the concentrate separate and let each guest decide if they would like to use sparkling or still water and mix each drink to taste. Garnish glasses with a sprig of parsley.

*If desired, roll the lemons between your palm and the countertop to help release all of the juices before juicing.

Friday, July 17, 2009

Pickled Radishes

Photobucket

Every year I have quite the supply of radishes at the beginning of summer. It’s the first thing that will sprout in the garden and I tend to get a little overzealous tucking radish seeds into every spare nook and cranny. I like radishes in my salads, but after a while, I really have to find something to do with the huge supply, especially when they’re getting large and overgrown in the garden because I can’t use them up fast enough.

When in doubt, pickle. That seems to be my mantra in the garden this year. Pickle or can everything in sight, so it can be enjoyed later in the year, when the best days of my garden are behind me for the season. My tomatoes are just starting to come in, but I’m already looking forward to making tomato jam and paste to put away for fall when I’m lamenting the all-too-short tomato season.

Photobucket

With the radishes I decided that rather than canning, I would whip up a quick brine and keep a jar of pickled radishes tucked in the fridge for a week (that’s about as long they will last without canning or preservatives) for intermittent snacking. We ended up devouring most of these during a BBQ with friends. They were great on burgers as well as on their own on the side.

If you have a favorite brine recipe, by all means use it and please share it with us! In a pinch you can even use a pre-packaged jar of brining spices. Though I prefer to make my own concoction of mainly mustard and coriander seeds, I was out of both and not wanting to run to the store, I settled for a pre-made blend I had at home. I recommend taking the time to go through and pick out come of the cloves and anything else you’d rather not include. The cloves would have overwhelmed the flavor of this batch of pickles.

Photobucket

Pickled Radishes
Makes about 4 cups (I had a lot of radishes to use up, feel free to reduce this recipe)

5 bunches store bought radishes or a good pile from your backyard*
1/2 cup red wine vinegar
1/2 cup white balsamic vinegar
1/2 cup granulated sugar
1 1/2 cups water
2 T kosher salt
1/4 cup brining spices, picked over to remove cloves
2 dried bay leafs
Jar large enough to hold the radishes

*The amount of radishes is intentionally not precise – at the end of the process, you will simply pour over enough brining liquid to cover what you have.

Rinse the radishes and slice thinly using a mandoline and set aside. Combine the next seven ingredients in a saucepan and bring barely to a simmer over medium heat, stirring to dissolve the sugar and salt. Remove the mixture from the heat and allow to cool slightly (for about 10 minutes). Place the radishes in a jar and pour in enough brining liquid to cover. Discard remaining liquid. Place the jar of radishes in the refrigerator and let sit for a day (if you can wait that long). These pickles will last about a week in the refrigerator.

Photobucket

Wednesday, July 8, 2009

Tomato and Burrata Salad

Photobucket

It’s a difficult thing to admit, even to myself, but sometimes I do not want to cook. A recent virus kicked off my latest spurt of time out of the kitchen which was extended a few weeks by a trip up north and the guilt that ensued for not adding anything to Apples and Butter for weeks upon weeks. I have been here, quietly perusing your sites and finding so much inspiration, just not adding much to the conversation myself. This past weekend, the push I needed came in the form of a little red globe of perfect, first-tomato-of-the-season ripeness I found hiding at the back of one of my potted cherry tomatoes.

The day I pull the first tomato of summer off the vine may as well be a holy day in my household. At the very least it’s the equivalent of a national holiday. The anticipation begins in March when I put the first seedlings in the ground and wonder why they don’t produce tomatoes the very next day. It’s a cruel, three-month waiting period until the flowers turn to green tomatoes and the green tomatoes ripen into voluptuous red globes that seem as though they will burst at the seems if left on the vine for one more minute.

Photobucket

The cherry tomatoes I pulled off the vine needed a very basic preparation to let the homegrown tomato flavor shine through. I grabbed a fresh package of burrata out of the fridge and opened my new bottle of Valderrama olive oil (more about that another time) that was waiting patiently on the counter for the perfect first use. This was definitely it.

With burrata and homegrown tomatoes as the star ingredients, the dish only needed a sprinkling of fresh herbs to finish it. Basil would be ideal, but since my bushes had not quite jumped into production, I settled for finely chopped parsley - a decent substitute in this situation.

For a presentation worthy of photographing (though I would have gladly thrown everything together in a bowl and dug in with a fork) I shaped the burrata into quenelles, a football shape which is formed by moving the cheese back and forth between two spoons, smoothing the edges as you go. If you have no idea what I’m talking about, this, more detailed, explanation may be helpful.

Photobucket

Wherever you are, I hope it’s warm enough that you too are enjoying the first homegrown tomatoes of summer.

Cherry Tomato and Burrata Salad
Serves 1 (this recipe can easily be doubled, though if you’re pulling your first tomatoes off the vine, you, like me, may not want to share)

Handful (10 +) of cherry tomatoes
4 quenelles (or spoonfuls) of Burrata (about a 1/2 cup)
1 T best quality olive oil
1 T chopped fresh herbs of your liking
Sprinkling of Maldon sea salt

Place the burrata quenelles on four opposite sides of a plate (think north, south, east, west). Slice the cherry tomatoes in half and arrange them among the burrata. Drizzle with olive oil and finish with a sprinkling of herbs and salt to taste. Try not to inhale everything in one bite.