Monday, December 21, 2009

Christmas Used to Last Forever

Photobucket
When I was a child the holidays seemed to go on for months. At the beginning of December the decorations would go up and as schedules slowed and school let out, we were left with plenty of time to sit around the tree with a cup of cider or hot cocoa and take in the season.

Today, I’m lucky if it feels like Christmas the week leading up to the 25th. Usually I get in the holiday spirit as I run around town, fighting crowds in an effort to cross off my Christmas list. While I love finding gifts for the important people in my life, I find it somewhat sad that I can’t get in the spirit until the shopping begins.

Photobucket

I didn’t know this was true for me until my family decided not to do Christmas gifts this year. In an effort to focus on what’s most important – time together – this year we are cooking meals with each other instead of buying gifts. Though I did just receive notification that one Thomas H. Durff has sent me a gift subscription to The Atlantic Monthly (someone’s cheating!).

The sad news is that without the many shopping trips in search of the perfect gift, I found myself totally lacking in Christmas spirit. Determined to redefine Christmas traditions so I can get in the holiday mood without racking up a huge credit card bill, I turned to the kitchen.

Photobucket

I wanted to make something in bulk so I could use the resulting product as gifts, but I didn’t want to make cookies. Decorated cookies may look festive, but I don’t really care for the way they taste. Then I stumbled on an article about homemade truffles in one of the Martha Stewart publications. I knew I could get creative with flavored ganache fillings and really how difficult could they be? Note to self: If I ever think, ‘really how difficult could they be,’ again, I will clear my calendar for the weekend and prepare to make seven trips to the store for more toppings, chocolate and gift boxes. When you’re doing something for the first time and not really using a set recipe, look out, things are going to get ugly.

While Martha’s ganache truffles seemed to stay perfectly firm with no coating, mine melted on contact with any finger that was near room temperature. And while all the articles I could find on coating truffles with chocolate seemed to think it wasn’t really necessary to temper the chocolate, my coating turned into a clumpy glob when I did not. I’m still attempting to make up with the boyfriend who was the recipient of, “get the f*$% out of the kitchen,” when the coating wasn’t going on smoothly.

Photobucket

So, did I fail miserably at getting myself into the Christmas spirit? Not entirely. First, the crazed trips to the store seemed to bring back that sense of holiday urgency that had been missing from my December. Second, by the time I got through the fifteenth bag of chocolate and had the kinks worked out, I was left with some decent looking truffles and the feeling that I would be able to spread a little chocolaty holiday cheer after all.

If you have time left in your holiday schedule and want to try these at home, I’ve included the basic ratio of cream to chocolate for the ganache filling as well as the four variations I created to add more flavor. If you don’t want the truffles melting on contact, coat them with chocolate that has been tempered. You can read about how to temper your chocolate here. It’s not that difficult and worth the time.
Photobucket

Ganache Truffle Filling
Makes about 40 truffles

16 oz chocolate (dark, semi-sweet or milk – your choice)
1 2/3 cups heavy cream

To use these variations, add the flavoring to the cream right as it comes to a simmer, but before you turn off the heat:

Chile truffles – 3/4 t cayenne pepper
Peanut butter truffles – 3/4 to about 1 cup of creamy peanut butter
Mint truffles – replace 12 oz of the chocolate with mint flavored chocolate
Earl Grey truffles – place 12 bags of Earl Grey in the cream, turn off the heat and let steep for 20 minutes. Remove the tea bags and reheat the cream slightly before adding to the chocolate.

Place 16 ounces of the chocolate of your choice in a heatproof bowl. Place the cream in a small saucepan and bring just to a simmer. Keep a close watch as simmering cream will very quickly boil over. Add any of the flavorings included above to the cream or create your own variations. Pour the warm cream over the chocolate and whisk until fully incorporated. Allow the mixture to cool slightly and then let it set in the refrigerator overnight.

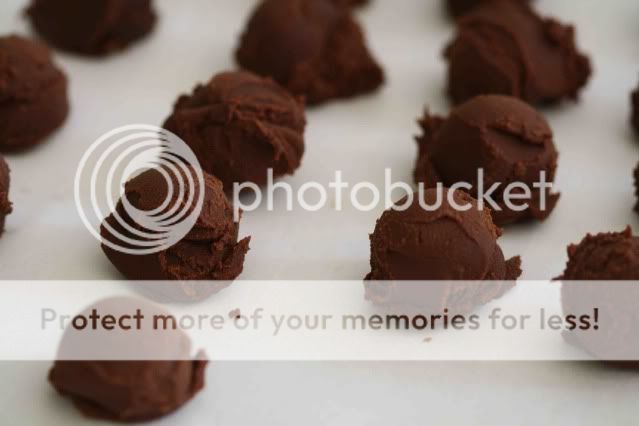
Cover a cookie sheet with parchment paper and use a small ice cream scoop or melon baller to portion out the ganache into small spheres, about 1-inch in diameter. Roll the ganache pieces between your hands to make a smoother circle. It’s not necessary, but I highly recommend using disposable, protective gloves for this part. It’s more sanitary if you’re giving the truffles as gifts and you’ll be washing your hands every five minutes if you don’t. Allow the ganache pieces to chill in the refrigerator again while you prepare the chocolate coating.

Select your chocolate coating (again, your choice of dark, semi-sweet, milk, etc.). I found that it took about 24 ounces to coat 80 truffles. Temper the chocolate according to the directions found here and use a dipping tool or toothpicks to submerge the ganache in coating. I read everything I could find on the best way to dip, but trial and error seemed to be the most helpful. Just submerge the ganache in the coating and try to get the excess off before setting it back on the cookie sheet to harden. If you’re topping the chocolate coating in anything (chopped nuts, sea salt, candy cane pieces, etc.) do this right away before the chocolate begins to harden. Place the coated truffles in the refrigerator overnight or for at least four hours, if you’re in a hurry, to fully harden.

Package as desired and spread your own version of chocolaty holiday cheer.
Wednesday, December 9, 2009

Poutine, Freezing and Stewing

Photobucket

It is freezing and I am stewing.

As already established on this blog, I am aware that freezing is a relative term so please, don’t all you Midwesterners jump on me at once. It has dropped into the 40s at night this week and for Los Angeles, by definition, that is freezing. Not to mention that I just returned from Wisconsin where it was, ahem, in the low 40s at night.

As far as the stewing is concerned, it mainly centers on meat, not my emotional state of mind – a much more delicious alternative. I just can’t help myself; I don’t want to turn my oven off in this cold weather. Already there have been soups and stews; braises and bread baking; even pastries on one choice afternoon.

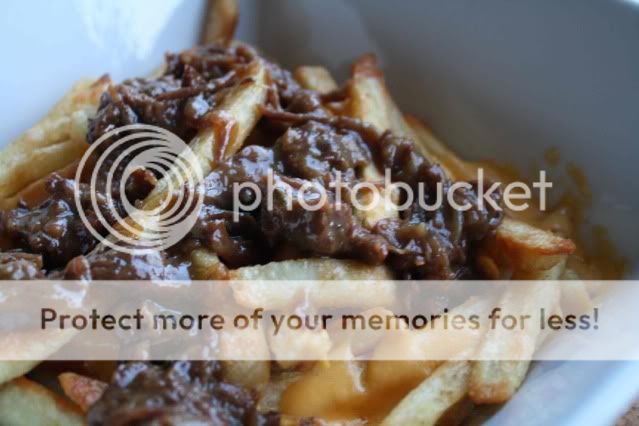
The most celebrated winter dish, new to my kitchen this year, is poutine. It’s only been celebrated by one person so far, but he has done enough on his own to earn it that designation. Poutine sounds pedestrian in theory – fries, covered with melted cheese curds, covered with gravy – but the right gravy can elevate the dish to something else entirely.

I originally created a poutine recipe of my own to avoid the $120 dinners at Animal that were threatening to turn into a weekly occurrence. My boyfriend had it bad for poutine and unlike the Canadian creators of the dish, we seemed hard-pressed to find it on many menus. As we would start planning for our weekend and the inevitable question of where to eat came up, I could see his eyes start to glaze over as he thought about the dish and subsequently pleaded with me to go to Animal, just one more time.

Not that I have a problem eating at Animal every weekend. It is by far my favorite restaurant in L.A. at the moment, but my pocketbook and my arteries started begging for mercy. So, into the kitchen I went determined to save our health and our finances and according to the boyfriend, I succeeded. He even thinks my poutine is better than Animal’s. I’m not certain about that but it is good enough to satisfy his craving and easy enough that I think you’ll enjoy making it at home.

Use this recipe only as a guide. I have varied it each time I’ve made it according to what I already had on hand and it is still delicious, even with modifications. Make sure you use real deal cheese curds - Trader Joes sells them if you have trouble locating them - and feel free to make your own fries, I just like to make the process slightly easier by using the frozen variety. I make my gravy with oxtails because that’s what Animal uses, but if you have a favorite recipe, by all means have at it. And finally, apologies in advance if this is your first introduction to poutine. I take no responsibility for resulting addictions.

Poutine
Serves 2

Gravy:
1 – 1 1/2 pounds oxtail (4 – 6 meaty pieces)
1 quart chicken (or beef) stock, preferably homemade
1 onion, roughly chopped
2 carrots, roughly chopped
2 pieces celery, roughly chopped
1 bay leaf
2-3 sprigs thyme
2 T olive oil
Salt and pepper

To Serve:
French Fries (I use one bag of frozen fries from Trader Joes)
1/2 cup cheese curds

Preheat oven to 375*
Sprinkle the oxtails with salt and pepper. Heat the olive oil in a Dutch oven over medium high heat and brown the oxtails on all sides. Remove to a plate. Add more oil if the pan is dry and sauté the onions, celery and carrots for five minutes, until just starting to soften. Return the oxtails to the pan and add the stock, bay leaf and thyme. If the stock doesn’t almost cover the oxtails, add water until the tops of the oxtails are just peaking out of the stock (but no more than two cups of water). Cover and place in the oven. Cook for three to four hours until the meat is tender and falling off the bone.

When the meat is finished, turn off the oven, remove the oxtails to a plate and set the pan over medium high heat. While the remaining stock is reducing (it should already be significantly reduced after four hours in the oven) pick all of the oxtail meat off the bone. When the stock is looking thick and gravy-like, add the meat to the gravy to warm through.

If you haven’t already, and you should have already, make your French fries. Transfer the French fries to an oven-safe serving dish and sprinkle with cheese curds. Place in your cooling oven for five – 10 minutes until the cheese is melted. Top the fries with gravy and serve while piping hot.

Tuesday, November 10, 2009

Aebleskivers and Unitaskers

Photobucket
My kitchen is very familiar with unitaskers - Alton Brown’s name for kitchen appliances that serve only one function. In Alton’s world they are reviled, but in mine they are an all-too-common occurrence. That is why, when I come across a unitasker that catches my eye, I walk away as quickly as I can. I simply don’t have room in my apartment kitchen, nor in my kitchen budget, for every kitchen tool known to man, no matter how much I would actually like to own them all.

This policy of limiting unitaskers is why I first walked away from the aebleskiver pan, and then again and again, until finally after at least a year of lusting after it, I gave in. It’s small, it won’t take up too much room, I love weekend breakfasts made at home, it was purchased with a gift card – these are the justifications that convinced me I could make room for just one more pan.

After three weekends in a row of Saturday-morning aebleskivers, I can fully endorse the purchase of one more unitasker. Go for it. This round, filled pancakes make such a delicious breakfast and they appear much more impressive to your guests than their easy preparation would lead you to expect.

I experimented with three different fillings over the course of those three weekends including an involved apple tarte tatin recipe courtesy of Williams-Sonoma and a delicious apple butter purchased at an orchard back East. I am thrilled that the favorite filling to date is nothing more than Bonne Maman raspberry preserves. No work needed for the filling means these Danish treats are even easier to prepare.

So go forth and purchase a unitasker. Even if you don’t have Alton’s blessing, you certainly have mine.

Photobucket

Aebleskivers

2 eggs separated
2 T vegetable oil
1 t sugar
1 cup flour
1/2 t baking powder
1 cup milk
1/4 t salt

In a medium bowl beat the egg yolks and sugar until light in color. Combine the remaining dry ingredients and add to the egg mixture. Mix in the milk and oil, alternating between the two. In a separate bowl, beat the egg whites until stiff and fold them into the batter.

Place the aebleskiver pan over medium heat and grease the indentations with butter. Place one tablespoon of batter in each indentation, top with a teaspoon of filling (your choice) and finish with another tablespoon of batter. Let cook for 3 – 4 minutes until the bottoms are beginning to turn a nice golden brown (the only way to tell is to try flipping one). Use two skewers or chopsticks to flip the aebleskivers by pushing down on one side with one skewer while simultaneously pulling up on the other side with the other skewer. If this makes no sense, watch this video. Let the aebleskivers cook for 2 – 3 minutes more after flipping. Serve immediately with a dusting of powdered sugar and some maple syrup.

Photobucket

Tuesday, November 3, 2009

The First Soup of Fall

Photobucket
The first soup of fall is a highly anticipated event at my house - at least by me. I’m not certain that anyone else even notices that rich, warm soups have been missing from the menu for months.

For Southern California residents like myself, it takes a certain finesse to know when the time is right for that first soup. Though the first official day of fall was September 22, the ninety degree weather we were experiencing at the time certainly was not conducive to soup. Here are a few signs I look for to help me figure out if it’s time: the last tomato has been pulled from the vines in the backyard; rather than gazpacho, I start to crave something warm and substantial; and the idea of turning the oven on for a few hours sounds comforting rather than torturous.

That time arrived on a recent Sunday when temperatures finally dipped below seventy and a low-lying Pacific fog that rolled in off the coast made me want to stay inside and hunker down with something nourishing. I was holding on to a recipe for Maple Carrot Soup from Delicious Magazine for just that kind of day. This soup is delicious, hearty and nourishing – all of the things one might want in a great fall soup. Just be sure to have it as an appetizer as it is surprisingly filling in large portions.

Of course, since I made this soup, temperatures in Los Angeles have returned to the eighties and I broke a sweat yesterday just walking to lunch. I hear that more cool weather is just around the corner and for once, I couldn’t be happier - perhaps the result of a recent trip to New York that forced me to bundle up in jackets and scarves as temperatures dropped into the…wait for it… fifties…gasp(!)… Surprisingly, this California girl loved it and is now ready for fall with scarves and rain boots in hand and on foot.

Photobucket

Maple Carrot Soup
Adapted from Delicious Magazine
Serves 6 - 8

2 pounds carrots, cleaned
2 onions, diced
1-inch piece ginger, peeled and grated
4 cloves garlic, minced
1/3 cup maple syrup
2 T olive oil + more if needed
4 cups chicken stock
Salt and pepper to taste
Crème fraiche to serve

Preheat oven to 350*
Slice the carrots about 1/4-inch think. A mandolin will make quick work of this. Line a baking sheet with a Silpat or parchment paper. Toss the carrots and onions with the ginger, garlic, maple syrup and olive oil and place on the baking sheet. Roast for 30-40 minutes, stirring and turning once or twice during cooking. If the carrots look like they are drying out, add more olive oil a tablespoon at a time. When the carrots and onions begin to soften, transfer them to a large pot with all of the juices from the baking sheet and add the chicken stock. Season with salt and pepper. Cover and bring to a boil and then simmer for about 20 minutes until the carrots are completely soft. Use an immersion blender to puree the soup in the pot, adding more water or stock as necessary to thin it out. Serve appetizer portions with a dollop of crème fraiche, maple syrup and snipped chives.

Thursday, October 15, 2009

Martha's Buttermilk Biscuits

Photobucket
I have southern roots. My feet are firmly planted in Los Angeles and have been for the majority of my 29 years, but my roots are most definitely southern. My mother was born in Vicksburg, Mississippi and my father in Memphis, Tennessee. My mother even bares the title of Miss Mississippi, but don’t tell her I told you. She’s not the beauty queen type and would be horrified to know you knew.

They moved to Los Angeles in the 60s to plant new roots, and while the southern accents have faded, there are some things you just can’t get rid of. Of course, in my family, most of the things you can’t get rid of are food-related. Cornbread dressing at Thanksgiving, a possibly too generous use of salt in just about everything, the understanding that few dishes wouldn’t be better with at least a dollop of mayonnaise and on it goes.

With this culinary background to draw from, you would think I would be the go-to-girl for buttermilk biscuits. I should have biscuits coming out of my ears, but instead, I’m hard-pressed to remember one batch of them from my childhood. Plenty of cornbread – no biscuits. So on a recent evening when a friend put in a special request for buttermilk biscuits, I turned to Martha, a trusted source for baked goods I have not made before.

These biscuits are delicious and so quick to pull together you won’t feel right about how easy it was, but the feeling of unease will disappear as soon as you taste the warm, buttery goodness that just came out of your oven. Kudos to Martha for filling in the gaps of my southern roots. Just don’t tell Miss Mississippi - she’s not exactly the Martha type either.

Photobucket
Martha’s Buttermilk Biscuits
Recipe cut in half an adapted from Martha Stewart’s Baking Handbook

2 cups flour
2 t baking powder
1/2 t baking
1/2 t salt
1 t sugar
1 stick butter
3/4 cups + 1/8 cup buttermilk

Preheat the oven to 375*

Place the flour, baking powder, baking soda, salt and sugar in a food processor and pulse just to combine. Take the cold butter from the fridge and cut into small pieces, taking care not to let the butter get warm. Add the butter to the food processor and pulse briefly just until the flour starts to look coarse. You should still have large pieces of unincorporated butter. Turn the mixture out into a mixing bowl and pour in the buttermilk. Stir gently, just until combined. Do not over mix. Turn the dough out onto a lightly floured surface and pat into a circle, about 1-inch thick. Use a biscuit cutter to cut the biscuits. Place on a baking sheet and brush with extra buttermilk. Bake for 18-20 minutes, slather with more butter and enjoy.

Photobucket

Tuesday, September 29, 2009

Making Cheese Even Better

Photobucket
I’m a sucker for a pretty picture. Especially if that picture is of food and in this particular case if that picture is of oil-dressed tomatoes piled high on top of slices of fried cheese. I have a few cookbooks that I adore that have absolutely no pictures of food, Marcella Hazan’s Essentials of Italian Cooking to name just one, but for the most part, beautiful pictures are what draw me in to a recipe, a book or an ingredient. It’s called food porn and it’s why, in addition to my obscene cookbook collection, I have subscriptions to every major food magazine.

Back to the tomatoes piled high on fried cheese. There isn’t much you can do to cheese to make it better than it already is, but frying it is certainly one way to try. Most cheeses can’t stand up to the heat, but one exception is Halloumi. Mentioned many times before on this blog, Halloumi is a Mediterranean cheese that has a very high melting point – in other words, you can pan fry it and it will keep its shape, but even more importantly something magical happens. The saltiness of the cheese is set off by the warm, melting creaminess and if you’ve left the Halloumi in the pan long enough, at a high enough heat, the crunchy crust that forms on the surface of the cheese finishes everything off with a seriously good contrast of textures. It’s cheese heaven so whenever I see a recipe that calls for it, I take note.

My latest ‘the pictures are just too pretty to pass up’ purchase is The Family Chef by Jewels and Jill Elmore. In a feeble attempt to stunt the growth of my cookbook collection, I stopped myself from buying this book the first time I saw it back in June, but after reading more about the sisters in this month’s Sunset Magazine, I knew I had to go back for a second look. I realized my first instinct was right and quickly purchased the book. It has been my bedside reading for the past week and their Halloumi Cheese with Cucumber Lentil Salad is the first recipe I made from it.

An added bonus with this recipe is that I discovered the boyfriend likes lentils! I didn’t think it was possible that such a healthy powerhouse could be on his list of, ‘please make me more of this right now,’ foods, especially after our phone conversation the day before I made the dish. He called me while I was browsing the aisles of Whole Foods and when told I was getting lentils, he responded with, “Why on earth would you be doing that? Lentils are gross.” Not encouraging, but he rarely knows what’s good for him so I picked them up anyway, made this salad and he couldn’t get enough. He even picked a lentil dish out of another cookbook for me to make the next night. I think I’m on to something here. Maybe you can be too.

Photobucket
Halloumi Cheese with Cucumber Lentil Salad
Adapted from The Family Chef (to make a smaller portion)

1/2 cup beluga lentils cooked according to package directions
1 medium cucumber, peeled in strips, halved lengthwise and sliced into half circles
2 ripe tomatoes (preferably one yellow and one red), cut into chunks
3 T extra-virgin olive oil + more for frying cheese
2 T chopped parsley
2 T chopped mint
2 T lemon juice
Salt and pepper to taste
1 package of Halloumi cheese, cut into 8 slices

Place the first seven ingredients in a bowl, season with salt and pepper and mix together. Heat a non-stick pan over medium-high heat and add some olive oil (about a tablespoon or two). Add the Halloumi slices and cook each side until golden brown, 2 – 3 minutes per side. Place the Halloumi slices on a platter and top with the tomato and cucumber mixture. Serve immediately while the cheese is still warm.

Monday, September 14, 2009

Pickles at Happy Medium

Photobucket
I don’t think there is any arguing with the fact that we live in an instant gratification oriented society. I certainly know it’s true in my life of internet shopping and instant music downloads to my iPhone, but there is one area where I try my hardest to leave that fast-paced lifestyle behind – the kitchen.

I am a card carrying member of Slow Food USA and, as mentioned before on this blog, would probably be quite happy spending my days curing prosciutto in my basement and experimenting with cheese cultures for the different blues and triple creams ripening in my fridge, but the truth is I just don’t have that kind of time. The majority of us have to work for a living so those projects must wait for the occasional, lazy weekend day. Making food and food products from scratch at home is no longer a necessity to be able to eat, but a luxury for those who have the time.

Since I don’t have time to be my own cheese maker, farmer or butcher, I have done my best to find a happy medium. I do grow some of my own vegetables and what I don’t have time to do myself, I try to purchase from the artisans who are taking the time and care to do it right (farmers markets, small batch cheese producers, etc.). This doesn’t mean I’m never at Ralphs buying blueberries shipped in from Argentina. It just means I make an effort not to be there, but when I am, I don’t feel guilty and neither should you.

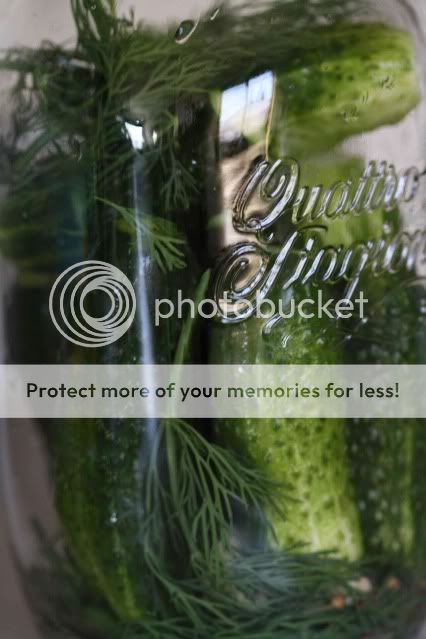
My favorite happy medium of the summer is refrigerator pickles. They’re quick and easy for the home cook who wants a pickled vegetable by next weekend, but doesn’t have the time or desire to make sure that there are pickles put up for the whole winter. It was quite satisfying and easy with pickled radishes from my own garden and even easier with my recent batch of pickled cucumbers, made from cucumbers purchased at the farmer’s market.

After I picked up two pounds of bright emerald green pickling cucumbers, I went looking for a good way to use them. Most of the recipes I found were intended for huge batches of pickles that were headed for a canning bath and wouldn’t be ready to consume for at least a month. I wanted pickles and I wanted them a lot sooner than in a month. I also wanted to be able to spend the evening with my boyfriend and not gently lowering and lifting canning jars in and out of a pot of boiling water. Instead, I mixed up a basic brine, cut the ends off my pickling cucumbers to allow the brine to quickly penetrate the cucumbers, poured the vinegary liquid over the cucumbers and let them sit, first on the counter and then in the refrigerator. Five days later I had wonderful crispy perfect pickles. Five days may not seem like instant gratification in your book, but compared to a month or two for the canned variety, I was happy. So were the rest of the pickle eaters at my BBQ the next Friday night. We all sat around a bonfire, happily crunching on some of the best pickles any of us had ever had and these are the folks who taste more of my food than anyone else. I can tell when they’re lying, and they were not.

Photobucket

Happy Medium Pickles

2 pounds pickling cucumbers
1 cup white wine vinegar
3 – 4 cups water
1/4 cup salt
4 garlic cloves
1/2 bunch of fresh dill
1 T mustard seed
1 1/2 T coriander seed
1 quart sized jar (or larger)

Rinse the cucumbers, dry thoroughly and chill in the refrigerator for at least two hours. If you've been keeping your cucumbers in the fridge, you can skip the drying and chilling steps. Heat the vinegar and three cups of water in a small saucepan and stir in the salt until dissolved. Set the vinegar mixture aside to cool just slightly. Place a few dill sprigs at the bottom of the jar along with the garlic cloves and half the mustard and coriander seeds. Cut the stem and blossom ends off the cucumbers (an eight of an inch is all you need to remove) and place them in the jar. Pour the vinegar mixture over the cucumbers, adding more water as needed to cover. Place a few more sprigs of dill and the remaining coriander and mustard seeds over the cucumbers. If the cucumbers are not fully submerged, add more dill to force the cucumbers fully under water. Leave the jar on the counter for two days and then place in the refrigerator for two to three days more. Enjoy the pickles within a week of opening the container.
Photobucket

Tuesday, September 1, 2009

Mayonnaise - How to Cheat

Photobucket
One thing I have noticed over the years is that mayonnaise is an oddly divisive substance. Many hate it with a passion, refusing to let it so much as touch a piece of sandwich bread, while others love it, slathering it on artichokes, mixing in herbs and calling it a sauce, even topping the occasional plate of scrambled eggs with a dollop just because they can. I am a card-carrying member of the latter group. It may be because both my parents are from the South where mayonnaise is more of a staple ingredient than just a condiment. Not a day went by at 3752 Chevy Chase Drive that we didn’t have a huge jar of Best Food’s (Hellman’s for you East Coasters) in the fridge, with another one on standby in the cupboard.

My appreciation of mayonnaise seemed perfectly normal amongst my own kind. In fact, I didn’t realize there was anything wrong with my level of mayonnaise consumption until my sophomore year of college when my roommates looked on, horrified at my decision to fold up pieces of Kraft American singles and dip them into my oversized jar of mayonnaise as a snack. Clearly, my gourmet tendencies had yet to take hold.

For someone who loves mayonnaise as much as I do, I find it surprising that this past weekend was the first time I tried to make mayonnaise at home. I guess it’s due to my devotion to Best Food’s. I never saw the need. I am here to tell you that I have been reformed. I still love my Best Food’s, but there is something completely different and luxurious about homemade mayonnaise. I am also here to tell you about a few mistakes I made with the first two attempts that never emulsified. Making mayonnaise is not as simple as it seems.

If you’re not in the Los Angeles area, then you don’t know that it topped 100 degrees this past weekend and not just in the Valley. It was a hot one and without the benefit of any air conditioning, the idea of vigorously whisking egg yolk while slooooowly adding oil, drop by drop at first, seemed like too much physical exertion for such a hot day. I decided to take a lovely looking recipe from Michael Rulhman and make it in my blender. After all, the blender will certainly whisk vigorously while I have my hands free to add the oil drop by drop. Right? Not so. It turns out, according to The Joy of Cooking, that you need to have egg white included in the recipe if you’re trying to make a blender mayonnaise. Clearly J o C must know what they’re talking about so I transitioned to their recipe which called for using a bit of egg white in addition to the yolk and a Cuisinart instead of a blender. I fitted my Cuisinart with the plastic blade as directed and attempted batch number two. Still no emulsification. Perhaps I added the oil too quickly? Possibly, but I have a sneaking suspicion that the plastic blade did not create enough agitation to get the mixture to emulsify.

Already having dirtied two of my major kitchen appliances, I eyed the third. Epiphany. If I used the whisk attachment on my KitchenAid mixer, then who, other than the all-seeing kitchen Gods, would ever know that it was, in fact, a mixing machine and not my own arm that was attached to that whisk? I reverted back to Ruhlman’s recipe and in about five or 10 minutes had a wonderful mountain of homemade mayonnaise sitting in front of me. Success. Who says cheating never gets you anywhere? Truth be told, the energy exerted while washing all of those appliances is at least equal to, if not more than what it would have taken me to whisk the darn thing by hand in the first place.

My final tip on homemade mayonnaise? Once you have succeeded in getting the mixture to emulsify, for God’s sake, don’t ruin it by throwing it in a blender to add fresh herbs. I lost two thirds of my beautiful mayonnaise by trying to turn it into basil mayonnaise in the blender. I managed to break the emulsification and ended up with a runny purple mess in front of me (purple basil). Thank goodness I had set some aside that I was able to combine with hand-chopped basil.

Photobucket
I served this basil mayonnaise next to a gorgeous skirt steak that the boyfriend grilled, but it would be equally delicious on just about any kind of sandwich.

Mayonnaise
Adapted from Michael Ruhlman

1 egg yolk
1/2 t salt
1 t lemon juice
1 t water
1 cup vegetable oil

Place egg yolk, salt, lemon juice and water in the bowl of a mixer fitted with the whisk attachment and whisk on medium to combine. Pour vegetable oil into a glass measuring cup, preferably with a pouring spout. Turn mixer up to medium high and use a spoon to add the oil to the mixer, drop by drop, until about a third of the oil is mixed in. You should see the emulsification coming together as a thick, white, creamy sauce. Each time you add oil you will see the emulsification loosen, then come together around the whisk and then start sticking to the sides of the bowl again. When the mixture sticks to the bowl, you know it’s safe to add more oil. I used the spoon method for the entire cup of oil, mainly because I had already broken two emulsifications that afternoon. If you are brave, feel free to start adding the oil in a slow drizzle after the first third is successfully incorporated. Once all the oil is incorporated, you should be left with glorious, luxurious mayonnaise. Use as you will.

Wednesday, August 26, 2009

Olive Oil Not Gelato Not Ice Cream

Photobucket

There are two things that happen a lot once your friends and family realize how crazy you are about food. The first is you tend to get food-related gifts for every birthday and holiday. This is a huge bonus. The second thing is that they bring every food-related question to you, assuming you must know everything there is to know about food. Truth be told, this is a huge plus as well. It’s taught me that I really do know a great deal about food because I can thoroughly answer a number of questions that come from the home cook. It also has helped me realize what I don’t know and what I want to learn more about.

The question I get asked the most, with far more frequency than anything else, is to explain the difference between gelato and ice cream. My default answer has been that it’s mainly in the churning process and that if you’re talking about a custard-based ice cream, the ingredients are generally the same.

That default answer was no longer good enough after tasting the olive oil gelato at Mozza in Los Angeles. It was so good I tracked down the recipe in one of Mario Batali’s cookbooks, because as much as I would love to eat at Mozza every time a craving for that gelato hits, my bank account cannot handle the pressure. I dutifully followed Mario’s gelato recipe, but, lacking a gelato machine, I was forced to churn the custard in my ice cream maker. I needed to know whether I could call what I made gelato or if it was ice cream.

After a quick google search I realized this question could have easily been answered a long time ago. It turns out that I was partially correct. Gelato is churned at a slower speed than ice cream which means less air is whipped into the final frozen treat, yielding a much thicker, denser product. Additionally, gelato has less fat than ice cream. What? That doesn’t make sense! Isn’t gelato the richer, creamier version of ice cream? Well, according to Alon Balshan as quoted in Jessica Harlan’s article on About.com, the extra fat in ice cream coats your mouth and the flavors don’t come through as strongly. There’s less standing between you and that intense flavor punch in a good gelato.

Gelato vs. ice cream dilemma solved. What to call my creation? Neither really. I used a recipe for gelato which didn’t include as much fat as ice cream and I churned it in an ice cream maker that whipped in too much air to call the final product gelato. So here is a recipe for Olive Oil Not Gelato Not Ice Cream. If you have a gelato machine, by all means, follow the instructions and end up with delicious gelato. If you, like me, don’t yet possess one, follow the directions, make something quite delicious and join me in adding gelato machine to your long list of necessary kitchen products.

Olive Oil Not Gelato Not Ice Cream
Adapted from Mario Batalio

6 egg yolks
1 cup sugar
3/4 cup extra-virgin olive oil (I used Valderrama – my current favorite)
3 cups milk
1 cup heavy cream

Place the egg yolks and sugar in the bowl of an electric mixer and use the whip attachment to beat to the ribbon stage (about five minutes on medium speed). You’ll know you’ve hit the ribbon stage when the mixture is pale yellow in color and it falls back into the bowl in a ribbon pattern. With the mixer running, drizzle in the olive oil and beat until combined. Continue mixing as you add the milk and cream. When everything is combined, freeze according to your gelato or ice cream maker’s directions.

Monday, August 17, 2009

Roasted Tomato Tart with Goat Cheese and Country Pate

Photobucket
This tart recipe is the product of a perfect Sunday – a day I woke up early, feeling well-rested and with nothing on the calendar aside from hours to spend in the kitchen, tinkering with leftover pate and trying to use up pounds and pounds of tomatoes from the bushes now bursting with fruit in my backyard. At least that’s my idea of a perfect Sunday. If it doesn’t sound appealing to you, you may be in the wrong place.

I planned on making a tomato tart to start using up the stockpile of tomatoes currently occupying my kitchen counter. On a whim, I sliced up the leftover pate from our Saturday night cheese plate and included it in the tart. It added an amazing richness, but if you’re not a fan of pate, by all means leave it out, just be sure to put something in its place to help boost the flavor. A slather of Dijon mustard along the base of the tart would be a welcome replacement. Additionally, use any cheese that you like or have on hand. This recipe was created from what was already in the pantry and your version should be too.

The following recipe is long enough so I won’t waste anymore of your time going on and on about how much I love the Pâté de Campagne from Monsieur Marcel or how, if you’re feeling particularly adventurous, you can make your own goat cheese for the topping. I’ll just leave you with the recipe for your own adaptation. Enjoy.
Photobucket
Roasted Tomato Tart with Goat Cheese and Country Pate
Dough recipe adapted from Once Upon a Tart

2 1/2 cups flour
3 T semolina
1 t salt
12 T butter (1 1/2 sticks)
3 T shortening
4 – 8 T ice water

4 large tomatoes (heirloom paste tomatoes if possible)
4 cloves garlic, peeled and minced
15 thyme sprigs
Salt and pepper to taste
1/4 cup olive oil

1/4 pound good quality country pate
2 oz goat cheese

Photobucket

Heat oven to 375*
Place the flour, semolina and salt in a food processor and pulse until combined. Cut the butter into small pads and add to the food processor along with the shortening. Pulse until small crumbs start to form. Pour the mixture into a bowl and drizzle in the water starting with 3 T and adding more, 1 T at a time, if needed until the dough comes together as you stir it with a wooden sppo. Divide the dough into two balls and form into discs. Wrap the discs in plastic wrap and refrigerate for 30 minutes (you will only need one disc for this recipe).

While the dough is chilling, slice the tomatoes to a 1/4 inch thick and place on a rimmed baking sheet. Season liberally with salt and pepper and spread the thyme sprigs and minced garlic over the tomatoes. Drizzle with olive oil and bake for 20 minutes. Remove from the oven, discard the thyme sprigs and allow to cool.

Roll the dough out on a floured surface. Transfer to the tart pan and pierce the dough all over with a fork. Chill the dough in the tart pan for an additional 30 minutes. Line the pan with foil and place pie weights in the tart shell. Bake for 10 minutes. Remove the foil and pie weights and return to the oven for an additional 15 minutes. Remove from the oven and allow to cool slightly.
Slice the country pate very thinly and lay over the base of the tart shell (the bottom may not be completely covered). Place one layer of tomatoes over the pate, sprinkle lightly with salt and repeat with a second layer. Crumble the goat cheese and spread around the top of the tart. Return the tart to the oven and bake until the edges of the cheese are starting to brown. Let cool slightly before cutting and serving with a simple mixed greens salad.

Friday, July 31, 2009

Semifreddo Popsicles

Photobucket

I always get a bit nostalgic for the summers of my childhood around this time of year. The advertisements for back-to-school shopping are starting and I can walk into any bookstore to find some of my favorite food magazines already touting the best stews for fall. When I was growing up, summer seemed to last forever. Those were the days before we scheduled every spare minute of a child’s life with sports and activities and year-round school had yet to catch on. If you weren’t enrolled in summer school, which I rarely was, you had a solid three months, from June through the end of August or even Labor Day, to enjoy the summer, and enjoy it we did.

As with most things in life, my memories of summer center on food. The American flag cake my mother made using blueberries and raspberries for the Fourth of July one year, eating almost every family dinner out on our back patio with citronella candles burning to ward off the bees and oddly enough, because I don’t think we used them that much, the Tupperware popsicle molds that we experimented with one year.

The only clear memory I have of trying out the molds is the ultra-gourmet diet coke popsicle I created. While I did like to play with food when I was young, my experiments, much like this one, rarely produced something you would actually want to eat.

I’ve seen many recipes for truly gourmet popsicles that far outpace my diet coke concoction. From puréed fruit mixed with prosecco to coconut milk with lime juice and most recently, a semifreddo recipe frozen in popsicle molds for individual servings. That is the recipe that pushed me over the edge and sent me out on a search for my own set of molds. It was surprisingly hard to find the old-fashioned popsicle sticks. Since most molds come with their own plastic stick, grocery stores, at least the ones by me, don’t seem to carry them anymore. I ended up in an Office Depot in the craft section to hunt them down. Tools in hand, I rushed home to try my hand at a semifreddo (first one I’d ever made) and making my own popsicles (first foray into the non-diet coke flavored arena).

These came out delicious and rich and sweet, but not overly so. When I make them again, I won’t use my dark-yolk eggs. That deep yolk color made the popsicles more yellow than the beautiful off-white I was going for. Other than that, these are perfect as is. The original recipe called for frozen raspberries, but I went with fresh. Use whatever you have on hand.

Photobucket

Raspberry Semifreddo Popsicles
Adapted from Donna Hay

2 eggs
1 egg yolk
1 T vanilla bean paste
1/2 cup sugar
1 cup cream
2 cups raspberries

Place the eggs, egg yolk, vanilla and sugar in a heatproof bowl and place over a bowl of simmering water (you can use a double boiler, but a bowl works better with the electric mixer). Use a handheld mixer to beat the mixture for 6 - 8 minutes until thick. Set aside.

Beat the cream to stiff peaks using a stand mixer or clean off the handheld mixer and use it. Gently fold into the egg mixture. Divide the raspberries between 12 popsicle molds. Pour enough semifreddo to come about one inch up the popsicle mold. Tap the molds against the counter to get the semifreddo to settle into the base of the mold, around the raspberries, then finish filling the molds with semifreddo. Cover the molds with aluminum foil and insert popsicle sticks through the foil - this will help the sticks stay upright while freezing. Freeze until solid, about six hours.

Thursday, July 23, 2009

Parsley Lemonade

Photobucket

I can’t think of anything more refreshing than a glass of homemade lemonade on a hot summer day. At least, I didn’t think I could. Then my boyfriend’s mother told me about the parsley lemonade she enjoyed on a recent lunch date. What better way to make lemonade even more delightful than to add in a bunch or two of fresh herbs? And why didn’t I think of that? There was no doubt that parsley lemonade would be served at my next BBQ and truth be told, it’s been served at every one since as well.

Rather than worry about everyone at the BBQ walking around with flecks of green, chopped parsley stuck in their teeth, I steeped the parsley in a simple syrup to infuse the flavor without leaving any parsley in the final drink. This kills two birds with one stone – you have your flavoring and sweetener in one mix.

If you feel like stocking up on some new glassware, good old-fashioned mason jars make a great vessel for this drink. Sur la Table sells a great set with handles that are sturdy enough to have survived a number of our backyard BBQs.

Photobucket

Parsley Lemonade

1 bunch parsley
2 cups sugar
2 cups water
3 pound bag of lemons*
Water or sparkling water to taste

Remove large stems from the parsley and roughly chop. Place water and sugar in a saucepan over medium heat until sugar is dissolved, stirring occasionally. Once the sugar is dissolved, add the chopped parsley to the pan and let heat for one – two minutes more. Remove from heat, cover and set aside until cool and the parsley flavor is infused, about an hour. In the meantime, juice the lemons.

When the simple syrup is cool, combine it with your lemon juice. You now have your concentrate. You can either mix the concentrate with water to taste and let your guests serve themselves, or keep the concentrate separate and let each guest decide if they would like to use sparkling or still water and mix each drink to taste. Garnish glasses with a sprig of parsley.

*If desired, roll the lemons between your palm and the countertop to help release all of the juices before juicing.

Friday, July 17, 2009

Pickled Radishes

Photobucket

Every year I have quite the supply of radishes at the beginning of summer. It’s the first thing that will sprout in the garden and I tend to get a little overzealous tucking radish seeds into every spare nook and cranny. I like radishes in my salads, but after a while, I really have to find something to do with the huge supply, especially when they’re getting large and overgrown in the garden because I can’t use them up fast enough.

When in doubt, pickle. That seems to be my mantra in the garden this year. Pickle or can everything in sight, so it can be enjoyed later in the year, when the best days of my garden are behind me for the season. My tomatoes are just starting to come in, but I’m already looking forward to making tomato jam and paste to put away for fall when I’m lamenting the all-too-short tomato season.

Photobucket

With the radishes I decided that rather than canning, I would whip up a quick brine and keep a jar of pickled radishes tucked in the fridge for a week (that’s about as long they will last without canning or preservatives) for intermittent snacking. We ended up devouring most of these during a BBQ with friends. They were great on burgers as well as on their own on the side.

If you have a favorite brine recipe, by all means use it and please share it with us! In a pinch you can even use a pre-packaged jar of brining spices. Though I prefer to make my own concoction of mainly mustard and coriander seeds, I was out of both and not wanting to run to the store, I settled for a pre-made blend I had at home. I recommend taking the time to go through and pick out come of the cloves and anything else you’d rather not include. The cloves would have overwhelmed the flavor of this batch of pickles.

Photobucket

Pickled Radishes
Makes about 4 cups (I had a lot of radishes to use up, feel free to reduce this recipe)

5 bunches store bought radishes or a good pile from your backyard*
1/2 cup red wine vinegar
1/2 cup white balsamic vinegar
1/2 cup granulated sugar
1 1/2 cups water
2 T kosher salt
1/4 cup brining spices, picked over to remove cloves
2 dried bay leafs
Jar large enough to hold the radishes

*The amount of radishes is intentionally not precise – at the end of the process, you will simply pour over enough brining liquid to cover what you have.

Rinse the radishes and slice thinly using a mandoline and set aside. Combine the next seven ingredients in a saucepan and bring barely to a simmer over medium heat, stirring to dissolve the sugar and salt. Remove the mixture from the heat and allow to cool slightly (for about 10 minutes). Place the radishes in a jar and pour in enough brining liquid to cover. Discard remaining liquid. Place the jar of radishes in the refrigerator and let sit for a day (if you can wait that long). These pickles will last about a week in the refrigerator.

Photobucket

Wednesday, July 8, 2009

Tomato and Burrata Salad

Photobucket

It’s a difficult thing to admit, even to myself, but sometimes I do not want to cook. A recent virus kicked off my latest spurt of time out of the kitchen which was extended a few weeks by a trip up north and the guilt that ensued for not adding anything to Apples and Butter for weeks upon weeks. I have been here, quietly perusing your sites and finding so much inspiration, just not adding much to the conversation myself. This past weekend, the push I needed came in the form of a little red globe of perfect, first-tomato-of-the-season ripeness I found hiding at the back of one of my potted cherry tomatoes.

The day I pull the first tomato of summer off the vine may as well be a holy day in my household. At the very least it’s the equivalent of a national holiday. The anticipation begins in March when I put the first seedlings in the ground and wonder why they don’t produce tomatoes the very next day. It’s a cruel, three-month waiting period until the flowers turn to green tomatoes and the green tomatoes ripen into voluptuous red globes that seem as though they will burst at the seems if left on the vine for one more minute.

Photobucket

The cherry tomatoes I pulled off the vine needed a very basic preparation to let the homegrown tomato flavor shine through. I grabbed a fresh package of burrata out of the fridge and opened my new bottle of Valderrama olive oil (more about that another time) that was waiting patiently on the counter for the perfect first use. This was definitely it.

With burrata and homegrown tomatoes as the star ingredients, the dish only needed a sprinkling of fresh herbs to finish it. Basil would be ideal, but since my bushes had not quite jumped into production, I settled for finely chopped parsley - a decent substitute in this situation.

For a presentation worthy of photographing (though I would have gladly thrown everything together in a bowl and dug in with a fork) I shaped the burrata into quenelles, a football shape which is formed by moving the cheese back and forth between two spoons, smoothing the edges as you go. If you have no idea what I’m talking about, this, more detailed, explanation may be helpful.

Photobucket

Wherever you are, I hope it’s warm enough that you too are enjoying the first homegrown tomatoes of summer.

Cherry Tomato and Burrata Salad
Serves 1 (this recipe can easily be doubled, though if you’re pulling your first tomatoes off the vine, you, like me, may not want to share)

Handful (10 +) of cherry tomatoes
4 quenelles (or spoonfuls) of Burrata (about a 1/2 cup)
1 T best quality olive oil
1 T chopped fresh herbs of your liking
Sprinkling of Maldon sea salt

Place the burrata quenelles on four opposite sides of a plate (think north, south, east, west). Slice the cherry tomatoes in half and arrange them among the burrata. Drizzle with olive oil and finish with a sprinkling of herbs and salt to taste. Try not to inhale everything in one bite.

Monday, May 18, 2009

Empanadas

Photobucket
Summer is encroaching on my backyard – and I couldn’t be happier. Each time I step outside to check on the garden it seems the tomato plants have sprung up another six inches and the pole beans have climbed further up their trellis. I have the warm Southern California days to thank for all of this progress and it is because of those warm days that I surprised myself when I cranked the oven up to 400 degrees for the better part of the afternoon. With no air conditioning in my humble abode, this is quite the commitment, but one that was well worth it as I turned out my first batch of empanadas for a friend’s birthday celebration.

Empanadas are an enticing ethnic food that I have shied away from making at home, always assuming that indigenous hands would do a much better job than my white-bread paws could ever hope to achieve. This is also why I have yet to make any Indian dishes at home. I love my Tikka Masala and I’m pretty sure that Taj Indian delivery will always do a better job than I.

The first time I considered making empanadas was after hearing my friend Lauren recount her experience making hundreds of them for a party for her Argentine boyfriend. She, like me, doesn’t have the Latin blood pumping through her veins that I assumed was necessary for a successful empanada. Knowing that her creations were well received encouraged me.

The final push came from the recent New York Times article on empanadas. I sent the article and recipes to Lauren and we began talking about the different types of empanada filling and the kind of dough she uses - after some unsuccessful attempts at making her own, she now relies on Discos, packages of premade frozen discs of empanada dough. Lauren even happened to have a package in her freezer leftover from a recent party. She offered to give it to me and I earnestly accepted. Armed with Discos and the New York Times recipes, it was time to get over my reservations.

I didn’t want to completely cop out with the pre-made dough so I decided to make half the batch with Discos and half the batch with the New York Times recipe. As I mentioned, I was making the empanadas for a friend’s birthday celebration, which turned out to be the perfect opportunity to have a large group compare the Discos with their homemade counterpart. I am actually happy to report that the Discos beat my dough, hands down. I’m happy because it will make future attempts at empanada making even easier. Not that the dough is particularly hard to make, in fact I think we may have gone a little too fat-conscious in Los Angeles - the hardest part of the dough recipe was tracking down lard. I stopped at three stores before finally locating the animal fat at a small neighborhood market. If you’re planning your own empanada party, I recommend saving yourself the trouble and using Discos.

The traditional minced meat filling was the crowd favorite, only marginally beating out my own corn and goat cheese experiment. Both filling recipes are included below. If you want to try your hand at the dough, check out the New York Times recipe.

In addition to the empanadas, I brought a tomato seedling to the party as a gift for my friend. A recent text informed me that her tomato plant, like mine, is, “sprouting like a teenager.” I hope your gardens are having as much luck as we are here in Southern California. And, if you’re going to try your hand at empanadas, I hope you, unlike me, have central air.

Photobucket

Minced Meat Filling
Adapted (doubled) from the New York Times

1 pound lean beef, minced
3 T lard
2 cups chopped onion
Salt and fresh black pepper
1/2 t ground cumin
1/2 t smoked paprika
20-pack of 5-inch Discos
3 hard-boiled eggs, sliced
12 pitted cured black olives, chopped
30 raisins
1 large egg, beaten with 1 T water for an egg wash

Preheat Oven to 400*
If you, like me, weren’t able to find minced meat, cut your beef into chunks and process in a food processor until minced. Melt the lard in a large sauté pan. Add the onion and cook until it starts to soften, then add the beef. Cook until the beef is lightly browned and stir in the seasonings – salt, pepper, cumin and paprika.

Place the filling on half of a Disco, leaving a half-inch border at the edge. Top with a slice of egg, some chopped olive and a few raisins. Brush the border and the other half of the Disco with egg wash and fold over. Crimp the edges with a fork to make sure they are sealed.

Place the filled Discos on a baking sheet, lined with parchment paper, and bake for 10 minutes. Flip the empanadas over and cook for an additional 5 to 10 minutes until golden brown.

Corn and Goat Cheese Empanada Filling

2 T olive oil
3 shallots, chopped
2 cloves garlic, chopped
Corn cut from three ears of corn
1/2 bunch of cilantro, roughly chopped
1/2 cup of goat cheese

Preheat Oven to 400*
Heat the oil in a large sauté pan and add the shallots and garlic. Cook just until fragrant and add the corn. Cook until the corn begins to soften 8 to 10 minutes. Let the mixture cool before transferring to a food processor. Add the cilantro to the food processor and process until the corn is coarsely chopped. Stir in the goat cheese by hand and season with salt and pepper.

Place the filling on half of a Disco, leaving a half-inch border at the edge. Brush the border and the other half of the Disco with egg wash and fold over. Crimp the edges with a fork to make sure they are sealed.

Place the filled Discos on a baking sheet, lined with parchment paper, and bake for 10 minutes. Flip the empanadas over and cook for an additional 5 to 10 minutes until golden brown.

Photobucket
If you are making your own dough, a lid or other round surface makes a good guide.

Thursday, May 7, 2009

Pavlova with Lemon Curd and Berries

Photobucket
I’m certain that when Anna Pavlova visited New Zealand in 1926 she was more concerned with the quality of her ballet performances than of the desserts she consumed. Fortunately for us, a local chef troubled himself with the later and created a dessert in her honor that consists of a pillow of meringue, topped with whipped cream or lemon curd (or both) and finished off with a scattering of fresh fruit. Best of all, it looks terrifically impressive and is perfect for company, but it’s also completely manageable if you’re willing to commit to a multi-step dessert.

I was willing to make such a commitment for a recent Sunday afternoon meal. However, my only company was the boyfriend and he thinks – or at least pretends to think – that everything I make is terrifically impressive (another one of the many reasons I keep him around). In the absence of guests to impress, I went ahead with the Pavlova recipe because really, when have I ever let the absence of an audience stop me from making something delicious?

And the Pavlova was delicious. It’s truly an exercise in varied textures. The crunch of the outside of the meringue contrasts with its marshmallow-like interior - achieved through slow and low cooking in the oven - and the creamy tartness of the lemon curd plays off the firm sweetness of the fresh fruit topping. All of these components come together to make not only an enjoyable mouthful, but also something beautiful to look at. And if you look closely, you may be able to imagine the ballerina’s tutu that inspired that pillow-like base.

The next time around I may add a little more sugar to the curd or use Meyer lemons as the tartness actually turned my tongue raw. Or maybe next time I will stop at one or two helpings instead of carrying on to three or four. Either way, your choice. I’ve included the recipe as it was printed in the April issue of Gourmet.

Photobucket

Pavlova with Lemon Curd and Berries
Adapted from Gourmet Magazine

Meringue:
1 cup sugar
1 T cornstarch
3 eggs at room temperature for 30 minutes
3 T cold water
1 t white vinegar

Curd:
3 egg yolks
2/3 cup sugar
1 T cornstarch
1/8 t salt
1/3 cup fresh lemon juice
4 T (1/2 stick) unsalted butter
2 t grated lemon zest

Assembly:
1 cup heavy cream
4 cups mixed berries

Photobucket

Preheat oven to 300*
Meringue:
Trace a 7-inch circle on a piece of parchment paper cut to fit your baking sheet. Turn the parchment over and place on the baking sheet. Whisk the sugar and cornstarch together in a small bowl. Place the egg whites and a pinch of salt in the bowl of a stand mixer fitted with the whisk attachment and beat at medium speed to soft peaks. Add the cold water and beat to soft peaks again. Increase the mixer speed to medium high and add the sugar and cornstarch mixture one T at a time. After the all the sugar has been added, beat for one minute more. Add the vinegar and beat for approximately five minutes until the eggs hold stiff peaks. Use a spatula to spread the meringue inside the circle drawn on the parchment paper. Shape a small crater in the middle by forming the edges higher than the center so you will have a place for the filling. Bake for 45 minutes until the meringue turns a tan color. Turn off the oven and prop open the door with a wooden spoon. Cool the meringue in the oven for an hour.

Photobucket

Curd:
Whisk the egg yolks together in a small bowl and set aside. Stir the sugar, cornstarch and salt together in a medium saucepan. Place the pan over medium heat and add the lemon juice and butter. Bring to a simmer and continue to cook for one minute longer, whisking constantly. Temper the mixture by adding a 1/4 cup of the lemon and butter mixture to the egg yolks in a small drizzle, whisking constantly. Whisk the tempered egg yolks back into the pan with the remaining lemon mixture. Reduce the heat to low and stir constantly for about two minutes longer, until the curd has thickened. Stir in the lemon zest and transfer to a bowl. Cover with plastic wrap directly on the surface of the curd so a skin does not form and chill until cold 1 – 1 1/2 hours.

Assembly:
Beat the heavy cream until it holds soft peaks. Use a spatula to gently fold 1/4 cup of the whipped cream into the lemon curd. Spread the lemon curd over the crater in your meringue and pile berries on top. Serve with the whipped cream to cut the tartness of the curd.

Photobucket

Thursday, April 30, 2009

Whole Wheat Flatbread and Dinner Rolls

Photobucket
Artisan Bread in Five Minutes a Day is the best thing that has happened to my bread baking and my comfort food cravings. Rough day at work? Spend a few minutes preheating the oven and shaping the dough and fresh baked bread, hot enough to melt butter on contact is yours. Unfortunately, because of the ease of the whole process, Artisan Bread in Five Minutes a Day is not the best thing that has happened to my waistline. C'est la vie.

My latest artisan dough of choice is the light whole wheat bread. It's turned out to be quite the gateway dough for whole wheat breads as I now have a batch of their full force whole wheat bread in the fridge waiting for its first use. 

The light whole wheat dough is perfect for flatbread. I discovered this when I was looking for something small to serve before a dinner that was taking longer than expected to finish. I also had the last of my homemade goat cheese to use up. While the dough rested, I whipped up a half batch of these caramelized onions and with the toppings finished, appetizers were jut about served.

This dough also works really well for dinner rolls. Be sure to save some of the caramelized onions from the flatbread to use as a topping for the rolls. Delicious. Just remember to re-read the first paragraph and consider yourself forewarned if your pants start to fit a little snug.

Artisan Light Whole Wheat Bread

3 cups lukewarm water (100* - 110*)
1 1/2 T yeast
1 1/2 T salt
1 cup whole wheat flour
5 1/2 cups unbleached all-purpose flour

Combine the water, yeast and salt in a 4 - 6 quart container. Mix in the flour and cover the container loosely. Let the dough rise for two hours. The dough can be used immediately or stored in the fridge until you're ready to use.

Flatbread
Sprinkle the dough with flour and pull off a fistful of dough (about a pound) and form into a ball. Stretch the surface of the dough around to the bottom on all four sides, rotating the ball a quarter turn as you go. Let rest on a floured work surface for 20 minutes. Preheat the oven to 450*. Roll or stretch the dough out into a long oval. Top with caramelized onions, goat cheese, herbs or any desired toppings. Slip the flatbread onto a baking stone in your preheated oven and bake for around 30 minutes (start checking after 20 minutes as there are a lot of variables - toppings used, amount of dough - that can change the baking time).

Photobucket

Dinner Rolls
Sprinkle the dough with flour and pull off a fistful of dough (about a pound). Form the dough into a ball and stretch the surface around to the bottom on all four sides, rotating the ball a quarter turn as you go. Let rest on a floured work surface for 20 minutes. Divide the ball into six equal portions and form into smooth balls. Let rest again on a floured surface for 40 minutes. Preheat oven to 450*. Dust each roll with flour and slash an x on the top. Place one tablespoon of caramelized onions in the indentation the x leaves. Bake the rolls for 20 - 25 minutes. If you have a broiler tray, pour 1 cup of water into it after you put the rolls in the oven to create steam to help with forming a crust.

Thursday, April 23, 2009

Strawberry Jam and Tea Together

Photobucket

I’m certain my great-grandmother would be very confused if she found out that learning to can and preserve was a novelty for me. I never met the woman, but raising nine children in a very rural section of Mississippi would have made the process a necessity, not a novelty in her life. The reality of my life includes a farmers’ market almost every day of the week in the greater Los Angeles area as well as a 24-hour grocery store a mile from my house that carries every imaginable fruit and vegetable including corn and tomatoes in the dead of winter. I won’t comment on the flavor of those winter tomatoes, or the distance they likely had to travel to make it to my market but they’re there which means the thought of canning or preserving my backyard produce for use throughout the year has never been a priority of mine. This year, I’m determined to change that.

It may be the expansion of the growing area in my backyard and the knowledge that if all goes well our garden really will runneth over this summer or it could be the impulse purchase of canning supplies on a recent Sur La Table trip; either way it was time to try my hand at canning. The garden is filled with more seedlings than actual food at this point in the season so I headed off to the farmers’ market in search of organic strawberries to make jam. I found a flat of organic camarosa strawberries that the farmer was willing to let go for $20. He assured me that of his three different varieties, these strawberries would make the best jam.

I used a recipe that was featured in a Los Angeles Times story on Edon Waycott, the woman who makes jams for La Brea Bakery. I figured if her preserves were good enough for Nancy Silverton, then they would certainly pass muster in my kitchen. The process itself is very simple, just slightly time consuming. The strawberries are hulled, left at room temperature while they macerate in lemon juice and sugar and then cooked down over medium heat until they gel. The jam is then cooled slightly before starting the canning process.

Photobucket

Full instructions for canning can be found here. Just keep in mind that you shouldn’t touch the jars, especially their lids, until they are completely cool. And that popping sound you hear coming from the kitchen? Don’t worry, those are the lids sealing shut, not popping open. For a seasoned canner, I’m sure that seems obvious, but for this beginner those pops sounded like the whole process going to ruin.

*Be sure to keep reading after the recipe for info on the best store-bought jam I have ever tried.

Photobucket

Strawberry Jam
Makes 12 8 oz Jars

3 - 4 quarts strawberries (12 pint baskets)
2 cups sugar
3 T lemon juice

Rinse and hull the berries. Combine the berries, sugar and juice in a nonaluminum bowl and let them sit at room temperature, stirring occasionally (once an hour or so), for 3 to 4 hours (after the strawberries had macerated for 4 hours, I covered them and put them in the fridge overnight to allow plenty of time the next day for the cooking and canning process, but this is not necessary).

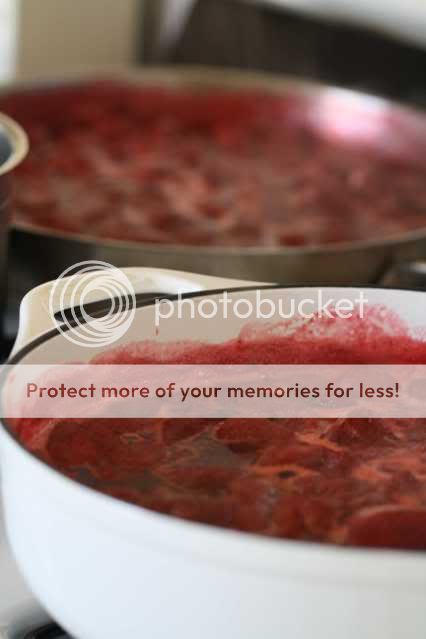
Scoop the strawberries and their juices into two wide, shallow saucepans (or one if you have a pan that big) and place over high heat. Bring to a boil, skim the foam that collects on the surface, then reduce the heat to low, making sure the mixture continues to simmer. After 20 - 30 minutes, the berries will give up additional juices. When you notice the extra liquid, continue cooking and skimming the foam for another hour. Let the mixture cool slightly before continuing with the canning process found here.

Photobucket

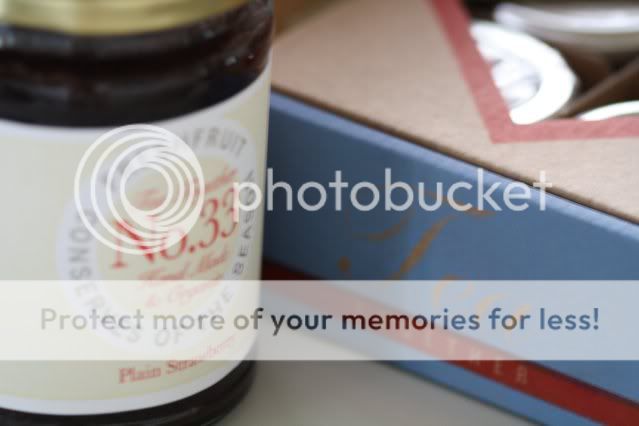
The preserves turned out deliciously. I was a bit concerned that the whole mixture was too runny and didn’t look as thick as store-bought jam, but lucky for me, providence stepped in. The day after I finished making my preserves, I was contacted by a company called Tea Together. They make small-batch, handmade organic jams, preserves and chutneys in Northern France and wanted to send me some samples to try. Having just finished my own batch of preserves using organic fruit, I was thrilled to have something from the professionals to compare it to. I had no idea what I was in for.

As soon as the samples arrived I pulled out the jar of strawberry preserves to compare to my own. I was thrilled to see that their batch was just as runny and chunky as mine. In fact while doing some research I found that Judith Gifford, one of the founders of Tea Together, had the perfect advice for me:

“Erase from your brain all notions about jam that you have from the shop-bought variety," says Judith. "The big producers can always do smooth, bright, bland and tidy much better than you can. So don't waste precious cooking time fishing out the pips, straining or trying to achieve a rigor-mortis set. Instead, consider the fruit you have chosen to immortalize (well, for a little while, anyway) as jam. What is it exactly about this perfume, this taste, this texture, that does it for you? Aim to end up with a jam that has character, vibrancy, individuality, and that gives back to you, in spades, what it is you love about that fruit.” (As reported by Anita Chaudhuri)

Photobucket

After reading that quote, I knew I was in love. How could you not be drawn in by a company that feels that way about food? And trust me, that philosophy is apparent in their jams. They don’t seem processed or mass-manufactured at all. It’s as though your mother sent you a bottle of homemade preserves and your mother is the best jam maker you have ever met. I knew we (the boyfriend and I) had to hold a taste test for the other products, so I made a batch of these scones and down we sat, resigning ourselves to the fact that we would have to spend the morning eating some of the best jam I’ve ever laid my hands on, slathered all over fresh-from-the-oven scones. Poor us.

My favorites are #33 (strawberry jam) and #14 (rhubarb, lemon and angelica). The boyfriend, with his British roots, fell in love with #15 (summer pudding with vanilla pod) based on the British dessert, Summer Pudding (note to self, make Summer Pudding for the boyfriend). Did I mention the founders are British ex-pats? That helps to explain the delightful British aesthetic of the packaging. In case it wasn’t already abundantly clear (PG Tips, boyfriend’s British side of the family, inappropriate squeals upon hearing someone say “the tube”), I’m an anglophile.

You can check out the company and products online at Tea Together or, if you happen to live in New Jersey, they’ve just opened a shop in Millburn. If you’re lucky enough to live in France, be sure to check out the list of local French suppliers. The jams are not cheap, but if you share my philosophy that good food costs money and that the artisans who create flavorful, good-quality food products deserve to be compensated for their efforts, then the cost will not seem off-putting. If you have yet to be convinced of this philosophy, I suggest you plant an edible garden. The flavor of the fruits and vegetables you get from your own yard will far surpass that which you find in the grocery store, but the real lesson will be in the amount of work it takes to get those plants to production stage. It certainly opened my eyes to the hard work of farm life. By the way, no judgment here at all - we’re all watching our pennies these days, but for something this special, I’m willing to splurge. Maybe you are too.


Photobucket