Tuesday, March 30, 2010

Fava Bean Assembly Line

Photobucket

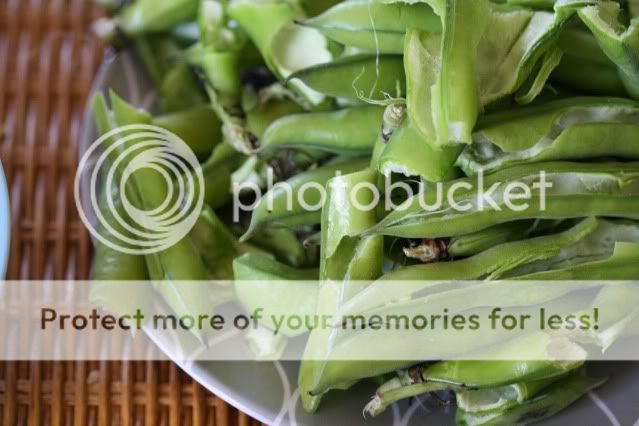
This weekend I decided that one of the things I am looking forward to about having children is setting up my own fava bean shelling assembly line. I am not pregnant, nor do I have plans to become pregnant anytime in the near future, but after working my way through two pounds of fava beans on Saturday, to be left with only a scant half cup of shelled beans, I am in need of that assembly line.
Photobucket

There are pictures of me as a child, saddled up to the kitchen counter, dutifully snapping the ends off of green beans as my mother prepares the other and slightly more challenging components of a family meal. She was all about child labor in the kitchen and I plan on taking the same route – especially when it comes to favas. The shelling, followed by blanching, followed by peeling is a lot of work for the small amount of food you’re left with. It is worth it, but you really have to set aside a chunk of time if you’re tackling the task on your own.

Photobucket

If there are any idle hands in your household, put a bowl of fava beans in front of them and demand help. This salad from Jamie Oliver really is worth all of the effort. The favas are paired with a fresh pea dressing and smoky pancetta. This is the first time I’ve made a salad dressing out of pureed vegetables and I’m a bit bothered that Jamie Oliver beat me to the punch. It’s a particularly great idea in this case; the pureed raw peas taste quintessentially fresh and the bright green color really pops.

The fava bean prep is the most difficult part of this recipe. If you have helpers, get extra fava beans. You’ll be grateful if you have leftovers.

Photobucket

Fava Bean and Pancetta Salad
Adapted from Jamie Oliver

1 garlic clove, peeled and left whole
10 ½ ounces of shelled fava beans (from about three pounds of whole favas)
8 pieces of pancetta (about a quarter pound)
1 handful of almonds
5 ½ ounces of shelled fresh peas (from about one and a half pounds)
2 ½ ounces of Pecorino cheese, grated plus more for scattering over the plates
15 mint leaves (a handful), plus more for scattering over the plates
6 – 8 T extra virgin olive oil
Juice of 1 – 2 lemons
Salt and pepper

Preheat the oven to 475*
Bring a medium saucepan of water to a boil and do not add any salt, which would toughen the favas while cooking. Add the garlic and cook for three minutes. Add the shelled fava beans and cook for an additional three to five minutes until the favas can be easily squeezed from their skins. Drain, set the garlic aside and remove the skins from the fava beans and discard.

Place the pancetta and the almonds on a baking sheet and bake just until the pancetta is crisp, about 10 minutes. If the almonds start to get too dark, remove them and continue cooking the pancetta.

To make the dressing, place the peas and reserved garlic clove in a food processor and process until smooth. Add the cheese and mint leaves and process until combined. Add 6 T of olive oil and 4 T of lemon juice and blend. This dressing should be thick, but if it seems too pasty, add more olive oil and lemon juice until your desired consistency is reached (I added about 1 T more of each). Season with salt and pepper to taste.

Divide the fava beans among four plates. Drizzle the dressing over the fava beans - you may not need to use all of it. Scatter the pancetta and the almonds evenly over the four plates and finish with a sprinkling of mint leaves and pecorino if desired.

Thursday, March 25, 2010

Pork Souvlaki on a Picnic

Photobucket

One of the many benefits of growing up in a warm climate is the option of eating outdoors on a regular basis. My mother made dinner for our family almost every night of the week and we ate it together, not in front of a television. As spring arrived each year and daylight extended a bit further into the evening, it would come time for my brother or I to set the table and my mother would ask, “are we eating inside or out tonight?” My answer was always, “out!” and if I could get outside fast enough, before any other family member had the chance to object, I would set our patio table and light the citronella candles to try and keep the bees away.

I’m not sure why I loved eating outdoors so much. Perhaps it was a change from the usual or maybe, even at a young age, I appreciated the amazing view of the Angeles Crest National Forest visible from my parents’ backyard. I couldn’t have known then that they wouldn’t live in that house forever and that I needed to make the most of the surroundings while I had the chance; luckily, I did it anyway.

Photobucket

I continue to love eating outdoors though I rarely get the chance to entertain in my own backyard. Busy schedules and the absence of my own family to cook for every evening mean eating outside is relegated to Saturday evenings and only then if I can round up a group of friends to come over for a BBQ.

Since the time change has already happened this spring and the sunlight hours are once again extending further into the evening, I need to make sure that my propane tank is full and ready to BBQ. Of course the first question that comes to mind and perhaps should not be addressed so late in this post is what to serve?

I love making skewers for picnics and BBQs. They can be prepared in advance and grilled on the spot or if you’re headed out on a picnic they can be cooked in advance and served at room temperature. Even more importantly, you don’t need silverware. Simply put, meat on a stick is easy outdoor food.

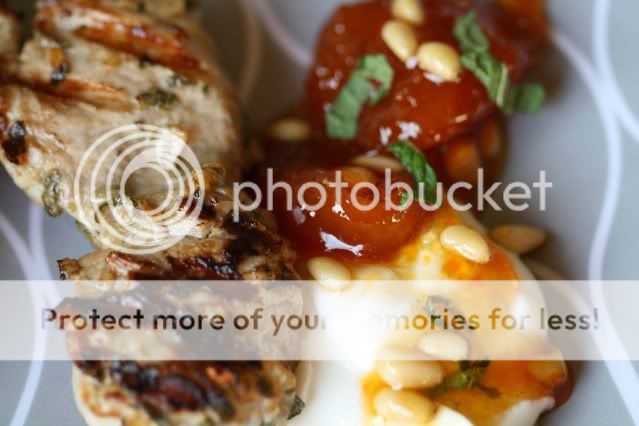
When meat on a stick is made with Greek flavors, it is often referred to as souvlaki or shish kebab, but still, at its base, it is meat on a stick. This recipe for Pork Souvlaki is marinated the night before so when it comes to cooking, all you have to do is skewer and grill. The accompanying honeyed apricots can also be prepared ahead, making the work when your guests arrive an exercise more in plating than in cooking.

Cooking note - Finding myself without a bottle of wine in the house, I substituted champagne vinegar for the wine, reducing the amount by two thirds. If you prefer to use wine, I’ve included the original amount called for. If you do use vinegar, be ready for a bit of a sour bite to the apricots, a bite that I found to be perfectly balanced by the Greek yogurt served on the side.

Photobucket

Pork Souvlaki with Honeyed Apricots
Adapted from Michael Symon
Serves 4 - 6

For the Pork:
2 shallots, minced
2 garlic cloves, minced
2 T fresh oregano, chopped
1 jalapeno, seeded and minced
Juice of 1 lemon
1/2 cup extra-virgin olive oil
2 pounds pork tenderloin, trimmed and cut into 1 1/2-to-2-inch chunks
Salt

For the Apricots:
Juice of 3 limes
3/4 cup white wine (or 1/4 cup champagne vinegar and 1/4 cup water)
1/4 cup honey (or, if using vinegar, 3/4 cup honey)
1 shallot, minced
12 or more dried apricots
1 T fresh mint, chopped
1 T toasted pine nuts
Greek yogurt for serving

For the Pork: Combine the shallots, garlic, oregano, jalapeno, lemon juice, olive oil and pork in a large Ziploc bag and turn to coat. Marinate overnight (or at least three hours if you don’t have that much time).

For the Apricots: Combine the lime juice, wine or vinegar, honey and shallots and bring to a boil. Add the apricots and simmer the mixture until syrupy, about 15 minutes. Remove from the heat and stir in the mint and pine nuts.

For the Pork: Soak 16 wooden skewers in water for half an hour if you are using a BBQ. If you are using a grill pan then there is no need to soak the skewers. Place two pieces of pork on each skewer, sprinkle generously with salt and cook over high heat until cooked through, about two minutes per side. Plate 2 to 3 skewers per person and serve with a dollop of yogurt and 2 to 3 apricots.

Monday, March 22, 2010

Roasted Beet Risotto

Photobucket

The first day of spring has come and gone and I am brimming with anticipation for the artichokes, fava beans and pea shoots that will soon appear at farmers’ markets all over Los Angeles. In an effort to cook seasonally, I have stockpiled recipes for fava bean purees and shaved artichoke salads, and held off on making a rhubarb tart until I see the harbinger of spring show up at my favorite Saturday market.

Photobucket

Beets are a year-round food here in Southern California, but the vibrant pink color imparted by roasted red beets announces spring almost as much as the honey baked ham I order every year for Easter. So, in anticipation of all the wonderful spring food headed to market, a number of beet dishes have been prepared in my kitchen.

This weekend I added a puree of roasted beets to risotto, turning the otherwise neutral colored dish into something bursting with color. The bright pink dish may look almost artificial to some, but served next to a green salad and a rack of lamb, it looks just like spring to me.

Photobucket

Roasted Beet Risotto
Serves 6 – 8 as a side dish

3 – 4 medium red beets
2 T extra virgin olive oil
2 T unsalted butter
1 small onion, minced
2 cups carnaroli or arborio rice
4 – 6 cups chicken stock or a combination of stock and water
Salt and pepper
Sour cream or crème fraiche to serve

Preheat Oven to 400*
Trim the beets of greens and scrub to remove any dirt. Wrap the beets in foil and bake until tender, 45 minutes to an hour. When the beets are cool enough to handle, remove the skin by peeling or gently rubbing with a paper towel. Puree the beets in a food processor and set aside while you prepare the risotto.

Bring the chicken stock or chicken stock and water to a boil and then keep warm over low heat. Heat the olive oil and butter in a large saucepan over medium heat. Add the onion and sauté until softened, about five minutes. Add the rice and stir until lightly toasted and turning opaque. Add about a cup of the heated liquid to the rice and stir until fully incorporated. Continue adding liquid, one cup at a time, until the rice is still lightly al dente – you may not need all the liquid. Stir in the beet puree and season with salt and pepper. If desired, add a spoonful of sour cream or crème fraiche to each serving.

Tuesday, March 16, 2010

A Chocolate Lover Makes Carrot Cake

Photobucket

I am an admitted chocoholic, especially when it comes to dark chocolate. Whether it’s flourless chocolate cake, dark chocolate pecan clusters, or even chocolate covered, peanut butter filled pretzels, once a piece of chocolate crosses my lips, I want more.

Not surprisingly, I’m known to only order chocolate desserts at restaurants. Though lately I’ve made a concerted effort to expand my horizons and have been rewarded with things like Mozza’s Torta Della Nonna which I am now in the process of feverishly trying to recreate at home (note to Nancy Silverton and Matt Molina – if you could finish up with that Mozza cookbook, I’d really appreciate it. Thanks). Also not surprisingly, when I’m cooking at home I tend to be drawn to dessert recipes that call for chocolate.

So, why isn’t this a post about a recipe for a chocolate dessert? Because I happen to be in a relationship with someone who loves carrot cake the way I love chocolate and in my never ending quest to please both our palates, I have a hard time passing up any carrot cake recipe that comes my way.

This particular version comes from the latest issue of Everyday with Rachael Ray. The addition of crushed pineapple makes for a very moist cake and in a deviation from tradition, the frosting calls for sour cream. It’s a nice change from the usual cream cheese and the tang the sour cream imparts is a great compliment to the carrot cake.

I have yet to hear what the carrot cake fanatic thinks of this recipe since he won’t get the chance to try it until tonight, but I think it’s a definite keeper. If you can’t get over the absence of cream cheese frosting, try the cake recipe and top it with your favorite frosting. I think it would be equally delicious.

One final note - The next time I make this recipe I’m going to double it. My bundt pan is clearly larger than a 6-cup capacity and the more cake I’m left with on this one, the better.

Photobucket

Carrot-Pineapple Bundt Cake with Sour Cream Frosting
Adapted from Everyday with Rachael Ray

1 cup flour
1 t baking powder
½ t baking soda
½ t ground cinnamon, plus more for dusting
¼ t salt plus an extra pinch
1 cup packed light brown sugar
½ cup sour cream, divided
¼ cup vegetable oil
1 egg
1 t vanilla bean paste
1 cup shredded carrot
½ cup crushed pineapple, drained (or chopped fresh pineapple)
½ cup chopped walnuts
1 cup powdered sugar, sifted
3 tablespoons butter, at room temperature

Preheat oven to 350*
Grease a 6-cup capacity bundt pan and set aside. In a medium bowl combine the flour, baking powder, baking soda, cinnamon and ¼ t salt. In a larger bowl, combine the brown sugar, ¼ cup of sour cream, the vegetable oil, egg and vanilla and whisk until smooth. Add the carrots, walnuts and pineapple and stir until combined. Add the flour mixture and stir just until combined. Pour the batter into the prepared bundt pan and bake for 55 minutes or until a toothpick test comes out clean. Let the cake cool for 15 minutes in the pan before inverting onto a wire rack to cool completely.

Use a wooden spoon to combine the powdered sugar and butter. Whisk in the remaining ¼ cup sour cream and pinch of salt. Pour the frosting over the cake and dust with cinnamon if desired.

Thursday, March 11, 2010

Individual Potato and Onion Tartes Tatin

Photobucket

If I could take one indulgent, calorie and fat-laden ingredient and make it good for you without changing the makeup or taste of the product at all, it would be puff pastry. Unless of course I could choose the entire category of cheese, but if I had to choose just one cheese, I would stick with puff pastry.

Its rich buttery flavor and flaky layers are totally addictive and such a good complement to so many sweet and savory applications. I love using it as an easy tart crust, rolling it into palmiers or using it for a simple dessert. Not only is it delicious, but all the hard work is already done or you. You just cut the pastry to size and use as desired.

Photobucket

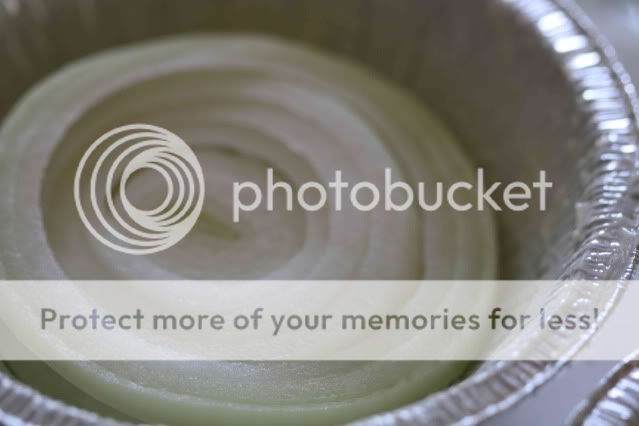
That ease of use is what makes these individual tartes tatins so brilliant. It’s an exercise in slicing more than cooking. Onion and potato slices are placed in individual pie pans and topped off with puff pastry. You can assemble them in about 15 minutes and after 30 minutes in the oven they emerge with the onions meltingly tender and sweet, and the crust perfectly puffed and golden. The hardest part, at least for me, is trying not to cut yourself on the mandoline as you slice the potatoes. I always cut myself. I probably need to give in and order a set of these to save my hands from total annihilation.

Photobucket

While I love any reason to purchase a new kitchen product, I actually could not find any 5-inch pie pans. Not even my trusted Surfas had them in stock. They are available online, but if you do not want to purchase small pie pans, I found that disposable 5-inch tins worked well (and only $3.99 for 15 of them).

Photobucket

Individual Potato and Onion Tartes Tatin
Adapted from Martha Stewart

4 T butter, cold and cut into small pieces, plus more for the pans
1 package puff pastry (17 ¼ oz)
4 medium yellow onions, peeled and cut into ¼-inch slices
5 small new potatoes
Salt and pepper
¼ cup balsamic vinegar
Pinch of sugar

Preheat Oven to 425*
Generously butter six 5-inch pie pans (or 5-inch disposable tin pans). Cut six 4 ½-inch rounds from the puff pastry and place in the refrigerator to chill while you finish the tarts.

Place two to three slices of onion on the bottom of each pie pan. Use a mandoline to cut the potatoes into ¼-inch (or thinner) slices. Lay the potato slices in a circle covering the onions, overlapping the slices as pictured above. Generously sprinkle the potatoes with salt and pepper. Place the puff pastry rounds over the potatoes and bake until golden (20 minutes in Martha’s oven, closer to 30 in mine).

Invert the tarts onto a serving platter or individual plates and allow to cool slightly while you prepare the glaze. Heat the balsamic vinegar and sugar in a small saucepan. Simmer until slightly reduced and syrupy, about four minutes. Whisk in the cold butter, one piece at a time. Season with salt and pepper. Using a pastry brush, brush the glaze over the onions topping each tart and serve warm.

Monday, March 8, 2010

Candied Kumquat Tart

Photobucket

There was a kumquat tree in my front yard when I was young. Unfortunately, it met the chopping block when my parents re-landscaped the front yard. I’d like to think the gardeners lovingly transplanted the tree elsewhere, but this was the eighties and sustainability wasn’t exactly “in” at the time. Sadly, I didn’t enjoy kumquats when I had an abundance of them at my fingertips. My young taste buds couldn’t appreciate the tartness of the tiny citrus fruit and something about eating the whole thing, rind and all, was off-putting to a six-year-old.

Photobucket

I’m certain I have eaten a kumquat at some point between the time the tree was removed and now, but the moment escapes me. So, this weekend when there were bags upon bags of kumquats available at the farmers’ market, I couldn’t resist the opportunity to try them again.

It turns out that my adult taste buds very much appreciate the balance of sweet and tart along with the convenience of eating the entire fruit, rind and all. In fact, I started popping the little suckers like candy. I knew I needed to make something with them before I worked my way through the whole bag.

Photobucket

I was already working on a tart crust made primarily of quinoa flour and almond meal for my first experiment in gluten-free cooking. I don’t have any problem digesting gluten, but I have girlfriends who do and to be honest, I was more curious than anything. I still needed something to fill the tart and the kumquats, with their bright orange color, promised to at least make the tart look appetizing if nothing else.

Appetizing indeed. I candied the kumquats which turned out to not only be delicious, but the process actually intensified their orange color. The crust was a partial success. It was tasty and imparted a peanut butter flavor to the tart, but it was a bit crumbly and could have held together better. This may have been my fault for rolling the dough out too thinly in an attempt to stretch it between two tarts. Either way, it was good enough to try again. Will I be giving up my all purpose flour and butter and lard-laden crusts? Absolutely not. But this will be a nice alternate to have on hand, especially when my gluten-free friends are coming over for dinner.

Photobucket

Candied Kumquat Tart
Crust adapted from a Whole Foods recipe
Filling adapted from Epicurious

Crust
1 cup quinoa flour
1/2 cup almond meal
1/4 cup sugar
1/2 t xanthan gum
1/4 t salt
1/2 cup (1 stick) unsalted butter
1 egg yolk

Filling
1 lb fresh kumquats
1 cup water
2 cups plus
2 T sugar
1 t fennel pollen
2/3 cup ricotta
1/3 cup sour cream

Crust
Place the quinoa flour, almond meal, sugar, xanthan gum and salt in a food processor and pulse to combine. Cut the butter into small cubes and add to the food processor. Pulse until the mixture looks like wet sand, but the butter is not fully incorporated. Form the dough into one disc for a round tart or two oblong discs for two smaller rectangular tarts and chill for 30 minutes.

Preheat oven to 400*
Remove the dough from the refrigerator and roll out to the shape of your tart pan. In order to keep the dough gluten-free, use quinoa flour to dust the dough while rolling it out. Transfer the dough to your tart pan and use a fork to prick the crust all over. Bake the crust for 15 – 20 minutes until golden brown. Remove from the oven and allow to cool on a wire rack.

Filling
Thinly slice the kumquats and remove any seeds. Bring the water and 2 cups of sugar to a boil and simmer for 5 minutes. Add the kumquats and simmer for 10 minutes. Drain the kumquats through a strainer set over a bowl to catch the syrup. Reserve the syrup for another purpose (I’m mixing mine with mineral water for drinks).

Combine the remaining sugar and fennel pollen with the ricotta and the sour cream. Spread the ricotta mixture evenly over the cooled tart shell. Place the kumquat slices in rows over the filling until the tart is fully covered. The crust is very delicate so slice carefully when serving.

Thursday, March 4, 2010

Shaved Beet Salad

Photobucket

Occasionally I look at a menu and find a dish that sets off a craving. It happened to me this past weekend when I spotted a roasted beet tower on the appetizer menu of a restaurant where I was enjoying a sunny Sunday afternoon on the patio. I envisioned layers upon layers of red, golden and bulls blood (pink) beets. What showed up was three very thin beet slices, each separated by a solid inch of an avocado and tomato mixture. Don’t get me wrong, I love avocados, but when I was expecting roasted beets, a plate of guacamole was pretty disappointing.

Lucky for me, the folks over at Clarkson Potter recently sent me a copy of the new Everyday Food cookbook – “Fresh Flavor Fast.” I subscribe to the Everyday Food magazine and buy their books because they have simple, get-down-to-business recipes. I may love spending hours on a dish on a quiet Saturday afternoon, but Monday through Friday, I need realistic recipes that take into account the maybe 30 minutes I have to prepare a meal.

Fresh Flavor Fast is everything I love about Everyday Food. It’s packed with new ideas to get you out of the cooking ruts that are so easy to get into when speed and simplicity are top priorities. I wasn’t expecting a side dish or salad to be the first recipe I made from the book, but upon arriving home from my disappointing roasted beet tower experience, I opened up the book and found this recipe for shaved beet salad.

The salad took no more than 10 minutes to put together and totally satiated my beet craving. Raw beets are not for everyone so make sure you slice them thinly. I used a mix of red and golden beets, but feel free to use all red or any combination you prefer. If you are using a mix, make sure you toss them with the dressing separately or the red beets will turn everything else red too.

Photobucket

Shaved Beet Salad
Adapted from Fresh Flavor Fast

1 pound beets, sliced thinly on a mandoline
1 t orange zest
2 T fresh orange juice
2 t white wine vinegar
1 T olive oil
1/2 t sugar
Coarse salt (kosher or Maldon) and pepper

Whisk together the zest, juice, vinegar, oil and sugar and season with salt and pepper. Toss the beets with the dressing. If you are using different colored beets, toss each color separately so that the red beets don’t bleed their color on the lighter beets. Arrange beets on individual plates and serve.

Tuesday, March 2, 2010

Prosciutto Corn Cakes

Photobucket

I love corn. I love corn on the cob, cornbread, corn pudding and I certainly love a coarsely ground cornmeal, cooked for at least thirty minutes while liquid is slowly introduced, turning the whole mixture into what is known as polenta.

Photobucket

This love of corn is why I get excited anytime I see a recipe that resembles cornbread or calls for some kind of ground corn product. It’s why I turned my mother’s cornbread recipe into madeleines so I could snack on them at tea time, or anytime really. It’s also why these little corn cakes caught my eye in a recent Donna Hay Magazine.

Photobucket

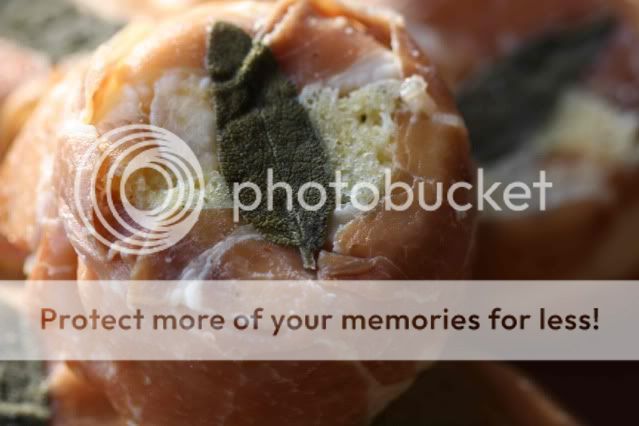
They’re quite simple really. An instant polenta mixture is seasoned with sage and poured into waiting muffin tins lined with prosciutto. The most complicated part of this recipe was locating instant polenta. If you live in Southern California let me save you the trouble of going to the four grocery stores that I visited during my search (yes I said four and yes I am aware that I have possibly the most patient boyfriend a girl could ask for). Gelson’s in Marina del Rey carried the instant variety and I’m willing to bet that their other locations do to.

Photobucket

If you can’t find instant polenta, do not try to substitute regular polenta here as it will completely throw off the cooking times. If you don’t feel like putting in the effort to find the instant variety than try what I am going to do next time – whip up a batch of my mother’s cornbread and use it to fill the prosciutto-lined muffin tins. I can’t make any promises about the state of the prosciutto after a longer cooking time, but I love my mother’s recipe so much that I’m willing to give it a try.

Photobucket

Prosciutto Corn Cakes
Adapted from Donna Hay Magazine

1 cup of instant polenta
1/2 cup of flour
1 t baking powder
1/4 t baking soda
2 T of chopped sage + 12 sage leaves
Salt and pepper
1 1/2 cups sour cream
2 eggs, lightly beaten
12 slices of prosciutto

Preheat the oven to 350*
Place the polenta, flour, baking powder, baking soda, chopped sage, cream and eggs in a bowl and mix well to combine. Season with salt and pepper. Place extra sage in the bases of 12 lightly greased 1/2 cup capacity muffin tins. Line each tin with prosciutto and fill with polenta mixture. Bake for 15 - 20 minutes or until cooked. Let cool slightly before serving.