Showing posts with label Olive Oil. Show all posts

Thursday, August 9, 2012

A Multi-Purpose Dressing

Photobucket

Well hello there. So. It’s been more than a little while since I last posted. 10 months to be exact. Things got busy, I planned a wedding, got married, went on a honeymoon and now, almost two months after The Big Day, I have recovered from the whole wonderful, exhausting experience just enough to get back in my kitchen and start documenting it again for you here, that is, if there are any of you left after my prolonged absence!

The meaning of this blog’s name (balancing the healthy – apples - with the delicious, but not-so-healthy – butter) could not be any more pertinent in my kitchen than it is right now. Since getting married I feel I am fighting the constant battle of trying to find dishes fabulous and flavorful enough to keep my husband (my ever-so-slightly picky husband) coming back to the dinner table, while trying desperately not to regain those 10 culinary school pounds I managed to lose for the wedding. Fun times in the Stanbrook kitchen.

Battle number one. Teach husband that chicken does not have to be flavorless diet food. Far from it! When cooked just until done (not to a dried out, parched mess of protein) I think chicken is absolutely delicious. However, properly cooked chicken does not, on its own, a fabulous and flavorful meal make.

Enter the one-two-punch of a marinade and grill. The flavor of chicken cooked on a grill will always remind me of the Cornish game hens my father grilled for our family at least once a week when I was a child. Perfectly cooked, with just the right amount of char, it is quintessential outdoor living, Southern California food to me. Use the following dressing that pulls on some of the season’s best flavors (pesto anyone?) as a marinade and I think you’ve got the perfect summertime dinner.

This dressing lives somewhere between vinaigrette and pesto. If you have extra basil, make as much of this dressing as you can and use it as a condiment for cooked meats or a salad dressing; toss it with freshly cooked vegetables or throw it over pasta. I have included directions below for using it as a marinade for grilled chicken breasts.

Photobucket        
Summer Pesto Dressing

1-1/2 cups loosely packed basil leaves
1/3 cup walnuts or walnut pieces
1 T white balsamic vinegar
2 T fresh lemon juice
1 t honey
1/2 t salt + more to taste
1/3 cup extra virgin olive oil + more as needed

Combine first six ingredients in a mini-food processor (or a regular food processor if you only have the full size) and pulse until combined. Add the olive oil and let the processor run until the oil has blended and somewhat emulsified with the other ingredients. I like to leave this dressing chunky, but if you prefer a smoother dressing, continue blending and add more olive oil until your desired consistency is reached. Taste and adjust seasoning.

To use this dressing as a marinade for chicken breasts:

Using a sharp knife, make three slashes in each breast, only cutting about 1/8” to 1/4”-inch into the breast. Reserve 1/2 of the dressing to serve as a condiment for the cooked chicken or to use later as a salad dressing. Rub 1/2 of the remaining dressing over the breasts and let them marinate in the fridge for as much time as you can – 30 minutes to three+ hours.

Fire up your grill. Let your chicken breasts start to come to room temperature while your grill heats up. Place the chicken on the grill and adjust the flames/charcoal to prevent flare ups. Close the grill cover and only lift it occasionally to baste the chicken with the remaining dressing. I wish I could tell you how long to cook the chicken, but every grill and every chicken breast is different. My chicken breasts were not gigantic and it took about six minutes on the first side and an additional four to five once I flipped them over. If your chicken is getting too black before finishing cooking, move it to a cooler area of the grill or a raised shelf and let it finish cooking with the grill cover closed. Serve the chicken with the remaining dressing.

Tuesday, April 5, 2011

Harbinger of Spring

Photobucket

Growing up, eating artichokes meant simmering them until tender and serving them with a dip of mayonnaise mixed with a bit of soy sauce. Had we been hip to it at the time, we might have called it a soy aioli, but to us it was just the perfect creamy salty accompaniment to those boiled leaves and still, to this day, I can’t eat artichoke leaves without it. Luckily, my artichoke repertoire has expanded ever so slightly beyond boiled leaves.

At FCI we prepare artichokes by ‘turning’ them, or removing all the outer leaves and using a paring knife to remove the green skin until you’re left with the tender heart of the artichoke. Once you have the heart, you can braise, roast, grill or do just about anything you want with it. Currently, in the restaurant at FCI, we serve slivers of braised artichoke heart with a roasted rack of lamb. They are delicious.

One of the perks of working on set at a cooking show is the opportunity to bring home the occasional excess produce. Once the segment is complete, the produce that was used to dress the set is usually still perfectly good, but won’t be visually appealing if saved for another shoot on another day. After the crew has been fed and talent takes what they want, the rest is up for grabs. I am very lucky to be working on these shows as the spring season rolls in and great produce such as asparagus, dandelion greens, spring onions, and of course artichokes, are the topic du jour. I made off with a few artichokes last week and while I was craving my mother’s simmered artichoke with ‘soy aioli’ I decided to broaden my artichoke horizon a bit more and see what I could come up with.

Enter Plenty, the new cookbook from Yotam Ottolenghi. I won’t say much about the book today, because I am smitten with the recipes and have a feeling that you may be hearing a lot about it over the coming weeks. Just know this: If you’re looking for some inspiration in the vegetable department, you are sure to find it in this book. I found mine when a relish of fava beans jumped off the page at me via some gorgeous photography. Favas are my ultimate harbinger of spring and they seemed the perfect accompaniment to the artichokes I had waiting. And a little hint about that other accompaniment I love so much? Hold on to the leaves you remove from the artichoke. Simmered over low heat they go very nicely with a little soy aioli.

I am providing the recipe here as Ottolenghi wrote it, but I was out of panko so I used a mix of walnut flour and whole wheat flour to bread the artichoke hearts. Use whatever, even plain old flour works well too.

Globe Artichokes with Crushed Fava Beans
Adapted from Plenty by Yotam Ottolenghi

1 3/4 cups shelled fava beans
1 small garlic clove, crushed
4 T extra-virgin olive oil plus more for frying
Freshly ground black pepper
1½ t Maldon sea salt
2-3 globe artichokes
3 lemons
1 egg, beaten
3 T panko
3 T fresh mint, chopped
2 T fresh dill, chopped

Bring a pan of water to a boil, add the beans and blanch for three minutes. Drain, refresh and leave in a colander to dry. Remove the outer skins by pressing each bean gently between your thumb and forefinger. Put the shelled beans in the bowl of a food processor. Add the garlic, four tablespoons of oil, some black pepper and half a teaspoon of salt, then pulse until just roughly chopped – don’t overdo it.

Cut off most of the stalk from the artichokes and pull off the tough outer leaves. Once you reach the softer, pale leaves, trim off the top, so you're left with the heart and some very soft leaves around it. Scrape off any remaining tough leaves and the 'hairs' in the center. Rub with a cut lemon to keep the artichokes from turning brown.

Bring a pan of water to a boil, drop in the artichokes and simmer until a knife cuts easily through the flesh, seven to 10 minutes. Drain and dry on paper towels. Put the artichokes in a bowl with the beaten egg, mix, then lift them into a bowl filled with the panko and 1/2 a teaspoon of salt, and coat them well.

Add enough oil to a pan to come 1 1/4 inches up the side. Heat until almost smoking. Fry the artichokes until golden, for about four minutes, turning them as you go. Transfer to a plate lined with paper towels and sprinkle with salt.

Put the fava bean mixture in a bowl and stir in the chopped herbs and the juice of a lemon. Spoon some of this over each serving plate, top with an artichoke heart and spoon more of the beans on top. Finish with a drizzle of olive oil and serve with a lemon wedge, if desired.

Friday, August 13, 2010

A Simple Salad for a Simple Summer Morning

Photobucket

It is only 73 degrees outside right now. I think that is the coolest it has been since I moved to New York. The boyfriend is in town for the weekend and I cannot wait to get outside and take advantage of the drop in temperature.

Tomorrow morning we head to Philadelphia for the day to visit the neighborhood where my boyfriend grew up, picnic in Valley Forge and if I’m lucky, eat a cheesesteak on South Street before heading back to New York.

Before I get started with all of that, I need to share this delicious summer salad with you. It is so simple. If you can use a knife to cut a tomato, you can make this salad. Because of its simplicity, it is vital that you find the juiciest, ripest, heirloom tomato you can get your hands on. I recommend hitting your local farmers market, even better if you have a plant or two going in your own backyard. If all you can get your hands on is a flavorless, bred-for-shelf-life grocery store tomato, don’t bother with this salad. Everything hinges on the flavor of the tomato.

If you haven’t had raw corn before, trust me, it is delicious. Cut straight from the cob into the salad, it tastes even juicer and sweeter than if you were to cook it for a few minutes on the stove or grill. Finish the cut vegetables with a few torn leaves of basil and a glug (technical term) or two of olive oil and you are finished. It is that simple. You do not need the recipe, but I will include one below just in case. Now get outside and enjoy the summer weather.

Simple Summer Salad

1 juicy tomato
1 ear of corn
6 – 8 leaves of basil
1 T good quality olive oil
1 t vinegar (your choice, I used balsamic)
Kosher salt to taste

Cut the tomato into thick slices and arrange on a plate. Sprinkle generously with kosher salt. Cut the corn from the cob and arrange around the tomato slices. Tear the basil leaves in half or quarters and add to the plate (smell your hands to enjoy the basil scent left behind). Drizzle the salad with a little olive oil and vinegar and share with someone you really like. This is summer on a plate.

Wednesday, July 28, 2010

Finally a Food Photo

Photobucket

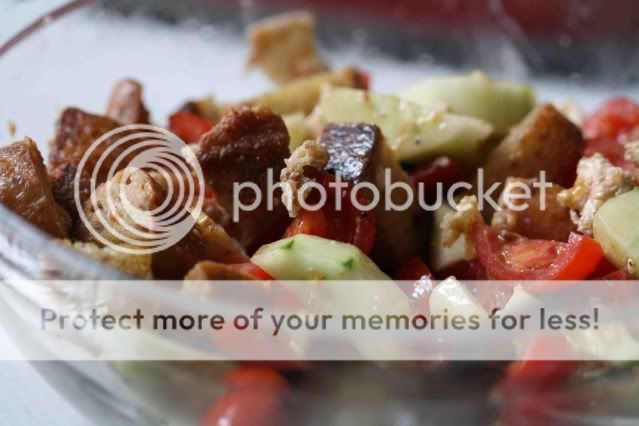
I find it appropriate that Panzanella is the first thing I made in my New York kitchen. After a week-long restaurant binge that could rival my best vacation eating on record (Cookshop, Tipsy Parson, Crema Restaurante, Oyster Bar, Bleecker Street Pizza, Txikito, Shake Shack, a culinary tour through Chinatown, and Otto Enotecca) I needed to slow down and make a simple and affordable dish.

Panzanella is considered peasant food in Italy. At least it was when the salad was created as a way to use up stale bread. A bit of a peasant myself these days (no paycheck in site and a culinary education to pay for) I am trying to take on my own waste-not-want-not mentality. Rather than discarding stale bread, I can chop it up, sauté it with a little olive oil and garlic and toss it with some chopped vegetables already on hand. It means lunch is thrown together without running out for additional ingredients. Simply put, Panzanella is delicious and makes me feel good about my grocery budget. Added bonus? I do not have to preheat my oven in the sweltering New York heat.

I ate this salad right away, but it gets even better after a few hours as the flavors meld together.

Next up – finding ways to use up mounds of julienned carrots without turning on my oven. Practicing my knife skills at home, where there is no industrial pot of chicken stock waiting at the ready for my carrot donations, may turn me orange from carrot consumption.

Photobucket

Panzanella

7-inch long piece of baguette (multigrain or other)
3 T of extra-virgin olive oil, divided
1 garlic clove, smashed and skin removed
1/2 cucumber
6 baby roma tomatoes (or 2 regular roma tomatoes, roughly chopped)
2 oz buffalo mozzarella
2 t balsamic vinegar
Salt and pepper

Cut the baguette into 1-inch chunks. Heat a large sauté pan over high heat. Add 2 tablespoons of olive oil to the pan and fry the garlic clove for one minute. Add the bread and salt liberally. Reduce heat to medium and sauté until bread is crisp and golden brown, about 10 minutes. While the bread is cooking, peel the cucumber and chop into 1-inch pieces. Cut the tomatoes into quarters. When the bread is crisp, place it in a medium bowl along with the cucumber and tomatoes. Using your hands, rip the mozzarella into small pieces and add to the bowl. Drizzle the balsamic vinegar and remaining tablespoon of olive oil over the bread mixture. Season to taste with salt and pepper.

Thursday, May 20, 2010

Squash Blossom Pizza

Photobucket

It has been far too long since I last posted! I left for vacation with the best of intentions of logging on and sharing a few recipes while I was off traveling, but of course, it never happened. I had some great food while out and about and even managed to snag the recipe for a delicious Thai curry that I promise to share with you soon. I’m also working on getting the recipe for a citrus marmalade we enjoyed in England. If I can get permission to share it with you, I’ll have that one up soon as well.

In the meantime, let’s take a look at what to do with all the squash blossoms that should be appearing in your kitchen garden right about now. Each time I have the pleasure of dining at Mozza Pizzeria, I order the squash blossom pizza. It’s my favorite dish on the menu and as I eagerly await any news about Nancy Silverton’s forthcoming Mozza cookbook, I am resigned to trekking to West Hollywood and paying $20 for a pizza. Or so I thought.

Photobucket

Saveur’s recent Los Angeles issue was a pleasure to read. I saw some of my favorite places in Los Angeles getting the credit they deserve and learned about some new restaurants, food trucks and taco stands that I must try. The most exciting discovery was the publication of not only Mozza’s famous pizza dough (adapted for the home kitchen) and not only Mozza’s tomato-based pizza sauce, but the entire recipe for Mozza’s squash blossom pizza. I think it might just be enough to hold me over until the Mozza cookbook is published.

Photobucket

In case you missed the Los Angeles issue of Saveur, I feel a sense of duty to share the recipe with you here. This could easily be the best pizza you’ve ever had. Make sure you take the time to track down the best burrata you can find. The creamy cheese, coupled with a healthy dusting of salt is really what makes this pizza so spectacular.

Next step? Build a wood burning pizza oven in my backyard so I can get just a little closer to pizza nirvana that Nancy achieves at Mozza.

Photobucket

Mozza’s Squash Blossom Pizza

9 T extra-virgin olive oil
1 T active dry yeast
1 T sugar
1 t kosher salt, plus more to taste
6 cups flour
2 cups pizza sauce (recipe below)
60 squash blossoms, stemmed
1 pound burrata

Combine 1T of the oil, the yeast, sugar, salt, and 2 cups of 115˚ water. Let sit until foamy, about 10 to 12 minutes. Add the flour and mix until the dough comes together. Transfer the dough to a floured surface and knead until smooth. Divide the dough into four equal parts and roll into balls. Put the balls on a floured baking sheet, cover with plastic wrap and let sit in a warm place until tripled in size, about 2 hours.

Place a pizza stone on a rack in the lower part of your oven and preheat the oven at 500˚ for 1 hour. Transfer 1 dough ball to a floured piece of parchment paper. Working from the center, gently flatten dough with fingertips to a 10" round. Cover the dough with a barely damp towel and let rest for 15 minutes. Brush the edges of the dough with2 T oil and season liberally with salt. Spread 1⁄2 cup of pizza sauce over the dough, leaving a 1" border. Arrange 15 squash blossoms over the sauce in concentric circles. Place the pizza (still on the parchment paper) on the pizza stone and bake until golden brown, about 10 to 14 minutes. Top with spoonfuls of burrata, a drizzle of olive oil and final sprinkling of salt.

Pizza Sauce

28-oz. can of whole peeled San Marzano tomatoes
1 T extra-virgin olive oil
1 t dried basil
2 garlic cloves, minced
½ medium onion, grated

Put all the ingredients in a food processor and purée. Season to taste with salt and pepper.

Wednesday, April 28, 2010

Butter Bean Salad

Photobucket

I love butter beans. Growing up, we had what we called lima beans as a side dish at least twice a week. My mother would drain the lima beans (always from a can – never fresh in those days), heat them up and serve them with butter. I used to mash up the beans on my plate, incorporating their silky butter coating into a butter bean mash. I didn’t know it at the time, but I was creating one of my favorite ways to serve butter beans (and most beans for that matter) - whizzed with a little butter and served as a side dish in place of mashed potatoes.

The other way I serve butter beans is in a cold, deli-style salad. I make healthy, hopefully delicious, deli-style salads almost every Sunday. I whip up a large batch and bring it with me to work for a week’s worth of lunches.

This butter bean salad is very simple to make and holds up well (actually improving in flavor) after a few days in the refrigerator. Beans, tuna, a little lemon for brightness and green onions are the stars. Add salt, pepper and olive oil and you have a great salad that will keep you fed throughout the week.

I like this salad just on its own, but I added some toasted, garlic-rubbed slices of baguette for a little more heartiness for the boyfriend. It would also be great served over a bed of lettuce or added to pasta for a cold pasta salad.

Butter Bean Salad
Serves 3 – 4

1 can butter beans
2 cans solid white tuna (I use water packed)
Zest of one lemon
Juice from one lemon
2 – 3 T of extra virgin olive oil
4 green onions, cut in half lengthwise and thinly sliced
½ t salt
¼ t of freshly ground pepper

Drain and rinse the butter beans. Drain the tuna. In a medium bowl combine the lemon zest, lemon juice, 2 T of olive oil, the onions and salt and pepper. Taste the dressing and if it is too tangy from the lemon, add an additional tablespoon of olive oil. Add the tuna and beans to the dressing and stir until combined.

Monday, April 5, 2010

Herbed Salad Dressing

Photobucket

From time to time, I get asked to teach people how to cook. The request usually comes from close friends and typically right after I’ve spent 10 minutes expounding on how anyone who hates anchovies hasn’t tried Spanish anchovies packed in salt or some other obscure topic, in other words, making it abundantly clear that I spend way too much time thinking about food. I am hugely flattered when people ask because I love to share what I know and help people discover how easy it can be to cook at home.

When my friend Meghan asked me to help her learn how to cook to “keep her from starving” (her words, not mine), I immediately suggested we make some of the basics I think every cook should know: how to properly cook a chicken breast, a good bolognese sauce and a salad dressing made from scratch.

Meghan quickly made it clear that she didn’t understand why she needed to know how to make a salad dressing when she can just buy one at the store. I suppose she’s right and I think most of us will get along just fine never knowing how to make our own salad dressings, but I am of the belief that the five minutes or less that it actually takes to make a salad dressing is time very well spent.

When making a salad dressing, a very basic formula to follow is three parts oil to one part vinegar with a little salt and pepper and any additional flavorings you want to throw in. It’s easy to remember, easy to make and will elevate any simple salad you throw together to something just a bit more special.

I try to keep vases of fresh herbs on my kitchen counter. They’re beautiful to look at and having them out encourages me to use them more in my cooking – most often they end up as the ‘additional flavorings’ in my herbed salad dressing that I make almost weekly, or as soon as my last batch is gone (I make three or four times what I need for one salad and keep the extra on hand for use throughout the week).

I intentionally didn’t specify which herbs to use in the recipe below. You should use whatever you have on hand, or if you’re going shopping, whichever herbs sound best to you. My favorite combinations include chive and basil (one bunch of chives and the leaves from four or five basil stems) and scallion, parsley and mint (two thinly sliced scallions combined with a handful of chopped parsley and a few mint leaves). Tarragon also works brilliantly in salad dressings. The key here is to try your own flavor combinations and determine what you like best.

This recipe calls for the best extra virgin olive oil you can afford. Sometimes that means the $6 jumbo bottle from the grocery store. Please know that that is perfectly acceptable here. Since the recipe calls for a good amount of olive oil, I tend not to use my $30 bottle of olive oil because that’s a lot of money going into one salad dressing. That being said, if I could afford to buy a countless supply of $30 olive oil, I would definitely use it in salad dressings because the flavor is so prominent and the quality really does come through. So, use the best you can afford, whatever that may be.

Photobucket

Herbed Salad Dressing
Makes about 1 ¼ cups

¾ cup extra virgin olive oil (the best you can afford)
¼ cup champagne vinegar
2 T dijon mustard
½ cup chopped herbs
Salt and pepper to taste
Pinch of sugar

Combine the vinegar, mustard and herbs in a mason jar, screw the lid on and shake to combine. Pour the olive oil in and shake vigorously to emulsify. Season to taste with salt and pepper. If the dressing still has too much of a vinegar bite, add a pinch of sugar to help balance it out. This dressing will keep for about a week in the fridge.

Tuesday, January 19, 2010

Finagling Ravioli with an Egg Inside

Photobucket

My significant other has gotten it into his head that Italian food is some kind of a cop-out. I don’t know where it comes from, but I’m pretty sure when he hears Italian food, he thinks boil pasta, throw canned tomato sauce on top, possibly with some meat or cheese to finish the dish and you’re done. As a result and much to my chagrin, I have a very difficult time convincing him to go out for Italian food.

In order to finagle a dinner at Osteria Mozza, I had to use my birthday dinner – no input from him, all my choice. Knowing I wouldn’t be able to convince him to try the pasta tasting menu (everyone at the table has to participate) I very carefully selected one pasta dish to add to the selections for the evening – fresh ricotta and egg ravioli. It was mentioned in almost every review (both professional and in the blog and Yelp worlds) and I generally fall in love with any dish that serves up a runny egg yolk. In this case that yolk comes from boiling ravioli with a whole egg yolk inside, just barely poaching the yolk in the process.

Photobucket

At the time, and still to this day, Osteria Mozza is not the easiest Saturday night reservation to secure. We ended up with a table at 10pm. Not a problem for us as we like to eat on the late side, but a huge problem for the fresh ricotta and egg ravioli. They had run out. It’s a popular dish and eating on the later side of things means risking the kitchen running out of favorites.

Photobucket

Of course it was still an amazing meal watching Nancy Silverton at work behind the mozzarella bar and eating the tenderest pasta I have ever been served. Even the “Italian food is a cop-out” boyfriend was impressed. Though in spite of the great meal, a strange, insatiable craving was set off in me for pasta and runny egg yolks.

Photobucket

Thank goodness for the internet. Batali + egg yolk ravioli = exact recipe I needed to satisfy that craving at home. Of course my homemade pasta can’t rival that found at Osteria Mozza, nevertheless the ricotta filling with runny egg yolk was completely satisfying.

If you can find it, do use sheep’s milk ricotta. If not, cow’s milk is a fine substitute. Definitely make your own pasta dough as you’ll need its quick cooking time to make sure your egg yolk doesn’t overcook and become hard. Two of these huge raviolis were enough per person, but if you’re hungry, maybe plan for three. They can be a bit addictive.

Photobucket

Uova da Raviolo (Ravioli with an Egg Inside)
Adapted from Mario Batali (adaption includes leaving out half of a truffle – making the recipe a more affordable, though slightly less luxurious at-home version)
Makes 6 large raviolis

1/2 cup Parmigiano-Reggiano, grated, plus more for garnishing pasta
1/2 cup fresh sheep's milk ricotta
1/2 cup spinach, blanched, drained and chopped
Pinch of nutmeg
Salt and pepper to taste
1 recipe basic pasta dough, recipe follows
6 very fresh eggs
6 tablespoons butter

Combine the parmesan, ricotta and spinach. Season to taste with nutmeg, salt and pepper. Start with a third of the pasta dough and roll it out to the thinnest setting on a pasta rolling machine. From the thin pasta sheets, cut 12 squares about six inches in length (roll out more of the dough if you need it). Set six squares on a tray dusted with flour and cover with plastic wrap. Divide the ricotta mixture evenly between the remaining six squares, placing it in mounds in the center of each square. Use the back of a spoon to create a well for the egg yolk in each mound. Carefully break an egg into a small bowl, and transfer one yolk and a bit of white into the center of each well. Don’t break the yolk! Repeat for the remaining squares. Cover each filled square of pasta with an unfilled square, and press the edges together with fingers to seal.

Bring a large pot of water to a boil and salt generously. Melt the butter in a large sauté pan. Gently lower each ravioli into the boiling water to cook for two minutes. Remove from the water and place into the sauté pan with the butter. Add a generous grating of parmesan, sauté for one to two minutes and serve.

Batali’s Basic Pasta Dough
3 1/2 cups flour, with more as needed
4 eggs
1/2 teaspoon extra-virgin olive oil

Place the flour in a mound and make a large well in the center. In a separate bowl, whisk the eggs and olive oil together. Pour the egg mixture into the well in the flour. Slowly start incorporating the flour into the eggs without breaking the well. The mixture should start to come together when half of the flour is incorporated. When all of the flour is incorporated, start kneading the dough, adding more flour as necessary to keep the dough from sticking to your hands. Knead the dough for about five minutes until the surface is smooth and just the slightest bit sticky. Flatten the dough into a disc shape, wrap with plastic wrap and set aside at room temperature for 30 minutes before rolling out for the raviolis.

Wednesday, August 26, 2009

Olive Oil Not Gelato Not Ice Cream

Photobucket

There are two things that happen a lot once your friends and family realize how crazy you are about food. The first is you tend to get food-related gifts for every birthday and holiday. This is a huge bonus. The second thing is that they bring every food-related question to you, assuming you must know everything there is to know about food. Truth be told, this is a huge plus as well. It’s taught me that I really do know a great deal about food because I can thoroughly answer a number of questions that come from the home cook. It also has helped me realize what I don’t know and what I want to learn more about.

The question I get asked the most, with far more frequency than anything else, is to explain the difference between gelato and ice cream. My default answer has been that it’s mainly in the churning process and that if you’re talking about a custard-based ice cream, the ingredients are generally the same.

That default answer was no longer good enough after tasting the olive oil gelato at Mozza in Los Angeles. It was so good I tracked down the recipe in one of Mario Batali’s cookbooks, because as much as I would love to eat at Mozza every time a craving for that gelato hits, my bank account cannot handle the pressure. I dutifully followed Mario’s gelato recipe, but, lacking a gelato machine, I was forced to churn the custard in my ice cream maker. I needed to know whether I could call what I made gelato or if it was ice cream.

After a quick google search I realized this question could have easily been answered a long time ago. It turns out that I was partially correct. Gelato is churned at a slower speed than ice cream which means less air is whipped into the final frozen treat, yielding a much thicker, denser product. Additionally, gelato has less fat than ice cream. What? That doesn’t make sense! Isn’t gelato the richer, creamier version of ice cream? Well, according to Alon Balshan as quoted in Jessica Harlan’s article on About.com, the extra fat in ice cream coats your mouth and the flavors don’t come through as strongly. There’s less standing between you and that intense flavor punch in a good gelato.

Gelato vs. ice cream dilemma solved. What to call my creation? Neither really. I used a recipe for gelato which didn’t include as much fat as ice cream and I churned it in an ice cream maker that whipped in too much air to call the final product gelato. So here is a recipe for Olive Oil Not Gelato Not Ice Cream. If you have a gelato machine, by all means, follow the instructions and end up with delicious gelato. If you, like me, don’t yet possess one, follow the directions, make something quite delicious and join me in adding gelato machine to your long list of necessary kitchen products.

Olive Oil Not Gelato Not Ice Cream
Adapted from Mario Batalio

6 egg yolks
1 cup sugar
3/4 cup extra-virgin olive oil (I used Valderrama – my current favorite)
3 cups milk
1 cup heavy cream

Place the egg yolks and sugar in the bowl of an electric mixer and use the whip attachment to beat to the ribbon stage (about five minutes on medium speed). You’ll know you’ve hit the ribbon stage when the mixture is pale yellow in color and it falls back into the bowl in a ribbon pattern. With the mixer running, drizzle in the olive oil and beat until combined. Continue mixing as you add the milk and cream. When everything is combined, freeze according to your gelato or ice cream maker’s directions.