Wednesday, June 30, 2010
Decisions, Decisions.
What is a girl to do?
At last count my cookbook collection had grown to include between 80 and 90 books. Even if you don't live in New York, which I still do not, you probably have at least heard about the size of New York apartments. I lucked out with my place. It is the only apartment I looked at that had a full-size stove and fridge. Unfortunately, that is where you must stop using the words full and size to describe anything in my apartment. So, sadly, I must leave the majority of my cookbooks at home.
My boyfriend has agreed to hold onto the surplus of books. I would like to believe he is doing this out of the kindness of his heart, but I have a feeling his motivations have more to do with the leverage he will have when trying to convince me to come home at the end of a year.
My dilemma now lies in trying to decide which 10 books come with me. How do you whittle down a collection of 90 to just 10 books? As I stare at the pile of half-packed boxes sitting in my living room, this question is just a bit too overwhelming. I need your help. If you were moving across the country and could take just one book with you, what book would that be?
Monday, June 21, 2010
This is Not a Food Photo
So this is not a photo of food. ‘Obviously,’ you might point out. Well, it is obviously not a food photo, but it is actually, not so obviously, food-related. I know it is just a building and the residents would probably disagree, but to me, it is absolutely food-related. This photo is of the building I will be living in one month from now, when I move to New York City to attend culinary school.
There. I said it. It’s out.
I have researched and considered and pondered the thought of going to culinary school for years. I finally decided it was time to stop waiting to start the rest of my life. The timing was never going to be perfect, the circumstances were never going to be ideal and I certainly couldn’t wait for someone else to make it happen for me. So now I have made the decision to leave and low and behold, the timing couldn’t get much better, the circumstances are as good as they’re ever going to be and the best part, I made it happen for myself (with the help of a huge support network).
So, I am leaving. I am packing up and I am leaving. I am leaving behind my boyfriend, a steady paycheck, the comforts of a comfortable life and risking it all in the hope that someone will pay me to play with food.
The French Culinary Institute in SoHo will be my home away from home for the next nine months as I complete their Classic Culinary Arts program. I’ll be living not too far away in Chelsea, doing my best to take advantage of all that New York has to offer and sharing as much of it as I can with you here, at Apples and Butter.
No recipe today. Just this really exciting (for me) news.
Friday, June 18, 2010
Layer Cake - The Frosting
As promised, it is time to finish up that layer cake. The last post on layer cake brought us through baking and freezing the cake. Today is frosting day.
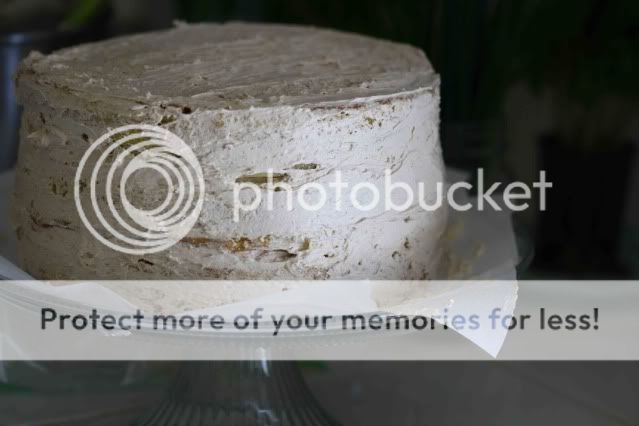
The first step is to pick your frosting. I wanted to match, not contrast, the rich, nutty flavor of my brown butter cake. Martha Stewart’s brown sugar buttercream seemed like it would provide a great flavor that would go well with the cake. Plus, I happen to like the sound of brown butter cake with brown sugar buttercream. Follow the recipe below or choose any frosting you like to complement your cake.
Once the frosting is made, take your cake layers out of the freezer and let them thaw slightly before trying to frost them. They do not need to thaw all the way, in fact a cool and slightly hard cake is a little easier to frost, but I found that my layers had warped ever so slightly in the freezer. 20 minutes on the counter was all they needed to return to their frostable (yes, I made up a word), level shape.
While researching layer cakes I discovered what it seems most of you already knew – if you want a smooth final product, you need to start with a crumb coat. It is unfortunate that I am just learning this now because it’s a genius step that results in a professional looking product.
If you, like me, are new to the crumb coat, here are the basics. After stacking your layers with whatever filling you are using (in my case, more frosting) slap a very light coat of frosting over the entire cake. It doesn’t need to completely cover the cake and it doesn’t need to be smooth. I like to think of it as frosting spackle. It fills in the nooks and crannies so after a bit of chill time in the fridge, it is 10 times easier to get the final layer of frosting looking fabulous.
Once your crumb coat is on, let your cake hang out in the fridge for at least an hour. The frosting will firm up and hold onto the cake as you apply the final layer. If you have time, chill the cake one more time after the final layer of frosting is on before adding any decorations. I was ready to be finished with my cake so my decoration consisted of a pint of raspberries scattered over the top of the cake. A move more lazy than calculated, it paid off as the fresh raspberries were a welcome break from the sugary frosting. Serve your cake at room temperature and enjoy the end result of all your hard work!
Brown Sugar Frosting
Adapted from Martha Stewart
6 large egg whites
1 1/2 cups brown sugar
4 1/2 sticks butter, cold and cut into tablespoons
Place the egg whites and sugar in the heatproof bowl of a stand mixer and set over a pot of simmering water in a double boiler set up. Whisk the egg whites and sugar together until the mixture reaches 160* (a candy thermometer comes in handy here).
Place the bowl on a stand mixer fitted with the whisk attachment and whisk until the egg white and sugar mixture holds stiff peaks, then continue whisking for six more minutes until the mixture is cooled. Switch to the paddle attachment and beat on medium-high while you add the butter, a few tablespoons at a time. Once all the butter is incorporated, stir with a spatula until smooth.
Wednesday, June 16, 2010
My First Cookbook
Okay, so in all fairness it's not my cookbook, but it is the first time an original recipe of mine will be included in a published book. A few months ago, I was contacted by the people at Posit Science who were putting together a book on food for brain fitness. They were looking for recipes from food bloggers that include brain-healthy ingredients and I was delighted to participate.
The hardcopy of the book won't be available until July, but starting today you can sign up to receive their weekly recipe e-mails at http://www.thinkfoodcookbook.com/.
Sign up and keep an eye out for the week that they feature the recipe from Apples and Butter. Be sure and stop back by here that week because I will be giving away a free copy of the ThinkFood cookbook.
Saturday, June 5, 2010
Layer Cake - The Cake
Special occasion baking is not my forte. I love to make cookies and cupcakes and even the occasional truffle, but cakes of mine have never crept above two layers.
Enter my first multi-day project cake. It turns out that tackling a huge and impressive layer cake can be completely manageable if you stretch the whole affair over a few days. This is good news because as much as I love to be in the kitchen, I do not want to spend an entire day baking, frosting, chilling and re-frosting when I have people coming over for some kind of celebration.
There are just a few easy steps to make sure your not-baked-today cake still turns out moist, delicious and professional looking:
1. After the cake layers have cooled, wrap them tightly in plastic wrap and freeze them.
2. Allow the layers to defrost slightly before frosting to get rid of any warping from the freezer.
3. Apply a crumb coating of frosting to the cakes and chill for at least an hour before applying the final layer of frosting.
My cake schedule looked something like this: Thursday night brown the butter for the cake and chill; Friday night after work bake, cool and freeze cakes; Saturday afternoon make frosting (I always make more than I think I’ll need and I always use it); Sunday morning apply crumb layer of frosting and chill; Sunday afternoon finish frosting and leave cake out for everyone to admire before serving.
If you’re interested in making your own layer cake, I highly recommend the following recipe for brown butter and vanilla birthday cake. It is from Kate Zuckerman’s book about desserts from the now closed Chanterelle in New York. It is the best cake I have ever tasted and that is coming from a self-admitted chocoholic.
In keeping with the multi-day theme, I’ll post the cake recipe today and the frosting recipe, along with crumb coat instructions, in a post later this week.
Whipped Brown Butter and Vanilla Birthday Cake
Adapted from The Sweet Life to make three layers
1 1/2 t vanilla bean paste
4 1/2 sticks of butter (18 oz)
2 1/2 cups sugar
3 whole eggs at room temperature
6 egg yolks at room temperature
3 3/4 cups + 3 T flour
4 1/2 t baking powder
1 1/2 t salt
1 3/4 cups milk + 2 T at room temperature
Place the butter in a saucepan over medium-high heat. Cook the butter, stirring occasionally, until it caramelizes and emits a nutty aroma. Stir in the vanilla paste. Pour the butter into a bowl. If desired, you can pour the butter through a strainer to catch any browned milk solids that have formed at the bottom of the pan. Chill the butter for at least two hours or overnight.
Preheat oven to 350*
Grease and flour three 9-inch cake pans.
Place the chilled butter in a stand mixer fitted with the paddle attachment and beat on medium for one minute. Add the sugar and beat until creamed (at least 10 minutes). Add the eggs and additional egg yolks one at a time until incorporated.
Combine the flour, baking powder and salt in a separate bowl. Set the mixer to low and add the dry ingredients to the batter in three additions, alternating with the milk until both are fully incorporated.
Divide the batter evenly between the three cake pans and bake for 40 to 45 minutes. Let the cakes cool slightly in their pans, then invert the cakes onto a wire rack to cool completely. If not using the cakes right away, wrap tightly in plastic wrap and freeze.
Subscribe to:
Posts (Atom)