Showing posts with label Favorite Things. Show all posts

Wednesday, October 12, 2011

Essential and Not So Essential Tools

Last night, while prepping out a cheese souffle for dinner with my fiancé, I realized how much pleasure I get out of whisking egg whites by hand. It, like whipping cream, is a task that has been made much more simple by the invention of electric hand mixers and stand mixers. I myself used to make mayonnaise and whip cream and egg whites in my stand mixer. It's so simple - place the ingredients in the mixer bowl, flip a switch and let the machine do the work for you.

Since completing studies at The French Culinary Institute, I no longer use my stand mixer for any of these tasks. It's either a result of being forced to do it by hand while I was in school, or the discovery that it is just not that difficult. I am not claiming that it is the easiest thing you will do in the kitchen this week - it certainly takes some elbow grease and a bit of patience - but the satisfaction I get from the finished product is increased ten fold when I use that elbow grease and make it happen myself.

To make the task a bit easier, make sure you have a balloon whisk - an essential tool for whipping ingredients by hand. The large spherical center of the balloon whisk helps to incorporate air into mixtures more quickly than a standard whisk. You also need to put the cream or egg whites in a large bowl so that you are working with a large surface area. If you use a small bowl with a large amount of liquid, you are going to be whipping forever. Good for your arm muscles, not so good for enjoying the process.

Any large bowl will do, but if you're interested in something truly beautiful and a bit of a splurge, check out this beating bowl from Mauviel:
Photobucket

It is definitely a non-essential tool, but isn't it beautiful? If you feel like splurging, you can buy this bowl here from Williams-Sonoma. I recently added it to my wedding registry in hopes that someone will splurge on me!

Balloon whisks are available from many retail outlets, but again, Williams-Sonoma carries a great selection. This whisk is an affordable, well-made option.

The Apples and Butter team is working on some short 'how to' videos, so hopefully soon we'll have one on whipping up egg whites. Perhaps you'll see this copper bowl make a cameo...

Friday, December 17, 2010

Chicken Liver Pâté Round ??

Photobucket


Chicken liver pâté is one of my favorite things to make and to eat. The first time I prepared it, I was living with my parents for a short period of time after graduating from college and before starting to work. I was trying to make up for playing the part of the typical college student who returned home jobless, by making dinner for them on a semi-regular basis. I was just starting to delve into the world of cooking and my meals were always the result of experiments with new dishes. It is unlikely that we ate the same thing twice during those few months.

I remember my osso bucco being a particular hit with my father. Of course, there was also the day I fell asleep on the couch while there were chicken thighs braising on the stove. I awoke to a house filled with smoke and some chunks of carbonized, used-to-be-chicken thighs permanently fused to the now ruined pan. Luckily, I was just cooking for one that night and my parents were out of town.

The first time I made chicken liver pâté it seemed as if I was embarking on quite the endeavor. After all, pâtés and charcuterie, though delicious, were still a mystery to me and not the sort of things you made at home. My mother assured me over and over again that it was a very simple dish to make, but I did not believe her. It was too exotic. How could pâté be easy?

Turns out, it is easy. It is also cheap. A pound of chicken livers is never over $2 and that includes the livers that I picked up from high-end, specialty retailer Eataly, here in New York. Once I discovered how easy it is to make this rich, delicious and often impressive dish, it became part of my regular repertoire. Chicken liver pâté at the holidays, chicken liver pâté to go with every cheese plate, my mom and I even made it for an event during the weekend of my brother’s wedding. We have bounced back and forth between recipes and I am always on the lookout for new ones to try.

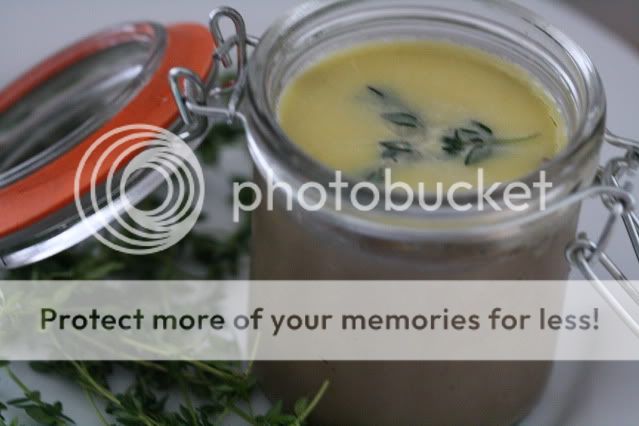
So, when I saw this latest recipe while perusing Sweet Paul, a visually stunning online magazine, I knew I would be making it that weekend. This is a great chicken liver pâté. I will not go as far as to say that it is my favorite (that title still belongs to this recipe), but it is delicious and, unlike my favorite recipe, perfect for placing in a beautiful jar, under a thick layer of clarified butter and giving as a gift this holiday season.

Chicken Liver Pâté
Sweet Paul Magazine

1 pound chicken livers, cleaned
1 cup milk
3 T butter
1 small yellow onion, chopped
1 t fresh thyme
1/2 t salt
1/2 t pepper
1/4 cup cognac (I used white wine)
4 T butter

Topping
1 stick butter
6 sprigs thyme

Place the chicken lives in the milk and soak in the refrigerator overnight (24 hours if possible). Drain the livers. In a large pan, melt 3 tablespoons of butter and sweat the onions until beginning to soften. Add the chicken livers and thyme and sauté until the livers are browned on the outside (about five minutes). Season with salt and pepper and cook for one more minute. Add the cognac or wine and cook until almost all of the liquid is gone. Transfer the mixture to a food processor and puree until smooth. Spoon the pâté into six ramekins.

For the topping: Melt a stick of butter in a small saucepan. As the milk solids float to the top, remove them with a spoon until the butter is totally clear and you are left with clarified butter (alternately you may purchase clarified butter and melt it until pourable). Cover each ramekin with a layer of clarified butter. Place one thyme sprig in the butter for decoration and chill until solid.

Wednesday, October 6, 2010

Thinkfood Cookbook Giveaway

Photobucket
This past summer I was asked to contribute a recipe to the Thinkfood Cookbook published by Posit Science. I was thrilled to be invited to participate and had so much fun working on the project. One of the highlights of the whole experience was hearing from a Posit Science contact that while out at a dinner in the Bay Area, she was discussing the cookbook with her dinner companions when she was interrupted by someone at the table next to her. The woman wanted to tell her that she had heard about the Thinkfood cookbook from a blog she reads, Apples and Butter (I would love to know who you are if you are still a reader!). So many great things have happened as a result of this project, but I do not think anything could match the thrill of seeing the published cookbook for the first time a few weeks ago.

It is a beautiful book, filled with delicious and brain-healthy recipes. I would tell all of you to head over to the Posit Science site to order your copy today (which you should all do), but I am more excited to tell you that I have one copy to give away here today.


Photobucket
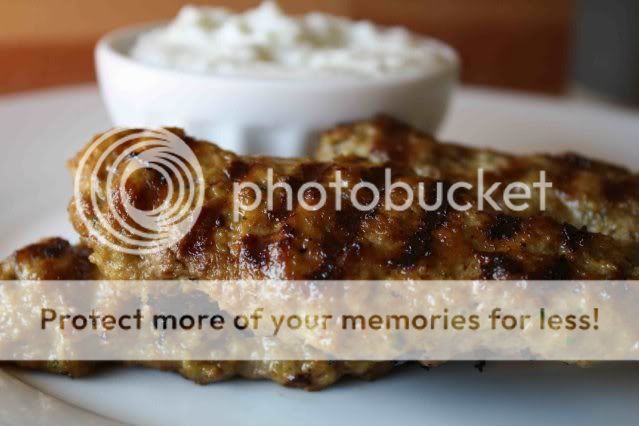
I created the recipe included in Thinkfood for my boyfriend. I was trying to satisfy a craving for a dish he had enjoyed many times in England with his father when he was growing up. We could not find proper lamb kofta in Los Angeles so I came up with this recipe to appease him until we made our next trip to London with his family.

Have you ever had to recreate a dish at home for someone you love, in an attempt to satisfy their food craving? Were you successful? Tell me about your story in the comment section and one reader will receive a copy of the Thinkfood book, lovingly shipped by yours truly. Bonus points if you are willing to share your recipe so we can try it out on Apples and Butter!

In the meantime, the original recipe for lamb kofta can be found on the Thinkfood cookbook page. If you stopped by today as a result of the Posit Science newsletter, thank you for visiting and please leave a comment with your recipe story so you can have a chance at winning the cookbook!

Monday, June 21, 2010

This is Not a Food Photo

Photobucket

So this is not a photo of food. ‘Obviously,’ you might point out. Well, it is obviously not a food photo, but it is actually, not so obviously, food-related. I know it is just a building and the residents would probably disagree, but to me, it is absolutely food-related. This photo is of the building I will be living in one month from now, when I move to New York City to attend culinary school.

There. I said it. It’s out.

I have researched and considered and pondered the thought of going to culinary school for years. I finally decided it was time to stop waiting to start the rest of my life. The timing was never going to be perfect, the circumstances were never going to be ideal and I certainly couldn’t wait for someone else to make it happen for me. So now I have made the decision to leave and low and behold, the timing couldn’t get much better, the circumstances are as good as they’re ever going to be and the best part, I made it happen for myself (with the help of a huge support network).

So, I am leaving. I am packing up and I am leaving. I am leaving behind my boyfriend, a steady paycheck, the comforts of a comfortable life and risking it all in the hope that someone will pay me to play with food.

The French Culinary Institute in SoHo will be my home away from home for the next nine months as I complete their Classic Culinary Arts program. I’ll be living not too far away in Chelsea, doing my best to take advantage of all that New York has to offer and sharing as much of it as I can with you here, at Apples and Butter.

No recipe today. Just this really exciting (for me) news.

Wednesday, June 16, 2010

My First Cookbook

Photobucket

Okay, so in all fairness it's not my cookbook, but it is the first time an original recipe of mine will be included in a published book. A few months ago, I was contacted by the people at Posit Science who were putting together a book on food for brain fitness. They were looking for recipes from food bloggers that include brain-healthy ingredients and I was delighted to participate.

The hardcopy of the book won't be available until July, but starting today you can sign up to receive their weekly recipe e-mails at http://www.thinkfoodcookbook.com/.

Sign up and keep an eye out for the week that they feature the recipe from Apples and Butter. Be sure and stop back by here that week because I will be giving away a free copy of the ThinkFood cookbook.

Tuesday, September 1, 2009

Mayonnaise - How to Cheat

Photobucket
One thing I have noticed over the years is that mayonnaise is an oddly divisive substance. Many hate it with a passion, refusing to let it so much as touch a piece of sandwich bread, while others love it, slathering it on artichokes, mixing in herbs and calling it a sauce, even topping the occasional plate of scrambled eggs with a dollop just because they can. I am a card-carrying member of the latter group. It may be because both my parents are from the South where mayonnaise is more of a staple ingredient than just a condiment. Not a day went by at 3752 Chevy Chase Drive that we didn’t have a huge jar of Best Food’s (Hellman’s for you East Coasters) in the fridge, with another one on standby in the cupboard.

My appreciation of mayonnaise seemed perfectly normal amongst my own kind. In fact, I didn’t realize there was anything wrong with my level of mayonnaise consumption until my sophomore year of college when my roommates looked on, horrified at my decision to fold up pieces of Kraft American singles and dip them into my oversized jar of mayonnaise as a snack. Clearly, my gourmet tendencies had yet to take hold.

For someone who loves mayonnaise as much as I do, I find it surprising that this past weekend was the first time I tried to make mayonnaise at home. I guess it’s due to my devotion to Best Food’s. I never saw the need. I am here to tell you that I have been reformed. I still love my Best Food’s, but there is something completely different and luxurious about homemade mayonnaise. I am also here to tell you about a few mistakes I made with the first two attempts that never emulsified. Making mayonnaise is not as simple as it seems.

If you’re not in the Los Angeles area, then you don’t know that it topped 100 degrees this past weekend and not just in the Valley. It was a hot one and without the benefit of any air conditioning, the idea of vigorously whisking egg yolk while slooooowly adding oil, drop by drop at first, seemed like too much physical exertion for such a hot day. I decided to take a lovely looking recipe from Michael Rulhman and make it in my blender. After all, the blender will certainly whisk vigorously while I have my hands free to add the oil drop by drop. Right? Not so. It turns out, according to The Joy of Cooking, that you need to have egg white included in the recipe if you’re trying to make a blender mayonnaise. Clearly J o C must know what they’re talking about so I transitioned to their recipe which called for using a bit of egg white in addition to the yolk and a Cuisinart instead of a blender. I fitted my Cuisinart with the plastic blade as directed and attempted batch number two. Still no emulsification. Perhaps I added the oil too quickly? Possibly, but I have a sneaking suspicion that the plastic blade did not create enough agitation to get the mixture to emulsify.

Already having dirtied two of my major kitchen appliances, I eyed the third. Epiphany. If I used the whisk attachment on my KitchenAid mixer, then who, other than the all-seeing kitchen Gods, would ever know that it was, in fact, a mixing machine and not my own arm that was attached to that whisk? I reverted back to Ruhlman’s recipe and in about five or 10 minutes had a wonderful mountain of homemade mayonnaise sitting in front of me. Success. Who says cheating never gets you anywhere? Truth be told, the energy exerted while washing all of those appliances is at least equal to, if not more than what it would have taken me to whisk the darn thing by hand in the first place.

My final tip on homemade mayonnaise? Once you have succeeded in getting the mixture to emulsify, for God’s sake, don’t ruin it by throwing it in a blender to add fresh herbs. I lost two thirds of my beautiful mayonnaise by trying to turn it into basil mayonnaise in the blender. I managed to break the emulsification and ended up with a runny purple mess in front of me (purple basil). Thank goodness I had set some aside that I was able to combine with hand-chopped basil.

Photobucket
I served this basil mayonnaise next to a gorgeous skirt steak that the boyfriend grilled, but it would be equally delicious on just about any kind of sandwich.

Mayonnaise
Adapted from Michael Ruhlman

1 egg yolk
1/2 t salt
1 t lemon juice
1 t water
1 cup vegetable oil

Place egg yolk, salt, lemon juice and water in the bowl of a mixer fitted with the whisk attachment and whisk on medium to combine. Pour vegetable oil into a glass measuring cup, preferably with a pouring spout. Turn mixer up to medium high and use a spoon to add the oil to the mixer, drop by drop, until about a third of the oil is mixed in. You should see the emulsification coming together as a thick, white, creamy sauce. Each time you add oil you will see the emulsification loosen, then come together around the whisk and then start sticking to the sides of the bowl again. When the mixture sticks to the bowl, you know it’s safe to add more oil. I used the spoon method for the entire cup of oil, mainly because I had already broken two emulsifications that afternoon. If you are brave, feel free to start adding the oil in a slow drizzle after the first third is successfully incorporated. Once all the oil is incorporated, you should be left with glorious, luxurious mayonnaise. Use as you will.

Thursday, April 23, 2009

Strawberry Jam and Tea Together

Photobucket

I’m certain my great-grandmother would be very confused if she found out that learning to can and preserve was a novelty for me. I never met the woman, but raising nine children in a very rural section of Mississippi would have made the process a necessity, not a novelty in her life. The reality of my life includes a farmers’ market almost every day of the week in the greater Los Angeles area as well as a 24-hour grocery store a mile from my house that carries every imaginable fruit and vegetable including corn and tomatoes in the dead of winter. I won’t comment on the flavor of those winter tomatoes, or the distance they likely had to travel to make it to my market but they’re there which means the thought of canning or preserving my backyard produce for use throughout the year has never been a priority of mine. This year, I’m determined to change that.

It may be the expansion of the growing area in my backyard and the knowledge that if all goes well our garden really will runneth over this summer or it could be the impulse purchase of canning supplies on a recent Sur La Table trip; either way it was time to try my hand at canning. The garden is filled with more seedlings than actual food at this point in the season so I headed off to the farmers’ market in search of organic strawberries to make jam. I found a flat of organic camarosa strawberries that the farmer was willing to let go for $20. He assured me that of his three different varieties, these strawberries would make the best jam.

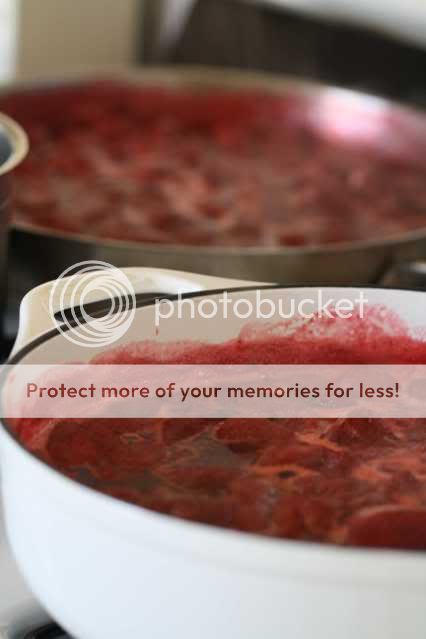
I used a recipe that was featured in a Los Angeles Times story on Edon Waycott, the woman who makes jams for La Brea Bakery. I figured if her preserves were good enough for Nancy Silverton, then they would certainly pass muster in my kitchen. The process itself is very simple, just slightly time consuming. The strawberries are hulled, left at room temperature while they macerate in lemon juice and sugar and then cooked down over medium heat until they gel. The jam is then cooled slightly before starting the canning process.
Photobucket

Full instructions for canning can be found here. Just keep in mind that you shouldn’t touch the jars, especially their lids, until they are completely cool. And that popping sound you hear coming from the kitchen? Don’t worry, those are the lids sealing shut, not popping open. For a seasoned canner, I’m sure that seems obvious, but for this beginner those pops sounded like the whole process going to ruin.

*Be sure to keep reading after the recipe for info on the best store-bought jam I have ever tried.

Photobucket

Strawberry Jam
Makes 12 8 oz Jars

3 - 4 quarts strawberries (12 pint baskets)
2 cups sugar
3 T lemon juice

Rinse and hull the berries. Combine the berries, sugar and juice in a nonaluminum bowl and let them sit at room temperature, stirring occasionally (once an hour or so), for 3 to 4 hours (after the strawberries had macerated for 4 hours, I covered them and put them in the fridge overnight to allow plenty of time the next day for the cooking and canning process, but this is not necessary).

Scoop the strawberries and their juices into two wide, shallow saucepans (or one if you have a pan that big) and place over high heat. Bring to a boil, skim the foam that collects on the surface, then reduce the heat to low, making sure the mixture continues to simmer. After 20 - 30 minutes, the berries will give up additional juices. When you notice the extra liquid, continue cooking and skimming the foam for another hour. Let the mixture cool slightly before continuing with the canning process found here.

Photobucket

The preserves turned out deliciously. I was a bit concerned that the whole mixture was too runny and didn’t look as thick as store-bought jam, but lucky for me, providence stepped in. The day after I finished making my preserves, I was contacted by a company called Tea Together. They make small-batch, handmade organic jams, preserves and chutneys in Northern France and wanted to send me some samples to try. Having just finished my own batch of preserves using organic fruit, I was thrilled to have something from the professionals to compare it to. I had no idea what I was in for.

As soon as the samples arrived I pulled out the jar of strawberry preserves to compare to my own. I was thrilled to see that their batch was just as runny and chunky as mine. In fact while doing some research I found that Judith Gifford, one of the founders of Tea Together, had the perfect advice for me:

“Erase from your brain all notions about jam that you have from the shop-bought variety," says Judith. "The big producers can always do smooth, bright, bland and tidy much better than you can. So don't waste precious cooking time fishing out the pips, straining or trying to achieve a rigor-mortis set. Instead, consider the fruit you have chosen to immortalize (well, for a little while, anyway) as jam. What is it exactly about this perfume, this taste, this texture, that does it for you? Aim to end up with a jam that has character, vibrancy, individuality, and that gives back to you, in spades, what it is you love about that fruit.” (As reported by Anita Chaudhuri)

Photobucket

After reading that quote, I knew I was in love. How could you not be drawn in by a company that feels that way about food? And trust me, that philosophy is apparent in their jams. They don’t seem processed or mass-manufactured at all. It’s as though your mother sent you a bottle of homemade preserves and your mother is the best jam maker you have ever met. I knew we (the boyfriend and I) had to hold a taste test for the other products, so I made a batch of these scones and down we sat, resigning ourselves to the fact that we would have to spend the morning eating some of the best jam I’ve ever laid my hands on, slathered all over fresh-from-the-oven scones. Poor us.

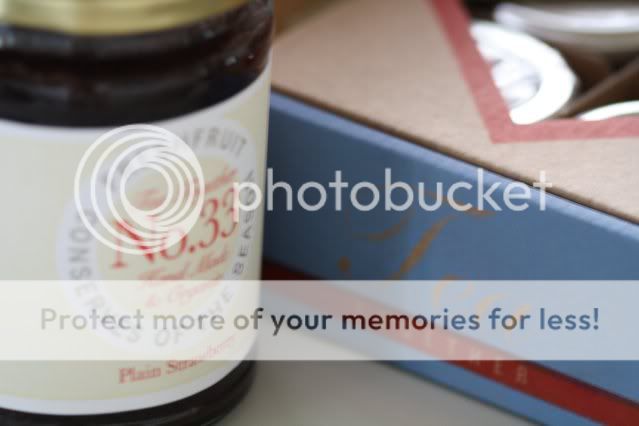
My favorites are #33 (strawberry jam) and #14 (rhubarb, lemon and angelica). The boyfriend, with his British roots, fell in love with #15 (summer pudding with vanilla pod) based on the British dessert, Summer Pudding (note to self, make Summer Pudding for the boyfriend). Did I mention the founders are British ex-pats? That helps to explain the delightful British aesthetic of the packaging. In case it wasn’t already abundantly clear (PG Tips, boyfriend’s British side of the family, inappropriate squeals upon hearing someone say “the tube”), I’m an anglophile.

You can check out the company and products online at Tea Together or, if you happen to live in New Jersey, they’ve just opened a shop in Millburn. If you’re lucky enough to live in France, be sure to check out the list of local French suppliers. The jams are not cheap, but if you share my philosophy that good food costs money and that the artisans who create flavorful, good-quality food products deserve to be compensated for their efforts, then the cost will not seem off-putting. If you have yet to be convinced of this philosophy, I suggest you plant an edible garden. The flavor of the fruits and vegetables you get from your own yard will far surpass that which you find in the grocery store, but the real lesson will be in the amount of work it takes to get those plants to production stage. It certainly opened my eyes to the hard work of farm life. By the way, no judgment here at all - we’re all watching our pennies these days, but for something this special, I’m willing to splurge. Maybe you are too.

Photobucket

Friday, October 17, 2008

Maldon Sea Salt

I have what you might call an arsenal of salts. Sea salt, kosher salt, flavored salts, fine salt and even good old Morton's. I never met a salt I didn't like. Black lava salt from Maui? I'm totally there. 

If you have yet to try Maldon Sea Salt, I highly recommend you go out and find a box right now. It's not a cheap salt at $8 - $12 a box, depending on where you get it, but since it's generally used as a finishing salt, a box will last you a long time.

Most of the salt flakes come in the shape of little pyramids and have an amazing crunch when you bite into them. I like to sprinkle them over meat right after cooking and have even been known to sprinkle one or two flakes over freshly baked chocolate chip cookies. That salty crunch as you bite into something sweet and chocolaty is absolutely amazing.

You can find more information on Maldon's web site here. I used to only be able to find it at specialty shops, but I have started to see it at Whole Foods and some other major retailers. What are your favorite salts or seasonings that you couldn't live without in the kitchen?

Saturday, October 4, 2008

Gnocchi Board

I finally gave in and bought a gnocchi board. Had I known it was going to cost me less than $10, I probably would have given in a long time ago. 

I really do have an unhealthy addiction to kitchen tools and cooking supplies. If my mom wants to treat me for my birthday, she knows we're going to the local restaurant supply store. If the boyfriend wants to cheer me up, he knows something that says KitchenAid has a bigger impact than flowers, though I still love flowers (just in case he's reading this).

While my kitchen is larger than any that I've had before (since living on my own), it's still small in the the grand scheme of things and certainly doesn't have the room to house my addiction. That seems not to matter as my purchasing has yet to be limited by the question, where will I put it?

Anyone else out there share my addiction? What is your weakness when it comes to kitchen gadgets?

Thursday, August 21, 2008

Favorite Things - Vanilla Bean Paste

A couple of you have asked me about vanilla bean paste, which is called for in a number of my recipes. I love this stuff. I don't even keep vanilla extract in the house anymore. This paste has a much more intense vanilla flavor without quite as much of the alcohol flavor of extract. I was first introduced to it by someone who kept a huge jug of it in her fridge to use in everything. I bought a small bottle the first time I saw it at my local gourmet shop and have since graduated to the jug. I mix this into yogurt, use it in all baked goods and make killer homemade vanilla ice cream with it. You'll even get the specks of vanilla you would get from scraping seeds out of a vanilla bean in the ice cream since this is made up of actual vanilla seeds suspended in an ooey gooey delicious paste. Try it. It's yummy. More information can be found here. Enjoy!

Thursday, July 31, 2008

The Cheese That Grills

Cheese is fabulous in all of its forms, but there is something especially delicious about warm melty cheese. Halloumi is a cheese that you can grill and it will hold its shape without turning into a hot mess in your pan or on the grill. Since it holds its shape so well, it's not particularly good in dishes where you need the cheese to melt into a sauce or a pasta. Save this to use in salads, on kebobs or anywhere else you need a slab of warm, grilled cheese.

Thursday, July 10, 2008

Best Yogurt Ever

Have you tried this stuff yet? If not, it's time to go out and buy it right now. If you can't find it in your local store, it's time to go request it right now. This is my favorite culinary product discovery in a long time. You can get more information on Fage's website and check out their other yogurts (they also have 2% and full-fat versions). I'm usually wary of non-fat yogurt in the place of full fat in recipes, but this has held up beautifully. I use it in Tzatziki, frozen yogurt and countless other ways. Mmmmm...Enjoy!