Wednesday, April 28, 2010

Butter Bean Salad

Photobucket

I love butter beans. Growing up, we had what we called lima beans as a side dish at least twice a week. My mother would drain the lima beans (always from a can – never fresh in those days), heat them up and serve them with butter. I used to mash up the beans on my plate, incorporating their silky butter coating into a butter bean mash. I didn’t know it at the time, but I was creating one of my favorite ways to serve butter beans (and most beans for that matter) - whizzed with a little butter and served as a side dish in place of mashed potatoes.

The other way I serve butter beans is in a cold, deli-style salad. I make healthy, hopefully delicious, deli-style salads almost every Sunday. I whip up a large batch and bring it with me to work for a week’s worth of lunches.

This butter bean salad is very simple to make and holds up well (actually improving in flavor) after a few days in the refrigerator. Beans, tuna, a little lemon for brightness and green onions are the stars. Add salt, pepper and olive oil and you have a great salad that will keep you fed throughout the week.

I like this salad just on its own, but I added some toasted, garlic-rubbed slices of baguette for a little more heartiness for the boyfriend. It would also be great served over a bed of lettuce or added to pasta for a cold pasta salad.

Butter Bean Salad
Serves 3 – 4

1 can butter beans
2 cans solid white tuna (I use water packed)
Zest of one lemon
Juice from one lemon
2 – 3 T of extra virgin olive oil
4 green onions, cut in half lengthwise and thinly sliced
½ t salt
¼ t of freshly ground pepper

Drain and rinse the butter beans. Drain the tuna. In a medium bowl combine the lemon zest, lemon juice, 2 T of olive oil, the onions and salt and pepper. Taste the dressing and if it is too tangy from the lemon, add an additional tablespoon of olive oil. Add the tuna and beans to the dressing and stir until combined.

Thursday, April 8, 2010

Ham and Eternity

Photobucket

“Eternity is two people and a ham," wrote Irma S. Rombauer in the original Joy of Cooking. Perhaps you can relate to this statement. I certainly know I can. It's the week after Easter and in my house that means we are diligently trying to use up the leftover Honey Baked Ham.

Every year I order more than we need. Perhaps I forget how hard it was to use up all the ham the year before or perhaps, because I only order Honey Baked Ham once a year, I get excited and order much more than could ever be consumed by two people in a reasonable amount of time. Whatever the reason, here I am, left with my piles of ham.

Photobucket

The ham bone was frozen for use in split pea or navy bean soup somewhere down the road, a half pound of ham was neatly diced and stowed in the freezer to have at the ready as a flavor base or to add to soups, and a ham and cheese quiche is on the menu for this weekend; still, I was in need of some new inspiration.

It came in the form of slices of ham and cheese sandwiched between two pieces of sourdough and smothered in a cheesy béchamel. In other words it came in the form of a croque monsieur. This happens to be my boyfriend's favorite sandwich and I am baffled at how it managed to escape me as a way to use up leftover ham.

The thick-cut Honey Baked Ham works perfectly in this sandwich. Gruyere is a traditional accompaniment, but I found that a blend of gruyere and swiss was particularly delicious. There is something about ham and swiss that just works.

This isn't the lightest or healthiest way to follow up Easter dinner, but let's be honest. Who hasn't already had a few too many pieces of Easter candy this week? Can one croque monsieur really do that much damage?

Photobucket

Croque Monsieur
Adapted from Ina Garten

2 T unsalted butter
3 T flour
2 cups hot milk
1 t kosher salt
½ t pepper
Pinch nutmeg
6 oz grated gruyere or gruyere / swiss blend
½ cup grated parmesan
8 slices sourdough bread
Dijon mustard
4 – 6 slices of Honey Baked Ham, or any thick-cut, cooked ham

Preheat oven to 400*
Melt the butter in a saucepan over medium heat. Sprinkle the flour over the butter and use a rubber spatula to combine. Cook the butter and flour for about two minutes, stirring constantly with the spatula. Add the milk, a half cup at a time, making sure the milk is fully incorporated before adding more. Let the béchamel simmer until thickened, stirring constantly for about five minutes. Turn off the heat and add the salt, pepper, nutmeg, ½ cup of gruyere and the parmesan cheese. Set aside.

Place the bread slices on a baking sheet and toast in the oven for five minutes. Turn the slices over and toast for an additional two minutes. Brush half the bread slices with mustard on one side and place one to one and a half slices of ham on top. Sprinkle the ham slices with half the remaining gruyere. Spread about a ¼ cup of béchamel over each of the remaining other slices and use them to top the sandwiches (béchamel side down). Spread the remaining béchamel evenly over the top of the four sandwiches and sprinkle with the remaining gruyere. Bake for five minutes. Turn the broiler on and place the sandwiches under the broiler until bubbly and browned, about five minutes.

Monday, April 5, 2010

Herbed Salad Dressing

Photobucket

From time to time, I get asked to teach people how to cook. The request usually comes from close friends and typically right after I’ve spent 10 minutes expounding on how anyone who hates anchovies hasn’t tried Spanish anchovies packed in salt or some other obscure topic, in other words, making it abundantly clear that I spend way too much time thinking about food. I am hugely flattered when people ask because I love to share what I know and help people discover how easy it can be to cook at home.

When my friend Meghan asked me to help her learn how to cook to “keep her from starving” (her words, not mine), I immediately suggested we make some of the basics I think every cook should know: how to properly cook a chicken breast, a good bolognese sauce and a salad dressing made from scratch.

Meghan quickly made it clear that she didn’t understand why she needed to know how to make a salad dressing when she can just buy one at the store. I suppose she’s right and I think most of us will get along just fine never knowing how to make our own salad dressings, but I am of the belief that the five minutes or less that it actually takes to make a salad dressing is time very well spent.

When making a salad dressing, a very basic formula to follow is three parts oil to one part vinegar with a little salt and pepper and any additional flavorings you want to throw in. It’s easy to remember, easy to make and will elevate any simple salad you throw together to something just a bit more special.

I try to keep vases of fresh herbs on my kitchen counter. They’re beautiful to look at and having them out encourages me to use them more in my cooking – most often they end up as the ‘additional flavorings’ in my herbed salad dressing that I make almost weekly, or as soon as my last batch is gone (I make three or four times what I need for one salad and keep the extra on hand for use throughout the week).

I intentionally didn’t specify which herbs to use in the recipe below. You should use whatever you have on hand, or if you’re going shopping, whichever herbs sound best to you. My favorite combinations include chive and basil (one bunch of chives and the leaves from four or five basil stems) and scallion, parsley and mint (two thinly sliced scallions combined with a handful of chopped parsley and a few mint leaves). Tarragon also works brilliantly in salad dressings. The key here is to try your own flavor combinations and determine what you like best.

This recipe calls for the best extra virgin olive oil you can afford. Sometimes that means the $6 jumbo bottle from the grocery store. Please know that that is perfectly acceptable here. Since the recipe calls for a good amount of olive oil, I tend not to use my $30 bottle of olive oil because that’s a lot of money going into one salad dressing. That being said, if I could afford to buy a countless supply of $30 olive oil, I would definitely use it in salad dressings because the flavor is so prominent and the quality really does come through. So, use the best you can afford, whatever that may be.

Photobucket

Herbed Salad Dressing
Makes about 1 ¼ cups

¾ cup extra virgin olive oil (the best you can afford)
¼ cup champagne vinegar
2 T dijon mustard
½ cup chopped herbs
Salt and pepper to taste
Pinch of sugar

Combine the vinegar, mustard and herbs in a mason jar, screw the lid on and shake to combine. Pour the olive oil in and shake vigorously to emulsify. Season to taste with salt and pepper. If the dressing still has too much of a vinegar bite, add a pinch of sugar to help balance it out. This dressing will keep for about a week in the fridge.

Tuesday, March 30, 2010

Fava Bean Assembly Line

Photobucket

This weekend I decided that one of the things I am looking forward to about having children is setting up my own fava bean shelling assembly line. I am not pregnant, nor do I have plans to become pregnant anytime in the near future, but after working my way through two pounds of fava beans on Saturday, to be left with only a scant half cup of shelled beans, I am in need of that assembly line.

Photobucket

There are pictures of me as a child, saddled up to the kitchen counter, dutifully snapping the ends off of green beans as my mother prepares the other and slightly more challenging components of a family meal. She was all about child labor in the kitchen and I plan on taking the same route – especially when it comes to favas. The shelling, followed by blanching, followed by peeling is a lot of work for the small amount of food you’re left with. It is worth it, but you really have to set aside a chunk of time if you’re tackling the task on your own.

Photobucket

If there are any idle hands in your household, put a bowl of fava beans in front of them and demand help. This salad from Jamie Oliver really is worth all of the effort. The favas are paired with a fresh pea dressing and smoky pancetta. This is the first time I’ve made a salad dressing out of pureed vegetables and I’m a bit bothered that Jamie Oliver beat me to the punch. It’s a particularly great idea in this case; the pureed raw peas taste quintessentially fresh and the bright green color really pops.

The fava bean prep is the most difficult part of this recipe. If you have helpers, get extra fava beans. You’ll be grateful if you have leftovers.

Photobucket

Fava Bean and Pancetta Salad
Adapted from Jamie Oliver

1 garlic clove, peeled and left whole
10 ½ ounces of shelled fava beans (from about three pounds of whole favas)
8 pieces of pancetta (about a quarter pound)
1 handful of almonds
5 ½ ounces of shelled fresh peas (from about one and a half pounds)
2 ½ ounces of Pecorino cheese, grated plus more for scattering over the plates
15 mint leaves (a handful), plus more for scattering over the plates
6 – 8 T extra virgin olive oil
Juice of 1 – 2 lemons
Salt and pepper

Preheat the oven to 475*
Bring a medium saucepan of water to a boil and do not add any salt, which would toughen the favas while cooking. Add the garlic and cook for three minutes. Add the shelled fava beans and cook for an additional three to five minutes until the favas can be easily squeezed from their skins. Drain, set the garlic aside and remove the skins from the fava beans and discard.

Place the pancetta and the almonds on a baking sheet and bake just until the pancetta is crisp, about 10 minutes. If the almonds start to get too dark, remove them and continue cooking the pancetta.

To make the dressing, place the peas and reserved garlic clove in a food processor and process until smooth. Add the cheese and mint leaves and process until combined. Add 6 T of olive oil and 4 T of lemon juice and blend. This dressing should be thick, but if it seems too pasty, add more olive oil and lemon juice until your desired consistency is reached (I added about 1 T more of each). Season with salt and pepper to taste.

Divide the fava beans among four plates. Drizzle the dressing over the fava beans - you may not need to use all of it. Scatter the pancetta and the almonds evenly over the four plates and finish with a sprinkling of mint leaves and pecorino if desired.

Thursday, March 25, 2010

Pork Souvlaki on a Picnic

Photobucket

One of the many benefits of growing up in a warm climate is the option of eating outdoors on a regular basis. My mother made dinner for our family almost every night of the week and we ate it together, not in front of a television. As spring arrived each year and daylight extended a bit further into the evening, it would come time for my brother or I to set the table and my mother would ask, “are we eating inside or out tonight?” My answer was always, “out!” and if I could get outside fast enough, before any other family member had the chance to object, I would set our patio table and light the citronella candles to try and keep the bees away.

I’m not sure why I loved eating outdoors so much. Perhaps it was a change from the usual or maybe, even at a young age, I appreciated the amazing view of the Angeles Crest National Forest visible from my parents’ backyard. I couldn’t have known then that they wouldn’t live in that house forever and that I needed to make the most of the surroundings while I had the chance; luckily, I did it anyway.

Photobucket

I continue to love eating outdoors though I rarely get the chance to entertain in my own backyard. Busy schedules and the absence of my own family to cook for every evening mean eating outside is relegated to Saturday evenings and only then if I can round up a group of friends to come over for a BBQ.

Since the time change has already happened this spring and the sunlight hours are once again extending further into the evening, I need to make sure that my propane tank is full and ready to BBQ. Of course the first question that comes to mind and perhaps should not be addressed so late in this post is what to serve?

I love making skewers for picnics and BBQs. They can be prepared in advance and grilled on the spot or if you’re headed out on a picnic they can be cooked in advance and served at room temperature. Even more importantly, you don’t need silverware. Simply put, meat on a stick is easy outdoor food.

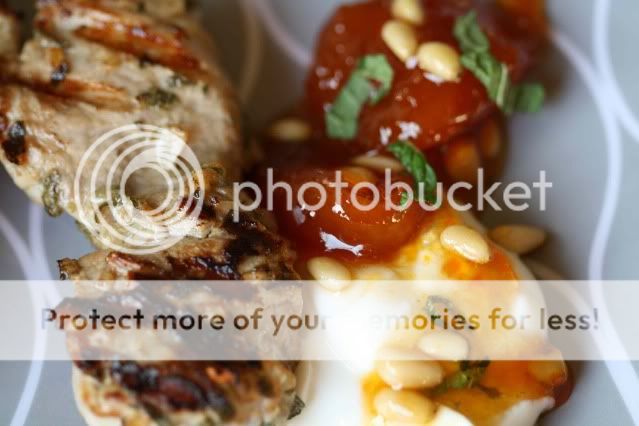
When meat on a stick is made with Greek flavors, it is often referred to as souvlaki or shish kebab, but still, at its base, it is meat on a stick. This recipe for Pork Souvlaki is marinated the night before so when it comes to cooking, all you have to do is skewer and grill. The accompanying honeyed apricots can also be prepared ahead, making the work when your guests arrive an exercise more in plating than in cooking.

Cooking note - Finding myself without a bottle of wine in the house, I substituted champagne vinegar for the wine, reducing the amount by two thirds. If you prefer to use wine, I’ve included the original amount called for. If you do use vinegar, be ready for a bit of a sour bite to the apricots, a bite that I found to be perfectly balanced by the Greek yogurt served on the side.
Photobucket

Pork Souvlaki with Honeyed Apricots
Adapted from Michael Symon
Serves 4 - 6

For the Pork:
2 shallots, minced
2 garlic cloves, minced
2 T fresh oregano, chopped
1 jalapeno, seeded and minced
Juice of 1 lemon
1/2 cup extra-virgin olive oil
2 pounds pork tenderloin, trimmed and cut into 1 1/2-to-2-inch chunks
Salt

For the Apricots:
Juice of 3 limes
3/4 cup white wine (or 1/4 cup champagne vinegar and 1/4 cup water)
1/4 cup honey (or, if using vinegar, 3/4 cup honey)
1 shallot, minced
12 or more dried apricots
1 T fresh mint, chopped
1 T toasted pine nuts
Greek yogurt for serving

For the Pork: Combine the shallots, garlic, oregano, jalapeno, lemon juice, olive oil and pork in a large Ziploc bag and turn to coat. Marinate overnight (or at least three hours if you don’t have that much time).

For the Apricots: Combine the lime juice, wine or vinegar, honey and shallots and bring to a boil. Add the apricots and simmer the mixture until syrupy, about 15 minutes. Remove from the heat and stir in the mint and pine nuts.

For the Pork: Soak 16 wooden skewers in water for half an hour if you are using a BBQ. If you are using a grill pan then there is no need to soak the skewers. Place two pieces of pork on each skewer, sprinkle generously with salt and cook over high heat until cooked through, about two minutes per side. Plate 2 to 3 skewers per person and serve with a dollop of yogurt and 2 to 3 apricots.

Monday, March 22, 2010

Roasted Beet Risotto

Photobucket

The first day of spring has come and gone and I am brimming with anticipation for the artichokes, fava beans and pea shoots that will soon appear at farmers’ markets all over Los Angeles. In an effort to cook seasonally, I have stockpiled recipes for fava bean purees and shaved artichoke salads, and held off on making a rhubarb tart until I see the harbinger of spring show up at my favorite Saturday market.

Photobucket

Beets are a year-round food here in Southern California, but the vibrant pink color imparted by roasted red beets announces spring almost as much as the honey baked ham I order every year for Easter. So, in anticipation of all the wonderful spring food headed to market, a number of beet dishes have been prepared in my kitchen.

This weekend I added a puree of roasted beets to risotto, turning the otherwise neutral colored dish into something bursting with color. The bright pink dish may look almost artificial to some, but served next to a green salad and a rack of lamb, it looks just like spring to me.

Photobucket

Roasted Beet Risotto
Serves 6 – 8 as a side dish

3 – 4 medium red beets
2 T extra virgin olive oil
2 T unsalted butter
1 small onion, minced
2 cups carnaroli or arborio rice
4 – 6 cups chicken stock or a combination of stock and water
Salt and pepper
Sour cream or crème fraiche to serve

Preheat Oven to 400*
Trim the beets of greens and scrub to remove any dirt. Wrap the beets in foil and bake until tender, 45 minutes to an hour. When the beets are cool enough to handle, remove the skin by peeling or gently rubbing with a paper towel. Puree the beets in a food processor and set aside while you prepare the risotto.

Bring the chicken stock or chicken stock and water to a boil and then keep warm over low heat. Heat the olive oil and butter in a large saucepan over medium heat. Add the onion and sauté until softened, about five minutes. Add the rice and stir until lightly toasted and turning opaque. Add about a cup of the heated liquid to the rice and stir until fully incorporated. Continue adding liquid, one cup at a time, until the rice is still lightly al dente – you may not need all the liquid. Stir in the beet puree and season with salt and pepper. If desired, add a spoonful of sour cream or crème fraiche to each serving.

Tuesday, March 16, 2010

A Chocolate Lover Makes Carrot Cake

Photobucket

I am an admitted chocoholic, especially when it comes to dark chocolate. Whether it’s flourless chocolate cake, dark chocolate pecan clusters, or even chocolate covered, peanut butter filled pretzels, once a piece of chocolate crosses my lips, I want more.

Not surprisingly, I’m known to only order chocolate desserts at restaurants. Though lately I’ve made a concerted effort to expand my horizons and have been rewarded with things like Mozza’s Torta Della Nonna which I am now in the process of feverishly trying to recreate at home (note to Nancy Silverton and Matt Molina – if you could finish up with that Mozza cookbook, I’d really appreciate it. Thanks). Also not surprisingly, when I’m cooking at home I tend to be drawn to dessert recipes that call for chocolate.

So, why isn’t this a post about a recipe for a chocolate dessert? Because I happen to be in a relationship with someone who loves carrot cake the way I love chocolate and in my never ending quest to please both our palates, I have a hard time passing up any carrot cake recipe that comes my way.

This particular version comes from the latest issue of Everyday with Rachael Ray. The addition of crushed pineapple makes for a very moist cake and in a deviation from tradition, the frosting calls for sour cream. It’s a nice change from the usual cream cheese and the tang the sour cream imparts is a great compliment to the carrot cake.

I have yet to hear what the carrot cake fanatic thinks of this recipe since he won’t get the chance to try it until tonight, but I think it’s a definite keeper. If you can’t get over the absence of cream cheese frosting, try the cake recipe and top it with your favorite frosting. I think it would be equally delicious.

One final note - The next time I make this recipe I’m going to double it. My bundt pan is clearly larger than a 6-cup capacity and the more cake I’m left with on this one, the better.

Photobucket

Carrot-Pineapple Bundt Cake with Sour Cream Frosting
Adapted from Everyday with Rachael Ray

1 cup flour
1 t baking powder
½ t baking soda
½ t ground cinnamon, plus more for dusting
¼ t salt plus an extra pinch
1 cup packed light brown sugar
½ cup sour cream, divided
¼ cup vegetable oil
1 egg
1 t vanilla bean paste
1 cup shredded carrot
½ cup crushed pineapple, drained (or chopped fresh pineapple)
½ cup chopped walnuts
1 cup powdered sugar, sifted
3 tablespoons butter, at room temperature

Preheat oven to 350*
Grease a 6-cup capacity bundt pan and set aside. In a medium bowl combine the flour, baking powder, baking soda, cinnamon and ¼ t salt. In a larger bowl, combine the brown sugar, ¼ cup of sour cream, the vegetable oil, egg and vanilla and whisk until smooth. Add the carrots, walnuts and pineapple and stir until combined. Add the flour mixture and stir just until combined. Pour the batter into the prepared bundt pan and bake for 55 minutes or until a toothpick test comes out clean. Let the cake cool for 15 minutes in the pan before inverting onto a wire rack to cool completely.

Use a wooden spoon to combine the powdered sugar and butter. Whisk in the remaining ¼ cup sour cream and pinch of salt. Pour the frosting over the cake and dust with cinnamon if desired.

Thursday, March 11, 2010

Individual Potato and Onion Tartes Tatin

Photobucket

If I could take one indulgent, calorie and fat-laden ingredient and make it good for you without changing the makeup or taste of the product at all, it would be puff pastry. Unless of course I could choose the entire category of cheese, but if I had to choose just one cheese, I would stick with puff pastry.

Its rich buttery flavor and flaky layers are totally addictive and such a good complement to so many sweet and savory applications. I love using it as an easy tart crust, rolling it into palmiers or using it for a simple dessert. Not only is it delicious, but all the hard work is already done or you. You just cut the pastry to size and use as desired.

Photobucket

That ease of use is what makes these individual tartes tatins so brilliant. It’s an exercise in slicing more than cooking. Onion and potato slices are placed in individual pie pans and topped off with puff pastry. You can assemble them in about 15 minutes and after 30 minutes in the oven they emerge with the onions meltingly tender and sweet, and the crust perfectly puffed and golden. The hardest part, at least for me, is trying not to cut yourself on the mandoline as you slice the potatoes. I always cut myself. I probably need to give in and order a set of these to save my hands from total annihilation.

Photobucket

While I love any reason to purchase a new kitchen product, I actually could not find any 5-inch pie pans. Not even my trusted Surfas had them in stock. They are available online, but if you do not want to purchase small pie pans, I found that disposable 5-inch tins worked well (and only $3.99 for 15 of them).

Photobucket

Individual Potato and Onion Tartes Tatin
Adapted from Martha Stewart

4 T butter, cold and cut into small pieces, plus more for the pans
1 package puff pastry (17 ¼ oz)
4 medium yellow onions, peeled and cut into ¼-inch slices
5 small new potatoes
Salt and pepper
¼ cup balsamic vinegar
Pinch of sugar

Preheat Oven to 425*
Generously butter six 5-inch pie pans (or 5-inch disposable tin pans). Cut six 4 ½-inch rounds from the puff pastry and place in the refrigerator to chill while you finish the tarts.

Place two to three slices of onion on the bottom of each pie pan. Use a mandoline to cut the potatoes into ¼-inch (or thinner) slices. Lay the potato slices in a circle covering the onions, overlapping the slices as pictured above. Generously sprinkle the potatoes with salt and pepper. Place the puff pastry rounds over the potatoes and bake until golden (20 minutes in Martha’s oven, closer to 30 in mine).

Invert the tarts onto a serving platter or individual plates and allow to cool slightly while you prepare the glaze. Heat the balsamic vinegar and sugar in a small saucepan. Simmer until slightly reduced and syrupy, about four minutes. Whisk in the cold butter, one piece at a time. Season with salt and pepper. Using a pastry brush, brush the glaze over the onions topping each tart and serve warm.